You cannot enter any values in [IP Address].
When selecting [BOOTP] or [DHCP]
You cannot enter any values in [IP Address], [Subnet Mask], and [Gateway Address].
If RARP, BOOTP, or DHCP cannot be used
Select [Manual Setting].
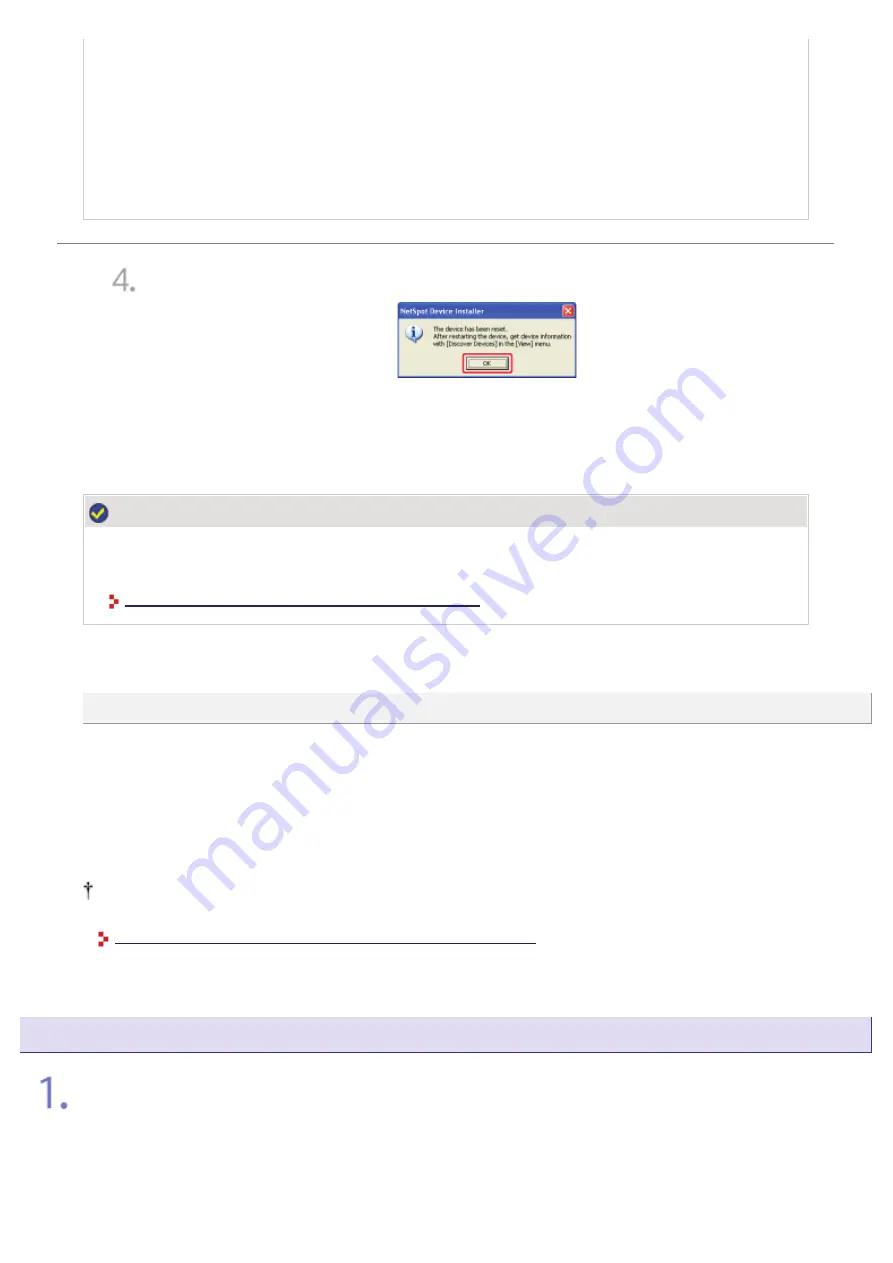
When the message <The device has been reset.> appears, click [OK].
ĺ
To perform a reset operation properly, wait for approximately 20 seconds or longer as
is after clicking [OK].
After completing the reset, the settings are enabled.
NOTE
If you changed the IP address after installing the printer driver
Specify the port to be used again in the printer driver.
After Changing the IP Address (Changing the Port)
If your case falls within neither of the above cases
A device on the network may have the same IP address as that set for the printer.
In this case, perform the following procedure.
1. Turn off the device that has the same IP address or remove the device from the network.
2. Repeat the procedure from the beginning.
3. After completing the settings for this printer, restore the devices to their original states.
If you cannot set the IP address using NetSpot Device Installer including the case where this procedure is not
possible, set the IP address using the ARP/PING command.
Setting the IP Address Using the ARP and PING Commands
Setting the IP Address Using the ARP and PING Commands
Attach the ferrite core to the LAN cable as shown in the figure.
Attach the ferrite core at 6 cm or less from the end of the connector connected to the
printer.
㻡㻡㻟㻌㻛㻌㻣㻜㻡
Summary of Contents for LBP7210Cdn
Page 1: ...㻝㻌㻛㻌㻣㻜㻡 ...
Page 10: ...㻝㻜㻌㻛㻌㻣㻜㻡 ...
Page 23: ... C Using the e Manual 㻞㻟㻌㻛㻌㻣㻜㻡 ...
Page 42: ...Click Exit Click Back Click Exit NOTE 㻠㻞㻌㻛㻌㻣㻜㻡 ...
Page 44: ... D Specifications and Parts 㻠㻠㻌㻛㻌㻣㻜㻡 ...
Page 59: ... E Printer Installation and Software Installation 㻡㻥㻌㻛㻌㻣㻜㻡 ...
Page 125: ... Installation on Clients 㻝㻞㻡㻌㻛㻌㻣㻜㻡 ...
Page 138: ...If the User Account Control dialog box appears click Continue 㻝㻟㻤㻌㻛㻌㻣㻜㻡 ...
Page 171: ... F Printing 㻝㻣㻝㻌㻛㻌㻣㻜㻡 ...
Page 198: ...NOTE For details on the settings See Help How to Use Help 㻝㻥㻤㻌㻛㻌㻣㻜㻡 ...
Page 212: ...㻞㻝㻞㻌㻛㻌㻣㻜㻡 ...
Page 225: ...See Loading Envelopes 㻞㻞㻡㻌㻛㻌㻣㻜㻡 ...
Page 284: ...ĺ The printer starts printing 㻞㻤㻠㻌㻛㻌㻣㻜㻡 ...
Page 304: ...Click OK or Print ĺ The printer starts printing 㻟㻜㻠㻌㻛㻌㻣㻜㻡 ...
Page 361: ... G Maintenance 㻟㻢㻝㻌㻛㻌㻣㻜㻡 ...
Page 363: ... G 03 Checking by the Remote UI Checking by the Remote UI 㻟㻢㻟㻌㻛㻌㻣㻜㻡 ...
Page 380: ... G 09 Loading Index Cards Loading Index Cards 㻟㻤㻜㻌㻛㻌㻣㻜㻡 ...
Page 381: ... G 10 Loading Envelopes Loading Envelopes 㻟㻤㻝㻌㻛㻌㻣㻜㻡 ...
Page 384: ... G 13 Correcting Rough Textured Images Correcting Rough Textured Images 㻟㻤㻠㻌㻛㻌㻣㻜㻡 ...
Page 385: ... G 14 Adjusting the Toner Density Adjusting the Toner Density 㻟㻤㻡㻌㻛㻌㻣㻜㻡 ...
Page 387: ... G 16 Adjusting the Color Adjusting the Color 㻟㻤㻣㻌㻛㻌㻣㻜㻡 ...
Page 388: ... G 17 Matching the Color on the Display Matching the Color on the Display 㻟㻤㻤㻌㻛㻌㻣㻜㻡 ...
Page 389: ... G 18 Calibrating the Printer Calibrating the Printer 㻟㻤㻥㻌㻛㻌㻣㻜㻡 ...
Page 390: ... G 19 Correcting Out of Register Colors Correcting Out of Register Colors 㻟㻥㻜㻌㻛㻌㻣㻜㻡 ...
Page 401: ... G 23 Paper Feeder Paper Feeder 㻠㻜㻝㻌㻛㻌㻣㻜㻡 ...
Page 403: ...㻠㻜㻟㻌㻛㻌㻣㻜㻡 ...
Page 404: ... G 25 Location of the Serial Number Location of the Serial Number 㻠㻜㻠㻌㻛㻌㻣㻜㻡 ...
Page 405: ... H Troubleshooting 㻠㻜㻡㻌㻛㻌㻣㻜㻡 ...
Page 431: ...If you changed the setting Restart the computer and printer 㻠㻟㻝㻌㻛㻌㻣㻜㻡 ...
Page 437: ...IP address 192 168 0 10 㻠㻟㻣㻌㻛㻌㻣㻜㻡 ...
Page 451: ... 2 Click OK 㻠㻡㻝㻌㻛㻌㻣㻜㻡 ...
Page 485: ...Correcting Out of Register Colors 㻠㻤㻡㻌㻛㻌㻣㻜㻡 ...
Page 487: ...If the Printer Status Window is not displayed Printer Status Window 㻠㻤㻣㻌㻛㻌㻣㻜㻡 ...
Page 502: ...Also check if the paper drawer is inserted into the printer firmly 㻡㻜㻞㻌㻛㻌㻣㻜㻡 ...
Page 514: ...Click OK 㻡㻝㻠㻌㻛㻌㻣㻜㻡 ...
Page 516: ...Click OK 㻡㻝㻢㻌㻛㻌㻣㻜㻡 ...
Page 518: ...㻡㻝㻤㻌㻛㻌㻣㻜㻡 ...
Page 562: ...Click Close Click Apply Click OK 㻡㻢㻞㻌㻛㻌㻣㻜㻡 ...
Page 586: ...About the DNS settings See Configuring the Protocol Settings 㻡㻤㻢㻌㻛㻌㻣㻜㻡 ...
Page 598: ...NOTE About the Remote UI See Remote UI 㻡㻥㻤㻌㻛㻌㻣㻜㻡 ...
Page 600: ... I 14 Configuring the Print Server Configuring the Print Server 㻢㻜㻜㻌㻛㻌㻣㻜㻡 ...
Page 601: ... I 15 Installation on Clients Installation on Clients 㻢㻜㻝㻌㻛㻌㻣㻜㻡 ...
Page 602: ... J Managing and Configuring the Printer 㻢㻜㻞㻌㻛㻌㻣㻜㻡 ...
Page 614: ...Select Display Language Click OK 㻢㻝㻠㻌㻛㻌㻣㻜㻡 ...
Page 641: ...Click Change under Security Enter the password currently being used 㻢㻠㻝㻌㻛㻌㻣㻜㻡 ...
Page 649: ...㻢㻠㻥㻌㻛㻌㻣㻜㻡 ...
Page 673: ...Click OK 㻢㻣㻟㻌㻛㻌㻣㻜㻡 ...
Page 680: ...Click OK 㻢㻤㻜㻌㻛㻌㻣㻜㻡 ...
Page 683: ...Click Change under Security Select the Restrict Multicast Discovery check box 㻢㻤㻟㻌㻛㻌㻣㻜㻡 ...
Page 686: ...㻢㻤㻢㻌㻛㻌㻣㻜㻡 ...
Page 689: ...Click Change under Security Select the Restrict MAC Address Access check box 㻢㻤㻥㻌㻛㻌㻣㻜㻡 ...
Page 692: ...㻢㻥㻞㻌㻛㻌㻣㻜㻡 ...
Page 696: ...㻢㻥㻢㻌㻛㻌㻣㻜㻡 ...


