background image

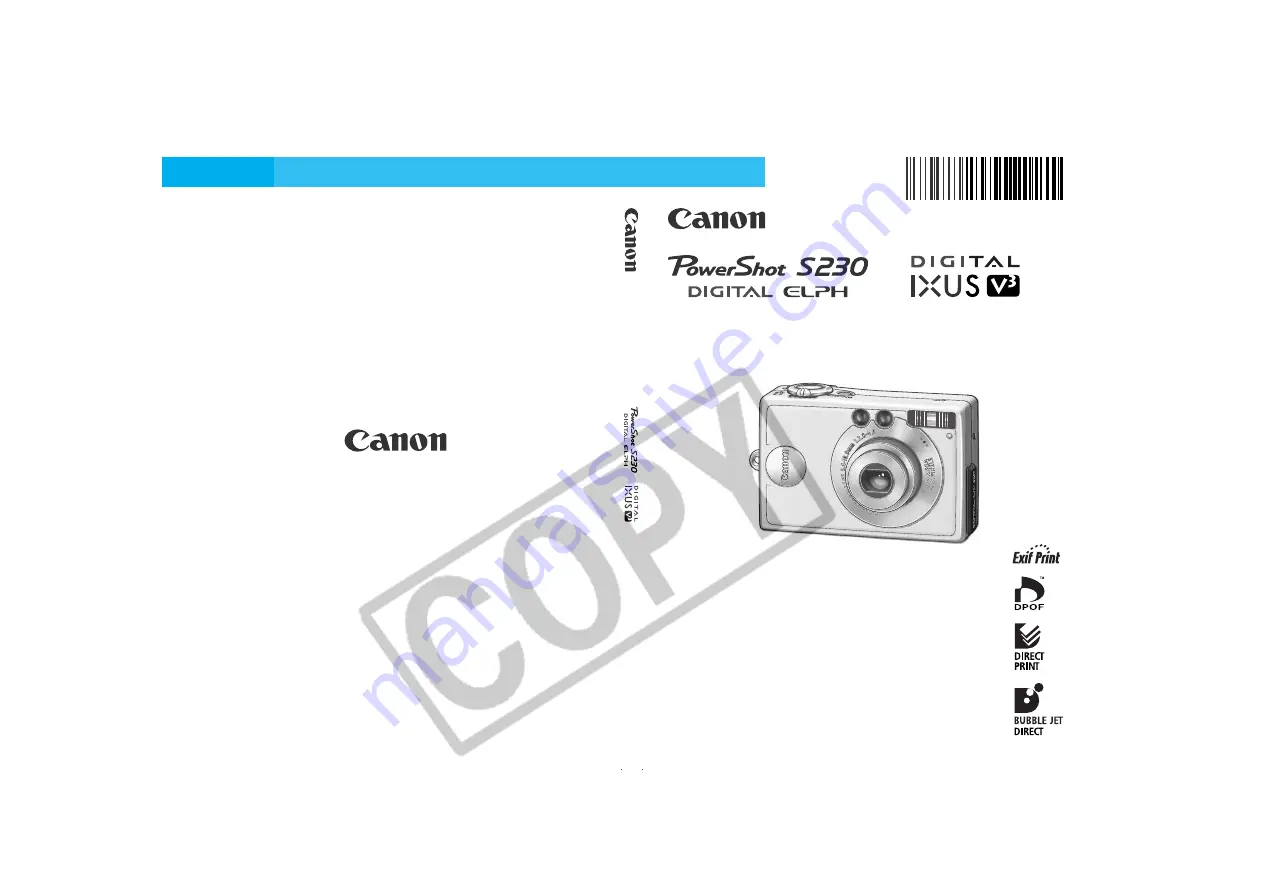
Camera User Guide

Camera User Guide

ENGLISH

CDI-E072

• Please read the 

Read This First 

section (p. 7).

• Please refer to the 

Software Starter Guide 

for

information on installing the software and
downloading images.

• Please also read the printer user guide included with

your Canon printer.

CDI-E072-010

XX01XXX.X

© 2002 CANON INC.

PRINTED IN JAPAN

DIGIT

AL CAMERA

Summary of Contents for IXUS V3

Page 1: ... This First section p 7 Please refer to the Software Starter Guide for information on installing the software and downloading images Please also read the printer user guide included with your Canon printer CDI E072 010 XX01XXX X 2002 CANON INC PRINTED IN JAPAN DIGITAL CAMERA ...

Page 2: ...Using the Printer and Printing Precautions This digital camera is designed to perform optimally when used with genuine Canon brand digital camera accessories Canon Brand Accessories You may use non Canon brand accessories with this digital camera However Canon makes no warranties concerning and is not responsible for damages resulting from use of non Canon brand accessories Flowchart and Reference...

Page 3: ... 2 2 Default setting Setting available Setting can only be selected for the first image Shaded Area Setting is memorized even when the camera power is shut off With the exception of the Date Time Language and Video System settings all the other menu settings and changes made with the camera buttons can be reset to the default values in a single operation p 125 1 The ISO speed cannot be set to AUTO...

Page 4: ...eo Format Please set the camera s video signal format to the one used in your region before using it with a TV monitor p 124 Charging the Date Time Battery The camera has a built in rechargeable lithium battery that maintains the date time and other camera settings This battery recharges when the main battery pack is inserted into the camera When you first purchase the camera place a charged batte...

Page 5: ...es issues that may affect the camera s operation This mark denotes additional topics that complement the basic operating procedures Question Look Here First How do I navigate the Menu Selecting Menus and Settings p 37 What settings are available under each function and Will my settings remain in effect even after I ve turned the camera off Functions Available in Each Shooting Mode p 148 How do I g...

Page 6: ...s Guide Front View 14 Back View 15 Operation Panel 16 Indicators 17 Preparing the Camera Charging the Battery Pack 18 Installing the Battery Pack 20 Installing a CF Card 22 Setting the Date and Time 23 Setting the Language 25 Basic Functions Turning the Power On Off 26 Switching between Shooting Replay 28 Using the LCD Monitor 29 Using the Viewfinder 33 Pressing the Shutter Button 34 Using the Zoo...

Page 7: ...Lock 60 Locking the Flash Exposure Setting FE Lock 61 Switching between Autofocus Modes 62 Switching between Light Metering Modes 63 Adjusting the Exposure Compensation 64 Shooting in Long Shutter Mode 65 Setting the White Balance 67 Changing the Photo Effect 70 Adjusting the ISO Speed 71 Setting the Auto Rotate Function 72 Resetting the File Number 73 Replaying Displaying Images Individually 74 M...

Page 8: ... Settings 103 Image Transmission Settings DPOF Transfer Order Selecting Images for Transferring 111 Shooting Replaying with a TV Shooting Replaying with a TV 113 Downloading Images to a Computer Downloading Directly from a CF Card 114 Connecting the Camera to a Computer with a USB Cable 115 Lists of Menu Options and Messages Rec Menu 118 Play Menu 121 Set up Menu 123 Resetting Settings to Their De...

Page 9: ...ces Using an AC Adapter Kit 130 Using a Car Battery Charger 131 Camera Care and Maintenance 132 Troubleshooting 133 Specifications Specifications 137 Index Index 143 List of Functions Functions Available in Each Shooting Mode 148 ...

Page 10: ...a camera or other device may contravene copyright or other legal rights even if the image was shot for personal use Warranty Limitations This camera s warranty is only effective in the country of sale If a problem arises while the camera is in use abroad please convey it back to the country of sale before proceeding with a warranty claim to a Canon Customer Support Help Desk For Canon Customer Sup...

Page 11: ...non Customer Support Help Desk To avoid the risk of high voltage electrical shock do not touch the flash portion of the camera if it has been damaged Similarly never touch internal portions of the equipment that become exposed as a result of damage There is a risk of high voltage electrical shock Please take the first opportunity to consult your camera distributor or the closest Canon Customer Sup...

Page 12: ...re Do not cut damage alter or place heavy items on the power adapter cable Any of these actions may cause an electrical short circuit which may lead to fire or electrical shock Do not handle the power cable if your hands are wet Handling it with wet hands may lead to electrical shock When unplugging the cable ensure that you hold the solid portion of the plug Pulling on the flexible portion of the...

Page 13: ...ectrical shock Disconnect the battery charger and compact power adapter from both the camera and the power outlet after recharging and when they are not in use to avoid fire and other hazards Continuous use over a long period may cause a unit to overheat and distort resulting in fire The camera terminal of the supplied compact power cord is designed for exclusive use with your camera Do not use it...

Page 14: ...s to form on its external and internal surfaces You can avoid this by placing the equipment in an airtight resealable plastic bag and letting it adjust to temperature changes slowly before removing it from the bag If Condensation Forms Inside the Camera Stop using the camera immediately if you detect condensation Continued use may damage the equipment Remove the CF card and battery or Compact Powe...

Page 15: ...press the battery lock while you insert the battery pack Insert the battery pack correctly by aligning the arrows on the camera and battery pack Install the CF Card p 22 Slide the lock on the CF card cover to open it and insert the CF card Set the Mode Switch to Shooting p 42 Turn on the Power p 26 Press the ON OFF Button until the power lamp in the center of the 4 buttons lights Quick Start Secti...

Page 16: ...e keep the shutter button pressed or hold the shutter button until you press the button and then release both To Immediately Delete the Displayed Image 1 Press the button while the image is displayed 2 Confirm that Erase is selected and press the button Set the date and time if the Set Date Time menu appears p 23 You can change the language in which menus are displayed p 25 To view the other image...

Page 17: ...les are used to connect the camera to a computer or printer Computer p 115 USB Interface Cable IFC 200PCU supplied with camera Direct Print Function Compatible Printer sold separately p 94 Direct Interface Cable DIF 200 supplied with printer DirectPrintFunctionCompatibleBubbleJetPrinter soldseparately p 95 Please refer to your Bubble Jet Printer user guide Please refer to the System Map supplied w...

Page 18: ...t Cover p 22 Battery Cover p 20 DC Coupler Terminal Cover p 130 CF Card Slot Cover p 22 Wrist Strap Mount Attaching the Wrist Strap LCD Monitor p 29 Tripod Socket Be careful not to wave the camera about or catch it on other items when dangling it from the wrist strap 1 2 ...

Page 19: ...m Lever Shooting Telephoto Wide Angle p 36 Replay Magnify p 75 Index p 76 ON OFF Button p 26 Light Metering p 63 Button Flash p 47 Button Continuous p 51 Self timer p 52 Button Macro Infinity p 49 Button Mode Switch p 42 Exposure p 64 White Balance p 67 Photo Effects p 70 Single Image Erase p 87 Button Display Button Menu Button Set Button Shutter Button p 34 ...

Page 20: ...Recording to CF card Reading CF card Erasing from CF card Transmitting data during a computer connection Orange Ready to shoot with slow shutter speed flash on Blinking Orange Ready to shoot but shutter speed is slow camera shake warning Lower Indicator Yellow Macro mode Infinity mode Focus lock Method 2 p 58 Blinking Yellow Focusing difficulty 1 beep sounds Although you can press the shutter butt...

Page 21: ...te After charging unplug the battery charger and remove the battery pack To protect the battery pack and prolong its life do not charge it for longer than 24 hours continuously Since this is a lithium ion battery pack you need not completely discharge it before recharging It can be recharged at any point It takes approximately 130 minutes to fully charge the battery pack from a fully discharged st...

Page 22: ...older etc Do not place anything such as tablecloths carpets bedding or cushions on top of the battery charger while it is charging Heat will build up and could result in a fire Do not charge batteries other than Battery Pack NB 1LH or NB 1L in this charger The battery pack continues to discharge a minimal portion of its power while installed in the camera even with the power off or in the charger ...

Page 23: ... the battery pack correctly by aligning the arrows on the camera and the battery pack To remove the battery pack press the battery lock and pull the battery pack out Slide the battery cover closed Do not turn off the power or open the battery cover while the camera s indicator blinks green The camera is writing reading erasing or transmitting an image to or from the CF card Remove the battery pack...

Page 24: ...n as possible before it is required for an extended period When the LCD monitor is off this icon will display when you press the or button mode Battery charge is insufficient to operate the camera Replace the battery pack immediately See Battery Capacity p 139 Please use an AC Adapter Kit ACK500 sold separately for extended use of the camera p 130 Change the battery pack ...

Page 25: ...erasing or transmitting data to or from the CF card when the indicator blinks green never perform the following actions during this time It could corrupt the image data Subject the camera body to vibration or shocks Turn the camera s power off or open the battery cover or CF card slot cover Please note that CF cards formatted with other manufacturers cameras or a computer or formatted or edited wi...

Page 26: ...perature If condensation forms on the CF card store it at room temperature until the water droplets have evaporated naturally Do not use or store CF cards in the following types of location Locations subject to dust or sand Locations subject to high humidity and high temperatures See CF Cards and Estimated Capacities p 140 Setting the Date and Time The Set Date Time menu will appear the first time...

Page 27: ...ime settings does not cause the date time stamp to appear on images Charging the Date Time Battery The camera has a built in rechargeable lithium battery for saving settings such as the date and time This battery is recharged by the battery pack while it is in the camera Right after purchasing the camera leave a charged battery pack in the camera or plug in AC Adapter Kit ACK500 for about 4 hours ...

Page 28: ...ess the button to display the Rec or Play menu Use the or button to select the Set up menu Use the or button to select Use the or button to select a language Press the button to redisplay the Rec or Play screen The Language menu can also be displayed in replay mode by holding down the button and pressing the button However language settings cannot be adjusted while a printer is connected ...

Page 29: ...he mode switch is set to from the or position The LCD monitor will always turn on when the mode switch is set to the or position Press the ON OFF Button again to turn off the power The Set Date Time menu will appear the first time the camera power is turned on or whenever the charge of the built in rechargeable lithium date time battery is low Reset the date and time when this occurs p 23 If the p...

Page 30: ...CD monitor back on Replay Mode Powers down approximately 5 minutes after the last control is accessed on the camera Connected to a Printer optional Powers down approximately 5 minutes after the last control is accessed on the camera or something is printed on a connected printer Connected to a Computer A warning message displays on the computer screen approximately 5 minutes after the last control...

Page 31: ...to To Replay Images Replay Mode Slide the mode switch to Recorded images can be printed when a printer sold separately is connected p 90 Recorded images can be downloaded to and viewed with a computer when it is connected p 115 The or icon displays on the LCD monitor when a connection to a printer is opened The LCD monitor shuts off while a computer is connected ...

Page 32: ...ormation View Off The LCD monitor setting On or Off is saved by the camera when the power is turned off so that the same setting is automatically available when the power is turned on again However the setting may be lost when the power has been turned off after the Change the battery pack message has displayed while the LCD monitor was on in shooting mode In the or mode the LCD monitor turns on r...

Page 33: ...et to On or Off The power is turned on The or button mode is pressed The camera settings are changed The Set up menu is closed While this information is displayed you may set the flash continuous mode self timer macro and infinity settings After you press the shutter button and take a shot the recorded image appears on the LCD monitor for 2 10 seconds 1 second increments It will continue to displa...

Page 34: ...ing Method Macro Infinity Metering Mode Movie Recording Digital Zoom Camera Shake Warning Low Battery x2 6 x3 2 x4 0 x4 9 x6 4 The icons in the shaded boxes above display regardless of the selected display mode Zoom powers reflect the optical and digital zoom functions in combination These figures display when the digital zoom is activated Replay Mode Standard Display File Number Image Number Shoo...

Page 35: ...recognized JPEG file with format not conforming to Design rule for Camera File System Standards RAW format file File with unrecognized format The image information may not display correctly if images shot with this camera are replayed on other cameras or images from other cameras are replayed on this camera Histogram Function The histogram is a graph that allows you to judge the brightness of the ...

Page 36: ...inder vs Recorded Image Please note that the actual image may differ from the image seen in the optical viewfinder due to the physical separation between the viewfinder and lens This is called the parallax phenomenon and is more noticeable the closer the subject is to the lens In some cases portions of images shot up close that appear in the viewfinder will not appear in the recorded image You are...

Page 37: ... Blinking Orange Camera shake warning Insufficient exposure Lower Indicator Yellow Macro mode Infinity mode Focus lock Method 2 p 58 Blinking Yellow Focusing difficulty single beep sounds When the indicator blinks yellow lock the focus before shooting p 58 AF Frame Status LCD Monitor On AiAF On Green Frame Metering complete AF frame when focus achieved No Frame Focusing difficulty AiAF Off Center ...

Page 38: ...e indicator blinks green AF assist Beam The AF assist Beam will sometimes emit when the shutter button is pressed halfway to assist focusing in certain conditions i e dark conditions The AF assist Beam can be turned off p 119 If animals are your subject turn off the beam when shooting in the dark to avoid startling them this may however make it more difficult for the camera to focus ...

Page 39: ...oom lever toward to zoom in telephoto Press the zoom lever toward to zoom out wide angle Digital Zoom When the LCD monitor is on you can shoot with a combined optical and digital zoom factor of up to 6 4 p 50 The digital zoom is unavailable in some modes p 148 Please note that the image appears grainier the more the image is digitally zoomed ...

Page 40: ...ults p 40 Press the button Use the or buttons to select the Rec Play or Set up menu Use the or buttons to select an option With some Rec Set up menu items the or buttons select the options for the items With some Play Set up menu items a submenu appears after you press the button Press the button The menu will close Menu when the mode switch is set to or The menu will appear slightly different in ...

Page 41: ...8 Basic Functions Play Menu Rec Menu Selecting a Mode Selecting a Menu Switching between the Rec Play and Set up Menus Selecting Menus and Settings Cont d The menu will appear slightly different in mode ...

Page 42: ...u Setting Options Completing the Procedure See Print Menu Settings p 92 for the procedures used with the Print Order item in the Play menu You can switch between menus at any time simply by pressing the zoom lever toward or button ...

Page 43: ... the display Erases all images on the CF card Replays selected images in a slide show Sets the print settings Sets the transfer settings Resolution Still images Resolution Movies Compression ISO Speed AiAF Digital Zoom Self timer Image Review AF assist Beam File No Reset Auto Rotate Long Shutter Protect Rotate Erase all Slide Show Print Order Transfer Order MenuItem Reference Page AvailableSetting...

Page 44: ...hanges made with the camera buttons can be reset to the default values in a single operation p 125 p 123 p 27 p 23 p 89 p 25 p 113 p 116 On Off On Off Sets the date and time Formats initializes the CF card English Deutsch Français Nederlands Dansk Suomi Italiano Norsk Svenska Español Chinese Japanese NTSC PAL Normal PTP Beep Power Save Date Time Format Language Video System Communication Menu Item...

Page 45: ...posure compensation white balance and other settings can be manually selected Stitch Assist Images are shot in overlapping series to create single panoramic images Movie Shoots movie clips Some settings selected in each shooting mode are saved when the power is turned off p 148 Selecting the or mode Use the or button to select a shooting mode Shooting ...

Page 46: ...criptions of the shooting functions that follow the icons beside the titles indicate the applicable shooting modes Before you proceed with Step 1 in each case set the camera to one of the shooting modes indicated by the icons in the title p 2 ...

Page 47: ...ay p 75 Changing the Review Duration The default review time is 2 seconds The review function can be set to Off or changed to any time in the range of 2 to 10 seconds in one second increments See Selecting Menus and Settings p 37 Use the or button to select Off or a time from 2 sec to 10 sec With the Off option the image will not automatically display However if you keep the shutter button fully p...

Page 48: ...Normal High Quality Normal High Low 2048 x 1536 pixels 1600 x 1200 pixels 1024 x 768 pixels 640 x 480 pixels Resolution Compression Purpose Purpose 640 x 480 pixels 320 x 240 pixels 160 x 120 pixels Resolution ChangingResolution CompressionSettings You can change the resolution and compression excluding movies settings to suit the purpose of the image you are about to shoot Movies can be shot with...

Page 49: ... option Resolution Still Images Select or Resolution Movies Select or Compression Select or The display will return to the Rec screen See Functions Available in Each Shooting Mode p 148 See Image File Sizes p 140 See CF Cards and Estimated Capacities p 140 In the Rec menu select or ...

Page 50: ... every shot Flash Off The flash will not fire Slow Synchro The flash timing is adjusted to slow shutter speeds This reduces the chance that the background will be dark when shots are taken at night or in rooms with artificial lighting The red eye reduction lamp fires with each shot Use of a tripod is recommended Using the Flash Setting available Can be selected for the first image only Press the b...

Page 51: ... upper indicator lights a steady orange The flash may take up to approximately 10 seconds to charge The recharging time will vary with such factors as the shooting conditions and battery charge The flash fires twice The main flash follows a preparatory pre flash The exposure reading obtained from the subject with the pre flash is used to set the optimal flash intensity for the main flash which is ...

Page 52: ...for compositions combining both near and distant objects Distance from Image Area Lens to Subject Telephoto End 27 cm 10 6 in 138 x 103 mm 5 4 x 4 1 in Wide Angle End 10 cm 3 9 in 102 x 76 mm 4 0 x 3 0 in Use the LCD monitor to compose close ups in macro mode since the parallax phenomenon may cause images composed with the optical viewfinder to be off center p 33 The exposure may not be optimal wh...

Page 53: ... select On The display will return to the Rec screen Press the zoom lever toward until the lens reaches the maximum optical telephoto setting and stops Press it again to activate the digital zoom and to advance through the settings Press the button to zoom back out The combined optical and digital zoom factor displays The digital zoom cannot be used when the LCD monitor is turned off Images become...

Page 54: ...ases when the shutter button is released This figure reflects standard shooting criteria established by Canon Actual figures may vary according to the subject and shooting conditions Display The interval between shots may lengthen slightly when the camera s built in memory fills If the flash is firing the interval between shots will lengthen to accommodate the flash s charging requirements ...

Page 55: ...electing Menus and Settings p 37 Use the or button to select 10 sec or 2 sec When 10 sec is selected the self timer sounds and the blinking gets faster 2 seconds before the shutter activates When 2 sec is selected the self timer sounds at the same time as the shutter button is pressed The shutter activates in 2 seconds The display will return to the Rec screen In the Rec menu select ...

Page 56: ...g a Subject The PhotoStitch program detects the overlapping portions of adjoining images and merges them When shooting try to include a distinctive item landmark in the overlapping portions Compose each frame so that it overlaps 30 50 of the adjoining image Try to keep the vertical misalignment to less than 10 of the image height Do not include moving items in the overlap The overlapping seams of ...

Page 57: ...ound its own vertical axis To shoot close ups slide the camera over the subject keeping it parallel to the subject as you move it Shooting Images can be shot in two sequences in Stitch Assist mode The LCD monitor turns on when the shooting mode is set to or Shoot the first frame in the sequence The exposure and white balance are set and locked with the first image Successive images use the same se...

Page 58: ...ional images A sequence may contain up to 26 images Press the button to close Stitch Assist mode A custom white balance setting cannot be set in or mode To use a custom white balance setting first set it in another shooting mode p 68 The settings for the first image are used to take subsequent images in the sequence It is not possible to display images on the TV when shooting in Stitch Assist mode...

Page 59: ...ately 15 frames sec is approximately 30 sec 3 min or 3 min according to Canon s testing standard Using an optional Canon FC 256MH CF Card not sold in some regions When using the CF card supplied with the camera the maximum length is approximately 14 sec These times may vary with the subject and shooting conditions Recording will automatically stop when the maximum is reached or when the CF card ru...

Page 60: ... at the values selected for the first frame After a clip is shot the upper indicator will blink green while the clip is being written to the CF card You cannot shoot again until the blinking stops See the Functions Available in Each Shooting Mode p 148 Sound is recorded monaurally The shutter sound will not sound when you fully press the shutter button to record a movie clip QuickTime 3 0 or later...

Page 61: ...with the Focus Lock Method 1 1 Aim the camera so that an object at the same focal distance as the main subject is centered in the AF frame in the viewfinder or LCD monitor 2 Press the shutter button halfway and wait until two beeps sound 3 Re aim the camera to compose the shot as desired and press the shutter button all the way Method 2 Turn the LCD monitor on Aim the camera so that an object at t...

Page 62: ...e button Method 2 is convenient because you can let go of the shutter button to recompose the image Moreover the focus remains locked after the picture is taken allowing you to capture a second image with the same focus In Method 2 pressing the zoom lever MENU button or DISP button or changing the shooting mode also releases the focus lock ...

Page 63: ... to The AE lock cannot be set if the flash fires Turn on the LCD monitor Focus the camera on the subject on which you wish to lock the exposure setting Press the shutter button halfway and wait until two beeps sound Without releasing your finger press the button The icon will display Re aim the camera to compose the shot To release the AE lock press the button The AE lock may release if you press ...

Page 64: ...sh to lock the flash exposure setting Press the shutter button halfway and wait until two beeps sound Without releasing your finger press the button The flash will fire a pre flash and lock the flash exposure to the required intensity to illuminate the subject The icon will display Re aim the camera to compose the shot and press the shutter button all the way To release the FE lock press the butto...

Page 65: ... the center AF frame This is convenient for focusing on a specific part of a subject with greater certainty On Off The symbol represents the AF frames as they appear in the LCD monitor No frame Switching between Autofocus Modes Although the autofocus function is preset to the AiAF setting nine AF frames you can set the AF frame to center point When center point is selected the AF frame will appear...

Page 66: ...r light metering It evaluates the complex lighting conditions such as the position of the subject the brightness the direct light and the backlighting and adjusts the settings to the correct exposure for the main subject Meters the area within the spot AE point at the center of the LCD monitor Use this mode when the subject is backlit or surrounded by strong light Evaluative Light Metering Spot AE...

Page 67: ...t in night shots Use the or button to adjust the exposure compensation The settings can be adjusted in 2 stops in 1 3 stop increments You can confirm the effect of the exposure compensation setting in the LCD monitor when the LCD monitor is on A shot can be taken immediately after The menu will reappear after the shot allowing you to further adjust the setting Reset the exposure compensation by re...

Page 68: ... select On The display will return to the Rec screen Use the or button to select the long shutter menu and the or button to select a shutter speed A shot can be taken immediately after The menu will reappear after the shot allowing you to further adjust the setting While the menu is displayed press the long shutter mode and finish the procedure In the Rec menu select Long Shutter Menu ...

Page 69: ...Nevertheless a certain amount of processing time may be required before the next image can be shot Use the LCD monitor to confirm that the image was recorded at the desired brightness Use of the flash may result in an over exposed image If that occurs shoot with the flash set to The following are unavailable Exposure Compensation Light Metering AE Lock ISO speed AUTO Available Shutter Speeds The f...

Page 70: ... wavelength fluorescent lighting Fluorescent H For recording under daylight fluorescent or daylight fluorescent type 3 wavelength fluorescent lighting Custom For setting a custom value with a white sheet of paper etc to obtain the optimal white balance for the conditions Press the button repeatedly until the White Balance Settings menu displays Use the or button to select a setting See the next pa...

Page 71: ...e button repeatedly until the White Balance Settings menu displays Use the or button to select Aim the camera at the white paper cloth or gray card and press the button Aim the camera so that the white paper cloth or gray card completely fills the frame on the LCD monitor or the entire viewfinder before pressing the button The camera reads the white balance data when you press the button A shot ca...

Page 72: ...nitor to compose the shot and to zoom in to the telephoto end setting Since the white balance data cannot be read in and mode preset the white balance in another shooting mode first before selecting the or mode Set the flash on or off when setting a custom white balance The white balance may not be accurate if the setting conditions and shooting conditions are not the same If the flash fires when ...

Page 73: ...hen the LCD monitor is on A shot can be taken immediately after The menu will reappear after the shot allowing you to further adjust the setting Photo Effect Off Records with no effect Vivid Emphasizes the contrast and color saturation to record bold colors Neutral Tones down the contrast and color saturation to record neutral hues Low Sharpening Records subjects with softened outlines Sepia Recor...

Page 74: ...ing Menus and Settings p 37 Use the or button to select a setting The display will return to the Rec screen Higher ISO speeds increase image noise To take clean images use as low an ISO speed as possible When AUTO is selected the camera automatically adjusts the ISO speed within a range equivalent to 50 to 150 In the Rec menu select ...

Page 75: ... When the camera is held on end to shoot the Intelligent Orientation sensor judges the upper end to be up and the lower end to be down It then regulates the optional white balance exposure and focus for vertical photography This function operates regardless of the On Off status of the Auto Rotate function When changing the camera s orientation between the horizontal and vertical positions you may ...

Page 76: ...rom 0001 to 9900 and organized in folders generally containing up to 100 images Folders are assigned numbers from 100 to 998 a folder with 99 in the last two digits cannot be created Since images shot in the or mode are always saved in the same folder some folders may contain 101 or more images The file number is reset to the start 100 0001 each time a new CF card is inserted New images recorded o...

Page 77: ...sition The last recorded image will appear in the display single image replay Use the button to move to the previous image and the button to move to the next Holding the button down advances the images more rapidly but the images will not appear as clearly Replaying ...

Page 78: ... the image Hold the button down and press the zoom lever toward to cycle through each setting from approxi mately 2 5 times to approximately 5 and 10 times Press the zoom lever toward to cease magnifying the image Approximate Location of the Magnified Area Movie frames and index replayed images cannot be magnified ...

Page 79: ...to display the selected image in single image replay Switching between Sets of Nine Images Successive sets of nine images can be shown in the display Use the button to move to the previous set and the button to move to the next Hold the button down and press the or button to jump to the first or last set Press the zoom lever toward to return to standard index replay Selected Image Movie ...

Page 80: ...edures Movies cannot be played in the index replay mode Use the or button to select a movie Images with a icon are movies The movie control panel will display Use the or button to select Play The movie images will play When a movie is finished it stops and displays its last frame ...

Page 81: ...rame Last Frame Switch to Movie Editing Mode p 79 The sound can also be played when a movie is displayed on a TV p 113 You may experience frame dropping and audio breakup when replaying a movie on a computer with insufficient system resources Movies shot with other cameras may not replay on this camera See the List of Messages p 126 Pausing and Resuming Play Press the button to pause the movie Pre...

Page 82: ...tion to which the cut is applied When Cut Beginning is selected the left hand cursor moves and when Cut End is selected the right hand cursor moves Use the or button to select Play A preview of the temporarily edited movie clip plays To stop it press the button again Use the or button to select Save to keep the edits p 80 If you use the or button to select Close Movie Editing Return to Movie Contr...

Page 83: ... card lacks sufficient space to create a new file only Overwrite can be selected A small symbol will appear in the time display on the movie in that case The minimum duration of an edited movie is 1 second It may take approximately 3 minutes to save an edited movie If the battery pack runs out of charge partway through edited movie clips cannot be saved When editing movies use a fully charged batt...

Page 84: ... 0º orientations with each press of the button Press the button repeatedly until the replay screen reappears to finish the procedure Movies cannot be rotated When images are downloaded to a computer the orientation of images rotated by the camera will depend upon the software used to download the images Images taken vertically with the Auto Image Rotate p 72 set to On will automatically be rotated...

Page 85: ... finish the procedure Movies play for their entire recorded length regardless of the time set in the slide show settings The power saving function does not activate during a slide show p 27 Automated Playback Slide Shows Starting a Slide Show A selection of images or all the images on a CF card can be displayed one by one in an automated slide show Slide show image settings are based on DPOF stand...

Page 86: ...images more rapidly Stopping a Slide Show Press the button to stop the slide show and redisplay the Slide Show menu Selecting Images for Slide Shows You can mark images for inclusion in slide shows 1 3 Up to 998 images may be marked per slide show Images display in the order of their selection Use the button to select Program and the or button to select Show 1 Show 2 or Show 3 Use the button and t...

Page 87: ...esponding to their selection order and a white checkmark You can press the zoom lever toward to switch to the index mode 3 images and use the same procedures to select images While in index replay you can clear all of the images by pressing the button using the or button to select Clear all and pressing the button again Press the button repeatedly until the replay screen reappears to finish the pr...

Page 88: ...en all the slides have been displayed or continues until stopped Use the or button to select Set up Use the or button to select or and the or button to select an option Select a play time Select On or Off Press the button repeatedly until the replay screen reappears to finish the procedure The display interval may vary slightly from the set time for some images when played Slide shows are easy to ...

Page 89: ...image Press the button again to remove the protection You can make the selection of images easier by toggling between single image replay and index replay by pressing the zoom lever toward Press the button repeatedly until the replay screen reappears to finish the procedure Please note that formatting initializing a CF card erases all data including protected images In the Play menu select Protect...

Page 90: ...ed images cannot be recovered Exercise adequate caution before erasing a file Protected images cannot be erased with this function Use the or button to select an image for deletion Use the or button to select Erase To exit instead of erasing select Cancel ...

Page 91: ...ges cannot be recovered Exercise adequate caution before erasing a file Protected images cannot be erased with this function See Selecting Menus and Settings p 37 Use the or button to select OK To exit instead of erasing select Cancel In the Play menu select ...

Page 92: ...is malfunctioning a corrupted CF card might be the cause Reformatting the CF card may solve the problem When a non Canon brand CF card is malfunctioning reformatting it may solve the problem CF cards formatted in other cameras computers or peripheral devices may not operate correctly in this camera When that happens reformat the CF card with this camera If formatting in the camera doesn t work pro...

Page 93: ...eloping service by sending your CF card with the DPOF Digital Print Order Format print settings set in advance on your camera Please refer to the System Map supplied with your camera for direct print function compatible printer information DPOF Print Settings Select the images you wish to print p 103 Set the number of print copies p 104 Set the print style p 106 Standard Index Date On Off File Num...

Page 94: ...ect Printing Setting the Number of Print Copies p 99 Setting the Print Style p 99 Standard Multiple Direct Print Function Compatible Printer Paper Card 1 Card 2 Card 3 LTR A4 Direct Print Function Compatible BJ Printer Bordered Borderless Date On Off Setting the Printing Area Trimming p 101 Photo Developing Service ...

Page 95: ...rint Menu Settings Use the Print menu to set print related settings The following diagrams illustrate how to use the Print menu DPOF Print Settings Set the Mode Switch to Direct Print Function Set the Mode Switch to ...

Page 96: ...u On Off Selects items and settings Sets items and settings Print Type p 106 Date p 106 File No p 106 Order Number of Copies p 104 Set up Reset p 108 Style Number of Copies p 99 Trimming p 101 Image p 99 Borders p 99 Date p 99 ...

Page 97: ... the battery charge while printing Please see the System Map supplied with your camera for the list of direct print function compatible printers Please see your printer s user guide for information about installing paper and ink cassettes tanks Connecting to a Direct Print Function Compatible Printer Your printer should come equipped with two direct interface cables To connect to this camera pleas...

Page 98: ...nter and power cable are connected Set the mode switch to the position and turn on the camera s power will display when the printer is correctly connected Connecting to a Bubble Jet Printer Please read the Quick Start Guide supplied with your BJ printer to see if it is compatible with the camera s direct print function and for instructions regarding the connection cables and the printer s general ...

Page 99: ...nel Set the mode switch to the position and turn on the camera s power will display when the printer is correctly connected This shows when a BJ printer is connected Interface Cable Ensure that you push the Push button on the connector to remove the cable from the camera s DIGITAL A V OUT terminal The following cannot be conducted while the printer is connected Playing movies Setting the language ...

Page 100: ...Use the or button to select the images you wish to print Specify the number of print copies print style and print area as required Setting the Number of Print Copies p 99 Setting the Print Style p 99 Setting the Printing Area Trimming p 101 Use the buttons to select Print To quit the procedure instead select Cancel Press the button to start printing The replay screen will reappear when printing is...

Page 101: ...d eject the paper Printing Errors An error message will display if an error occurs while printing p 128 129 Use the or button to select Stop or Resume and press the button With a BJ printer the print will automatically restart if the error is resolved Direct Print Function Compatible Printers The Resume option may not appear with some types of error In that case select Stop BJ Printers The type of...

Page 102: ...ng the Print Style You can select from among the following print styles Direct Print Function Compatible Printer BJ Printer Paper Select a paper size from the following Card 1 Card 2 Card 3 LTR and A4 See the printer s user guide for its media specifications Borders Borderless Prints right to the edges of the paper Bordered Prints with a border Date Prints the image s creation date This option is ...

Page 103: ...ect or and the or button to select an option Image Settings Direct Print Function Compatible Printer Select Standard or Multiple Paper BJ Printer Select Card 1 Card 2 Card 3 LTR or A4 Borders Select Borderless or Bordered Date Select On or Off Current print style selection ...

Page 104: ... bottom and sides trimmed The date settings are overridden by the DPOF print settings if you are using them to print p 106 Setting the Printing Area Trimming You can print a portion of an image The shape of the trimming frame is determined by the print style selection image paper borders date Set the print style before setting the printing area p 99 Use the or button to select Trimming ...

Page 105: ...magnifying rate With direct print function compatible printers the trimming frame displays in red Moving the Trimming Frame Use the or button to set the trimming frame s position Rotating the Trimming Frame Press the button to rotate the trimming frame The trimming frame will appear on images that have already had one assigned Trimming settings can only be set for one image Trimming settings are c...

Page 106: ...ng the images to a photo developing service or for printing on a direct print function compatible printer or a direct print function compatible BJ printer Selecting Images for Printing There are two ways to select images Singly All images on a CF card the number of print copies is set to one per image See Print Menu Settings p 92 Use the or button to select Print Order Display the Print Order Menu...

Page 107: ...p to maximum of 99 Index Use the or button to move to an image and the or button to select or deselect it A checkmark displays on selected images You can use the same procedures to select images in index replay 3 images Press the zoom lever toward to switch between single image replay and index replay Press the button repeatedly until the replay screen reappears to complete the procedure Number of...

Page 108: ...pies can be set individually for each image When Index is selected the print settings can be deleted p 104 Press the button repeatedly until the replay screen reappears to complete the procedure The symbol will display on images that have had print settings set by other DPOF compliant cameras These settings will be overwritten by those set by your camera The output of some printers or photo develo...

Page 109: ...d When Both is selected the number of print copies can be set but it applies to Standard prints only The Index setting only produces one print copy Print settings can also be assigned to images with the bundled software on a computer Standard Prints one image per page Print Type Index Prints the selected images together at a reduced size in an index format Both Prints the images in both the standa...

Page 110: ...n or Off File No Select On or Off Press the button repeatedly until the replay screen reappears to complete the procedure The date prints as the date and time in the format specified in the Set Date Time menu p 23 When the print type is set to Index only one or the other of the Date and File No options can be set to On at the same time ...

Page 111: ...can all be removed at once The print type resets to Standard and the Date and File No options to Off See Print Menu Settings p 92 Use the or button to select Reset Use the or button to select OK To exit without resetting select Cancel Display the Print Order Menu ...

Page 112: ...2 Use the button to select Print Set the print style as required p 106 The print style cannot be set for images that have had the print type set to Index in the DPOF print settings You can also select the type of paper when printing with a BJ printer Use the buttons to select OK Press the button to start printing The replay screen will reappear when printing is successfully concluded Display the P...

Page 113: ...toyourBubbleJetPrinterQuickStartGuideforan explanationofthenumberofimagesprintedwithaBubbleJetPrinter Canceling Printing Seepage98 Restarting Printing InthePrintOrdermenu usethe or buttontoselect Resume and pressthe button Theremainderoftheselectedimageswillprint Printingcannotberesumedunderthefollowingcircumstances Iftheprintsettingswerechangedbeforeprintingisrestarted Ifimageswithprintsettingswe...

Page 114: ... for image transfer instructions The settings used on the camera comply with the Digital Print Order Format DPOF standards The symbol will display on images that have had print settings set by other DPOF compliant cameras These settings will be overwritten by those set by your camera Selecting Images for Transferring See Selecting Menus and Settings p 37 The Transfer Order menu will display Use th...

Page 115: ...replay and index replay While in index replay you can select all of the images by pressing the button using the or button to select Mark all and pressing the button again Press the button to complete the transfer settings and redisplay the Transfer Order menu Images are transferred in order from oldest to newest by the shooting date A maximum of 998 images can be selected per CF card Transfer sett...

Page 116: ...g the normal procedures If the images are not appearing on the TV when shooting press the button A TV cannot be used in or mode No image will appear on the LCD monitor when the camera is connected to a TV If the TV is a stereo model you can plug the audio plug into either the left or right Audio In jack Please refer to the TV s manual for details The video output signal can be switched NTSC or PAL...

Page 117: ...o a computer with the supplied USB cable Please refer to the Software Starter Guide for installation instructions image download instructions and system requirements Downloading Directly from a CF Card Images can be loaded directly from a CF card if you have a slot equipped notebook computer a PC card reader or a CF card reader Eject the CF card from the camera and insert it into a CF card reader ...

Page 118: ...mera Solution Disk before connecting the camera to the computer Please refer to the Software Starter Guide for installation instructions Use the supplied USB cable to connect the computer s USB port to the DIGITAL A V OUT Terminal on the camera You do not need to shut off the camera or computer to attach or detach USB interface cables Please refer to your computer s manual for the locations of the...

Page 119: ...n the Canon Digital Camera Solution Disk have not been installed Viewing the camera s images Downloading the camera s images to a computer Deleting the camera s images These functions are available with Windows XP or Mac OS X 10 1 or later OS Select the Normal option for all other operating systems Normal Default PTP Picture Transfer Protocol With any other OS PTP cannot be used Please select Norm...

Page 120: ...uter p 130 If the USB cable is detached while the camera power is on the camera will power down When the camera is connected to a computer a warning displays on the computer display after 5 minutes if the camera is not used The camera shuts down if a further minute passes without a button being pressed Except when the camera s power saving function is set to off To restore power press the main swi...

Page 121: ...to CF cards Superfine Fine Normal Sets the sensitivity at which images are recorded 50 100 200 400 AUTO Sets the number of pixels used to record movies to CF cards 640 x 480 pixels 320 x 240 pixels 160 x 120 pixels Sets the number of pixels used to record images to CF cards Large 2048 x 1536 pixels Medium 1 1600 x 1200 pixels Medium 2 1024 x 768 pixels Small 640 x 480 pixels Default setting p 45 p...

Page 122: ...ssist Beam AiAF Sets whether or not the camera automatically selects one of nine AF frames or a fixed center AF frame On Off Sets the duration before the selftimer releases the shutter 10 seconds 2 seconds Sets the duration images display on the LCD monitor after the shutter button releases Off 2 10 seconds 1 second increments Sets the AF assist Beam to on or off On Off p 35 p 44 p 52 p 50 p 62 ...

Page 123: ...s how file numbers are assigned to images when new CF cards are inserted On Off Long Shutter File No Reset Auto Rotate Sets whether or not images shot with the camera on end are automatically rotated in the display On Off Sets the shutter speed to slow settings On Off p 73 p 72 p 65 ...

Page 124: ...rence Page Protect Rotate p 86 p 81 p 88 Erase all Slide Show Protects images from accidental erasure Rotates images clockwise 90º or 270º in the display Deletes all images from a CF card except for protected images Plays images in automated slide shows p 82 Play Menu ...

Page 125: ...creen Options Reference Page Print Order Transfer Order p 103 p 111 Selects images and the number of print copies for output to a DPOF compatible printer or a photo developing service Selects the images that will be transferred to your email software ...

Page 126: ...ed or a menu operation is performed On Off A beep still sounds to warn of errors even when Off is selected Sets whether or not the camera automatically powers down after a set period of time elapses without something being pressed On Off Sets the date and time and the date format p 27 p 23 p 89 Power Save Date Time Default setting Format Formats initializes CF cards ...

Page 127: ...ed in menus and messages on the LCD monitor English Italiano Deutsch Norsk Français Svenska Nederlands Español Dansk Chinese Suomi Japanese You can also change the language in replay mode by holding the SET button and pressing the MENU button Language Video System p 25 Sets the camera and computer communication settings Normal PTP p 116 Communication ...

Page 128: ...en power lamp lights Set the mode switch to any position Press and hold the button for more than 5 seconds Use the or button to select OK To exit without resetting select Cancel White balance data recorded with the custom white balance function is not reset by this function p 68 Settings cannot be reset when the camera is connected to a computer to a direct print function compatible printer option...

Page 129: ...a file with the same name as the directory that the camera is attempting to create or the highest possible file number has already been reached In the Rec Menu set the File Reset option to On Save all the images you wish to retain onto a computer then reformat the CF card Please note that formatting will erase all the existing images and other data Change the battery pack Battery charge is insuffi...

Page 130: ... rotate You attempted to rotate an image which was photographed with another camera recorded in a different format or edited on a computer Protected You attempted to erase a protected image Too many marks Too many images have been marked with print settings transfer settings or slide show settings Cannot process any more Unselectable image You attempted to set the print settings for a non JPEG fil...

Page 131: ...sette Paper and ink do not match The paper and ink are from different sets Paper Jam Paper jammed during printing Paper has been changed The paper size was changed between the time the Print Style menu was displayed and the time printing started Recharge the printer battery The printer s battery is out of power Communication Error A communication error has occurred Reajust trimming You attempted t...

Page 132: ...will start printing automati cally No printhead No printhead installed in printer Printer cover open Secure the printer front cover Media type error You selected a paper type incompatible with the printer Select a compatible paper type in the Print Style menu Paper lever error Adjust the paper thickness lever to the proper position Low ink level Ink tank needs replacement soon Prepare a new ink ta...

Page 133: ...lug the other end into the power outlet Open the battery cover and press the battery lock in the direction shown while inserting DC Coupler DR 500 Insert the DC coupler all the way in until the battery lock clicks Slide the battery cover closed Open the DC coupler terminal cover and attach the cord to the DC terminal After you have finished using the camera unplug the AC adapter from the power out...

Page 134: ...ry charger Insert the battery pack all the way into the battery charger as shown The charge indicator will light red while the battery pack is charging It will change to green when the charge is complete After charging unplug the car battery cable from the cigarette lighter socket and remove the battery pack The battery will stop charging whenever you turn the engine off so be sure to unplug the c...

Page 135: ...ens blower brush to remove dust and dirt then remove any remaining dirt by wiping the lens lightly with a soft cloth Never use synthetic cleansers on the camera body or lens If dirt remains contact the closest Canon Customer Support Help Desk as listed on the separate Canon Customer Support leaflet Viewfinder and LCD Monitor Use a lens blower brush to remove dust and dirt If necessary gently wipe ...

Page 136: ...a new CF card If required download the images to a computer and erase them from the CF card to make space Format CF card See Formatting CF Cards p 89 If reformatting doesn t work the CF card logic circuits may be damaged Consult the nearest Canon Customer Support Help Desk Power is not turned on Battery cover or CF card slot cover is open Insufficient battery voltage Poor contact between camera an...

Page 137: ...shutter button Be careful not to block the AF assist Beam with fingers or other items Problem Cause Solution Lens will not retract Battery pack consumed quickly Battery pack will not charge Image is blurred or out of focus Battery cover or CF card slot cover was opened with power on Battery cover or CF card slot cover was opened while recording to the CF card warning signal sounds Battery life exc...

Page 138: ...of the subject at the maximum wide angle or 2 m 6 6 ft of the subject at the telephoto end setting when using the flash When using the flash stay at least 27 cm 10 6 in from the subject Set the exposure compensation to a negative setting or use the spot metering function Problem Cause Solution Image is blurred or out of focus Subject in recorded image is too dark Subject in recorded image is too b...

Page 139: ... NTSC or PAL for your TV p 124 The output will not appear on a TV in or Stitch Assist mode Shoot in a different mode Adjust the zoom before shooting a movie Use a CF card formatted in your camera See Formatting CF Cards p 89 Problem Cause Solution Light is shining directly on the subject or reflected off the subject into the camera Flash is set to on Flash is set to off Incorrect video system sett...

Page 140: ... pixels Autofocus TTL 9 point AiAF TTL 1 point center AF Focus lock possible Focusing Range Normal 47 cm 1 5 ft Macro AF 10 47 cm 3 9 in 1 5 ft W 27 47 cm 10 6 in 1 5 ft T Shutter Mechanical electronic Shutter Speed 15 1 1500 sec 1 1 6 sec possible at flash off or slow synchro in manual mode 15 1 sec possible in long shutter mode Noise reduction processing on speeds between 15 1 3 sec Light Meteri...

Page 141: ...e Recording Format Still images JPEG Exif 2 2 1 Movies AVI Image data Motion JPEG Audio data WAVE monaural Compression Superfine fine normal Number of Recording Pixels Still images large 2048 x 1536 pixels medium 1 1600 x 1200 pixels medium 2 1024 x 768 pixels small 640 x 480 pixels Movies 640 x 480 pixels Approx 30 sec 2 320 x 240 pixels Approx 3 min 160 x 120 pixels Approx 3 min Approx 15 frames...

Page 142: ...prints 2 This is the maximum recording time per movie clip for the optional Canon FC 256MH CF card not sold in some regions Battery Capacity Battery Pack NB 1LH fully charged Excludes movie data At low operating temperatures the battery performance may drop and the low battery icon may appear sooner than at high temperature To improve performance at these temperatures warm the battery in your pock...

Page 143: ...sec 1954 sec CF Cards and Estimated Capacities Recordable Images The maximum movie clip length is approximately 30 sec or 3min The times shown are the maximum continuous recording times When used with the FC 256MH CF card sold separately Large Medium 1 Medium 2 Small and indicate the recording resolution Superfine Fine and Normal indicate the compression setting The FC 256 MH CF card is not sold i...

Page 144: ...0 oz Battery Charger CB 2LS CB 2LSE Rated Input 100 240 V AC 50 60 Hz 0 075 A 100 V 0 045 A 240 V Rated Output 4 2 V DC 0 5 A Charging Time Approx 130 minutes Operating Temperatures 0 40 ºC 32 104 ºF Dimensions 90 4 x 56 0 x 28 0 mm 3 6 x 2 2 x 1 1 in Weight Approx 78 g 2 8 oz When charging Battery Pack NB 1LH Compact Power Adapter CA PS500 Included with the optional AC Adapter Kit ACK500 Rated In...

Page 145: ...ptional Rated Input DC 12 24 V 4 3 W Rated Output 4 2 V DC 0 55 A Charging Time Approx 130 minutes Operating Temperatures 0 40ºC 32 104ºF Dimensions 90 4 x 56 0 x 28 0 mm 3 6 x 2 2 x 1 1 in Weight Approx 106 g 3 7 oz When charging Battery Pack NB 1LH ...

Page 146: ... Custom White Balance 68 D Date Time 23 DIGITAL A V OUT Terminal 95 96 115 Digital Zoom 36 50 Direct Interface Cable DIF 200 94 Direct Print function Compatible BJ Printer 95 Direct Print function Compatible Printer 94 Direct Printing 90 DPOF 90 92 103 111 DPOF Print Order 90 Printing 104 Print Style 106 Resetting 108 Selecting Images 103 DPOF Transfer Order 111 Downloading Images to a Computer 11...

Page 147: ...lay Menu 121 Power On Off 26 Power Lamp 16 Power Save 27 Print Settings Direct Print Printers Number of Print Copies 99 Print Area Trimming 101 Print Style 99 Selecting Images 97 Protect 86 R Rec Menu 118 Red Eye Reduction Function 48 Replay Mode 28 Resolution 45 Review Duration 44 Rotate 81 S Self Timer 52 Set up Menu 123 Shooting Mode 28 42 Shutter Button 34 Pressing Fully 35 Pressing Halfway 34...

Page 148: ...145 ...

Page 149: ... to a mistaken operation or malfunction of the camera the software the CompactFlash cards CF cards personal computers peripheral devices or use of non Canon CF cards Trademark Acknowledgments Canon and PowerShot are trademarks of Canon Inc CompactFlash is a trademark of SanDisk Corporation iBook and iMac are trademarks of Apple Computer Inc Macintosh PowerBook Power Macintosh and Quick Time are tr...

Page 150: ...pment off and on the user is encouraged to try to correct the interference by one or more of the following measures Reorient or relocate the receiving antenna Increase the separation between the equipment and receiver Connect the equipment into an outlet on a circuit different from that to which the receiver is connected Consult the dealer or an experienced radio TV technician for help The cable w...

Page 151: ... 45 p 45 p 45 p 45 p 45 p 45 p 45 p 45 p 45 p 47 p 47 p 47 p 47 p 47 p 49 p 49 p 58 p 60 p 61 p 51 p 52 p 62 Reference Page Resolution Compression Flash Macro Mode Infinity Mode Focus Lock AE Lock FE Lock Shooting Method Autofocus Modes Large Medium 1 Medium 2 Small Movie Movie Movie Superfine Fine Normal Auto Red Eye Reduction Auto On Off Slow Synchro Single Continuous Self timer Function Auto Ma...

Reviews: