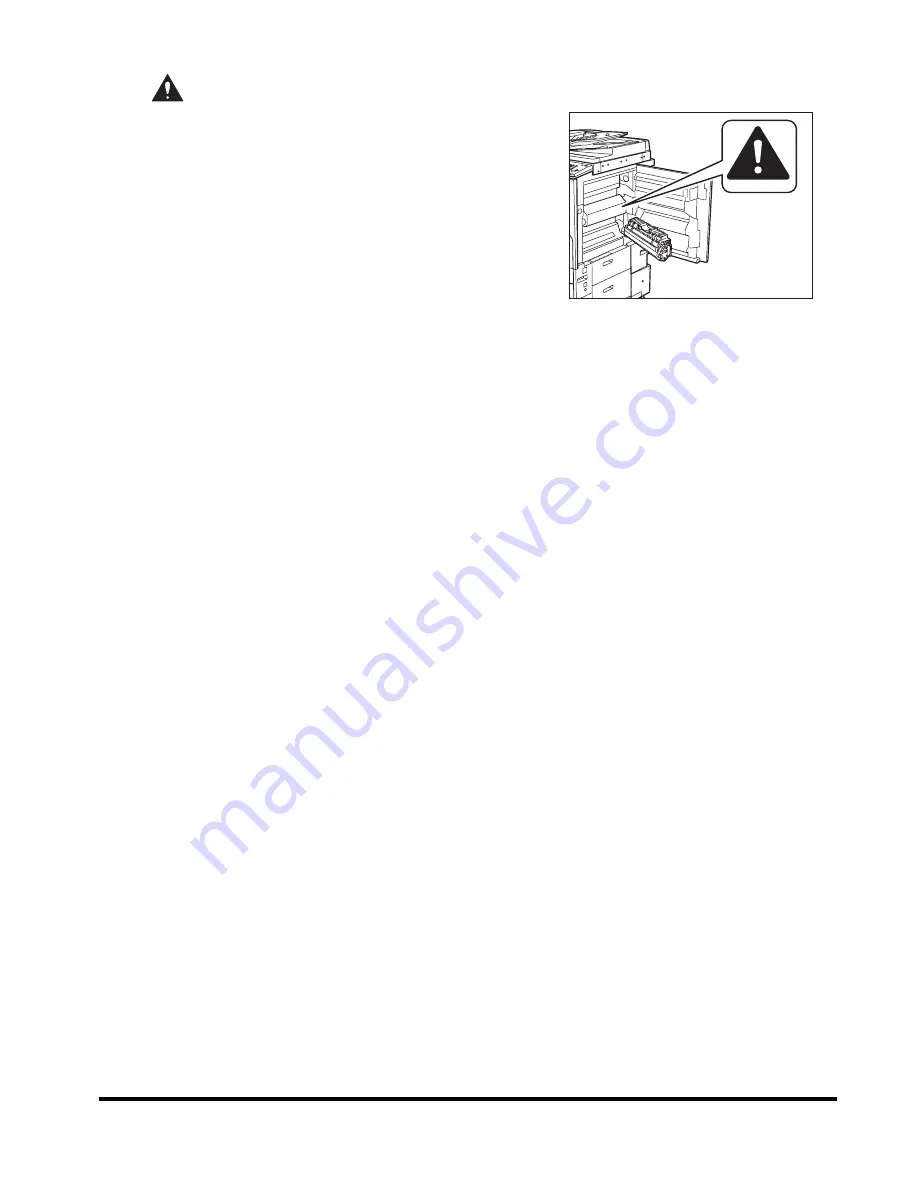
Canon iR4570 Series User Manual Download Page 19

xix

CAUTION

The fixing unit and its surroundings inside the 
machine may become hot during use. When 
removing jammed paper or when inspecting the 
inside of the machine, do not touch the fixing unit 
and its surroundings, as doing so may result in 
burns or electrical shock.

When removing jammed paper or replacing the 
toner cartridge, take care not to allow the toner to 
come into contact with your hands or clothing, as 
this will dirty your hands or clothing. If they become 
dirty, wash them immediately with cold water. 
Washing them with warm water will set the toner, 
and make it impossible to remove the toner stains.

When removing paper which has become jammed inside the machine, remove the jammed 
paper gently to prevent the toner on the paper from scattering and getting into your eyes or 
mouth. If the toner gets into your eyes or mouth, wash them immediately with cold water and 
immediately consult a physician.

When loading paper or removing jammed originals or paper, take care not to cut your hands 
on the edges of the originals or paper.

When removing a used toner cartridge, remove the cartridge carefully to prevent the toner 
from scattering and getting into your eyes or mouth. If the toner gets into your eyes or mouth, 
wash them immediately with cold water and immediately consult a physician.

Summary of Contents for iR4570 Series

Page 1: ...iR4570 iR3570 iR2870 iR2270 User s Guide...

Page 2: ...s Guide This Document Basic Operations Troubleshooting Reference Guide CD ROM Copying and Mail Box Instructions Copying and Mail Box Guide CD ROM Sending and Fax Instructions Sending and Facsimile Gu...

Page 3: ...ROM Installing MEAP Applications and Using the Login Service MEAP SMS Administrator Guide CD ROM To view the manual in PDF format Adobe Reader Adobe Acrobat Reader is required If Adobe Reader Adobe A...

Page 4: ...viii Consumables xx Other Warnings xx About the Instruction Manual CD ROM xxi Contents of Instruction Manual CD ROM xxi Instruction Manual CD ROM xxi Super G3 FAX Board CD ROM Universal Send Kit CD RO...

Page 5: ...rent Date and Time 1 25 Registering This Machine s Fax Number 1 28 Registering Sender Names 1 29 Registering the Unit s Name 1 31 Displaying a Help Screen 1 33 Chapter 2 Routine Maintenance Loading Pa...

Page 6: ...s restrictions handling precautions and instructions that should be observed for safety WARNING Indicates a warning concerning operations that may lead to death or injury to persons if not performed c...

Page 7: ...ed inside the product is completely confined within protective housings and external covers the laser beam cannot escape from the machine during any phase of user operation Do not remove protective ho...

Page 8: ...amage your eyes The labels shown below are attached to the Paper Drawer s Right Cover and Toner Supply Port Cover This Product has been classified under IEC60825 1 1993 and EN60825 1 1994 which confor...

Page 9: ...ards and logos are uniform among participating nations European Union and EEA only This symbol indicates that this product is not to be disposed of with your household waste according to the WEEE Dire...

Page 10: ...nts of EC Directive 1999 5 EC at nominal mains input 230 V 50 Hz although the rated input of the product is 220 V 240 V 50 60Hz Use of shielded cable is necessary to comply with the technical requirem...

Page 11: ...pyright Copyright 2005 by Canon Inc All rights reserved No part of this publication may be reproduced or transmitted in any form or by any means electronic or mechanical including photocopying and rec...

Page 12: ...int or otherwise reproduce any particular document and or of the use of the images scanned printed or otherwise reproduced you should consult in advance with your legal advisor for guidance Paper Mone...

Page 13: ...ered under your Limited Warranty Installation WARNING Do not install the machine near alcohol paint thinner or other flammable substances If flammable substances come into contact with electrical part...

Page 14: ...t remove the machine s leveling feet after the machine has been installed as this may cause the machine to fall or tip over resulting in personal injury Power Supply WARNING Do not damage or modify th...

Page 15: ...d high voltage components inside the machine which may result in a fire or electrical shock If the machine makes strange noises or gives off smoke heat or strange smells immediately turn OFF the main...

Page 16: ...t the power cord for safety when the machine will not be used for an extended period of time such as during consecutive holidays Even if the machine is not operating do not touch the rollers in the pa...

Page 17: ...this manual Do not remove the following caution labels which are attached to the machine This product is certified as a Class I laser product under IEC60825 1 1993 If the laser beam escapes from the m...

Page 18: ...result in a fire Clean the machine using a slightly dampened cloth with a mild detergent mixed with water Do not use alcohol benzene paint thinner or other flammable substances Check detergent for fla...

Page 19: ...set the toner and make it impossible to remove the toner stains When removing paper which has become jammed inside the machine remove the jammed paper gently to prevent the toner on the paper from sca...

Page 20: ...en discarding used toner cartridges put the cartridges in a bag to prevent the toner remaining inside the cartridges from scattering and dispose of them in a location away from open flames CAUTION Kee...

Page 21: ...c operation instructions daily maintenance and troubleshooting instructions Copying and Mail Box Guide Contains the Copying and Mail Box function instructions Remote UI Guide Contains the Remote User...

Page 22: ...n of your computer some functions may not operate correctly If the PDF manual does not open from the CD ROM Menu open the PDF file directly from the uk_english or asia pacific_english folder on the Us...

Page 23: ...Windows users NOTE For Macintosh users double click the START icon to start the CD ROM Menu The Language Selection screen is displayed The screen shot shown above may differ from the one you actually...

Page 24: ...al authorized Canon dealer Checking the Breaker 1 Push the test button with the tip of a ball point pen or similar object IMPORTANT Briefly push the test button 2 Confirm that the breaker lever is swi...

Page 25: ...xxv 3 Move the breaker lever to ON I side 4 Press the main power switch to ON I side 5 Fill in the check sheet located on p 4 6 to document your periodic inspections of the breaker...

Page 26: ...xxvi...

Page 27: ...an Do 1 10 System Configuration and Parts 1 13 Optional Equipment 1 13 External View and Internal View 1 14 Control Panel Parts 1 15 Touch Panel Display 1 16 Main Power and Control Panel Power 1 19 Ho...

Page 28: ...ing the Machine in the Following Locations Avoid locations subject to extremes of temperature and humidity whether low or high For example avoid installing the machine near water faucets hot water hea...

Page 29: ...tion runs especially in poorly ventilated rooms It is recommended that the room be appropriately ventilated sufficient to maintain a comfortable working environment in areas of machine operation Avoid...

Page 30: ...machine near televisions radios or similar electronic equipment The machine might interfere with sound and picture signal reception Insert the power plug into a dedicated power outlet and maintain as...

Page 31: ...nnect the power cord to a multiplug power strip as this may cause a fire or electrical shock The power cord may become damaged if it is often stepped on or if heavy objects are placed on it Continued...

Page 32: ...on Space Provide enough space on each side of the machine for unrestricted operation No optional equipment is attached The optional Feeder DADF N1 Finisher S1 and Paper Deck Q1 are attached The option...

Page 33: ...ontact your local authorized Canon dealer beforehand Handling Precautions Do not attempt to disassemble or modify the machine Some parts inside the machine are subject to high voltages and temperature...

Page 34: ...moke or unusual noise immediately turn the main power switch OFF disconnect the power cord from the outlet and call your local authorized Canon dealer Using the machine in this state may cause a fire...

Page 35: ...anel power switch of the machine when it will not be used for a long period of time such as overnight As an added safety measure turn OFF the main power switch and disconnect the power cord when the m...

Page 36: ...unctions such as Sample Set which helps to avoid copy errors Booklet for making copies into booklets and Different Size Originals for copying originals of different sizes together in one copy operatio...

Page 37: ...e The optional Super G3 FAX Board is required Printing optional See the PS PCL UFR II Printer Guide or UFR II Printer Guide You can upgrade this machine to a high speed network printer by installing t...

Page 38: ...all from your PC s web browser Scanning optional See the Network ScanGear User s Guide Scanning image data into computers is a function that is available if the iR4570 iR3570 iR2870 iR2270 is upgrade...

Page 39: ...pe H b Feeder DADF N1 c Card Reader C1 d Copy Tray J1 e 3 Way Unit A1 f Paper Deck Q1 g Cassette Feeding Unit Y2 h Inner 2 Way Tray D1 i Puncher Unit Q1 j Additional Finisher Tray B1 k Finisher S1 l E...

Page 40: ...Main Power Switch f Test Button g Breaker h Paper Drawer s Right Cover i Paper Drawer 2 j Paper Drawer 1 k Output Tray l Output Tray Guide The optional Feeder DADF N1 and Cassette Feeding Unit Y2 are...

Page 41: ...r blinks green when the machine is performing operations and maintains a steady green light when fax data is stored in memory h Clear key Press to clear entered values or characters i Numeric keys Pre...

Page 42: ...the printing destination for remote and cascade copying g Adjust Contrast Press or to manually control the copy exposure Press A to select or cancel the automatic exposure control h Original Type Sele...

Page 43: ...initial screen can be the Copy Send or Fax Mail Box MEAP or System Monitor screen NOTE The top of the touch panel display may differ according to the optional equipment that is attached to the machin...

Page 44: ...the Job Print Status Display Area on the bottom left of the screen are described below Icon Type of Job Description Copy Job Send Fax Job Mail Box Job Printer Job Report Job Network Scan Job Remote C...

Page 45: ...rd with wet hands as this may result in electrical shock 2 Press the main power switch to ON I side The main power switch is located on the right side of the machine If you want to turn the main power...

Page 46: ...or SSO Single Sign on is not set and an application other than MEAP is selected as the initial function in Common Settings from the Additional Functions screen The Start Up screen is displayed until t...

Page 47: ...s the initial function in Common Settings from the Additional Functions screen The Start Up screen is displayed until the machine is ready to scan After the Start Up screen disappears the MEAP Start U...

Page 48: ...The background colour of the screen is changed to brown IMPORTANT If you turn OFF the main power wait at least 10 seconds before turning the main power back ON Do not turn the main power OFF if the U...

Page 49: ...Machine in the Sending and Facsimile Guide IMPORTANT If you attempt to use the machine without registering the necessary information correctly the machine may not function properly Network settings ha...

Page 50: ...ne 1 24 Before You Start Using This Machine 1 2 Press User Settings under Fax Settings 3 Press Tel Line Type 4 Select the type of telephone line press OK The selected mode is set 5 Press Done repeated...

Page 51: ...nal Functions screen See Chapter 3 Using a TCP IP Network in the Network Guide 1 Press System Settings 2 Press Date Time Settings GMT The time at the Greenwich Observatory in England is called GMT Gre...

Page 52: ...ar and time using numeric keys If you are setting the Time Zone Press the Time Zone drop down list select the time zone where the machine is located NOTE The default setting is GMT 00 00 If the desire...

Page 53: ...e settings in the same way as Start Date press OK NOTE If you set Daylight Saving Time the machine automatically sets the standard time of the machine one hour forward at the specified date and time T...

Page 54: ...ty The number may also be displayed on the touch panel display of the receiving party s machine depending on their type of machine NOTE For this setting the optional Super G3 FAX Board is required 1 P...

Page 55: ...can be displayed on the touch panel display of the recipient s machine and or printed at the top of the documents that you send as the sender s information NOTE You can set to display and print the s...

Page 56: ...s 2 Press Sender s Names TTI 3 Select the number under which you want to register the sender s name press Register Edit 4 Enter the sender s name press OK You can enter up to 24 characters for the sen...

Page 57: ...e Device Information settings for this machine is displayed in the From field on the I fax recipient s machine and the e mail address of the login user registered for SDL or the Local Device Authentic...

Page 58: ...ne 1 32 Before You Start Using This Machine 1 1 Press Communications Settings TX Settings under Common Settings 2 Press Unit Name 3 Enter a name press OK The selected mode is set 4 Press Done repeated...

Page 59: ...mple the Margin mode has been selected If you press after pressing Special Features Margin the Help Function screen appears as shown on the right To display the Help Menu screen press Help Menu To ret...

Page 60: ...ine 1 1 Press Making Copies Various originals 2 Press Photo original or Originals with Text Photo press or to read the detailed information on the selected mode 3 Press Done to return to the Various O...

Page 61: ...CHAPTER 2 1 2 Routine Maintenance This chapter describes how to load paper and replace toner Loading Paper 2 2 Replacing the Toner Cartridge 2 5...

Page 62: ...the stack of paper well before loading it Never place paper or any other items in the empty part of the drawer next to the paper stack Doing so may cause paper jams NOTE If a message prompting you to...

Page 63: ...When loading paper take care not to cut your hands on the edges of the paper IMPORTANT Rewrap any remaining paper in its original package and store it in a dry place away from direct sunlight NOTE For...

Page 64: ...the back of the paper drawer NOTE Each paper drawer holds approximately 550 sheets of paper 80 g m2 For more information on the print direction of preprinted paper paper which has logos or patterns al...

Page 65: ...r cartridge like the one shown on the right appears on the touch panel display Follow the instructions on the touch panel display and the procedure described below to help you replace the toner cartri...

Page 66: ...ridges while the machine is in the process of printing NOTE When the message Toner is low Replacement not yet needed appears approximately 1 000 pages can be printed If toner runs out during a print j...

Page 67: ...y cause the toner remaining inside the cartridges to ignite resulting in burns or a fire CAUTION Do not touch the tip of the toner cartridge or subject it to a shock by hitting something with it as th...

Page 68: ...machine with your other hand 6 Push the lever down until it becomes horizontal IMPORTANT Make sure that the on the lever is aligned with the of the Lock position NOTE If you insert a toner cartridge...

Page 69: ...ER 3 1 3 Troubleshooting This chapter explains what to do in response to a paper jam and an error message display Clearing Paper Jams 3 2 List of Error Messages 3 6 List of Error Codes without Message...

Page 70: ...re not to allow the toner on the jammed paper to come into contact with your hands or clothing as this will dirty your hands or clothing If they become dirty wash them immediately with cold water Wash...

Page 71: ...the directions on the touch panel display to clear the paper jam See Feeder DADF N1 Optional in the Reference Guide If the MEAP screen is displayed a message appears in the Job Print monitor area Pre...

Page 72: ...ncher Unit Q1 Optional or Inside the Transfer Cover of the Finisher S1 Optional in the Reference Guide f Paper Deck Q1 See Paper Deck Q1 Optional in the Reference Guide g Finisher Q3 See Inside the To...

Page 73: ...you have removed all of the jammed paper in locations other than the feeder printing or copying resumes If there is paper that still needs to be removed a screen indicating how to clear that paper jam...

Page 74: ...the Results column on the Activity Report and Send Report See Printing Communication Reports in the Sending and Facsimile Guide Perform the necessary procedures according to the error code NOTE If a s...

Page 75: ...was interrupted Remedy Try copying printing again 701 Cause The specified Department ID does not exist or the password has changed Remedy Enter the correct Department ID or password using numeric keys...

Page 76: ...OFF disconnect the machine and contact your local authorized Canon dealer 816 Cause You cannot print because the set page Limit total has been reached Remedy Contact your System Manager 849 Cause Dev...

Page 77: ...d inbox 852 Cause An error occurred because the main power switch was turned OFF while a job was being processed Remedy Check to see if the main power switch is turned ON Try processing the job again...

Page 78: ...ings from the Additional Functions screen set to On and device information from the host machine cannot be delivered Remedy Try delivering device information again after setting Restrictions for Recei...

Page 79: ...CHAPTER 4 1 4 Appendix This chapter provides other useful information Multifunctional Operations 4 2 Available Paper Stock 4 4 Check Sheet for the Periodic Inspection of the Breaker 4 6...

Page 80: ...tifunctional operations Available Unavailable Available but with conditions Receive Send Scan Print Copy Scan and Print via Network via Fax Print Data via Network via Fax Copy Mail Box Send Copy RX Do...

Page 81: ...nisher is attached When an optional finisher is attached one set is output alternately for each job When an optional finisher is not attached one page is output alternately for each job 3 The machine...

Page 82: ...he Reference Guide Available Unavailable 1 Plain Recycled Colour and Pre punched paper are from 64 to 80 g m2 2 Heavy paper is from 81 to 128 g m2 3 Some types of tracing paper cannot be used 4 Use on...

Page 83: ...ck Bypass Making Prints Using the Stack Bypass in the Reference Guide Paper Drawers 3 4 and the Paper Deck Q1 are optional Paper Size Width x Length Paper Source Paper Drawer 1 Paper Drawer 2 3 4 Stac...

Page 84: ...pect the Breaker Periodically Follow the procedure described in Periodic Inspection of the Breaker on p xxiv once or twice a month How to Fill in This Check Sheet Fill in the date of inspection and th...

Reviews: