Chapter 1
1-41
- Although the ink is not harmful to the human body, it contains organic solvents.
Ink may contaminate the surrounding parts. Carry out the work with due caution. If your hands are stained with ink, wash them with a plenty of water.
Be careful not to allow the ink to get into your mouth or eyes.
If the ink gets into your eyes, flush them with water well and see a doctor.
In case of accidental ingestion of a large quantity of ink, see a doctor immediately.
- It is also effective to use gloves to prevent ink from adhering when working.
- Since this ink contains pigment, stains will not come out of clothing.
(2) Ink Mist
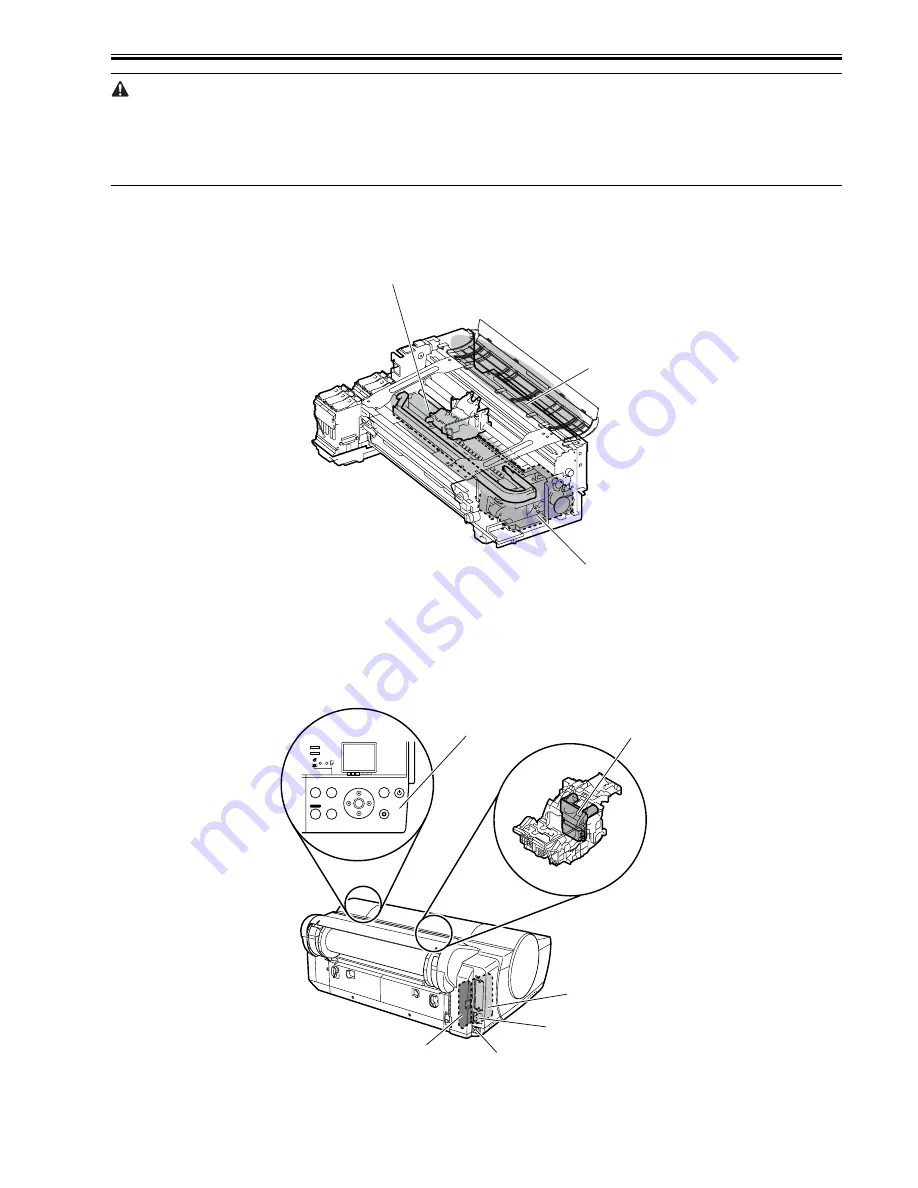
Since the printhead prints by squirting ink onto the media, a minute amount of ink mist is generated in the printing unit during printing. The generated ink mist
is collected in the printer by the airflow. However, uncollected ink mist may stain the platen, carriage unit, exterior, and purge unit.
These stains may soil the print media or hands and clothes when servicing the printer. Wipe them off carefully with a soft, well-wrung cloth.
F-1-27
1.7.1.3 Electric Parts
0017-4650
The electric parts of the printer are activated when the printer is connected to the AC power supply.
At the left rear of the printer are the main controller, power supply, and interface connector. The carriage PCB is incorporated in the carriage unit, and the operation
panel is on the upper right top cover.
When serving the printer with the cover removed, be extremely careful to avoid electric shock and shorting electrical devices.
F-1-28
Top Cover
Platen/carriage unit
Purge unit
Main controller PCB
Power supply PCB
Interface connector
Carriage PCB
Operation panel
Power connector
Summary of Contents for iPF610 - imagePROGRAF Color Inkjet Printer
Page 1: ...Jul 3 2007 Service Manual iPF600 series iPF610 ...
Page 2: ......
Page 6: ......
Page 11: ...Chapter 1 PRODUCT DESCRIPTION ...
Page 12: ......
Page 14: ......
Page 22: ...Chapter 1 1 8 1 4 Detailed Specifications 1 4 1 Print Speed and Direction 0017 4240 ...
Page 23: ...Chapter 1 1 9 T 1 2 ...
Page 30: ...Chapter 1 1 16 Adjust this guide to hold paper widthwise ...
Page 35: ...Chapter 1 1 21 Displays the printer menu status or messages ...
Page 61: ......
Page 62: ......
Page 63: ...Chapter 2 TECHNICAL REFERENCE ...
Page 64: ......
Page 74: ...Chapter 2 2 8 T 2 2 ...
Page 123: ...Chapter 2 2 57 ...
Page 124: ......
Page 125: ...Chapter 3 INSTALLATION ...
Page 126: ......
Page 128: ......
Page 145: ...Chapter 4 DISASSEMBLY REASSEMBLY ...
Page 146: ......
Page 148: ......
Page 206: ......
Page 207: ...Chapter 5 MAINTENANCE ...
Page 208: ......
Page 210: ......
Page 215: ...Chapter 5 5 5 ...
Page 216: ......
Page 217: ...Chapter 6 TROUBLESHOOTING ...
Page 218: ......
Page 220: ......
Page 239: ...Chapter 7 SERVICE MODE ...
Page 240: ......
Page 242: ......
Page 264: ......
Page 265: ...Chapter 8 ERROR CODE ...
Page 266: ......
Page 268: ......
Page 272: ...Chapter 8 8 4 E198 401D RTC low battery error E198 401E RTC clock stopped Code Description ...
Page 273: ...Jul 3 2007 ...
Page 274: ......


