


13
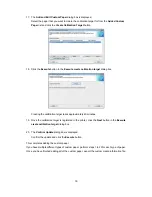
3. Once
the
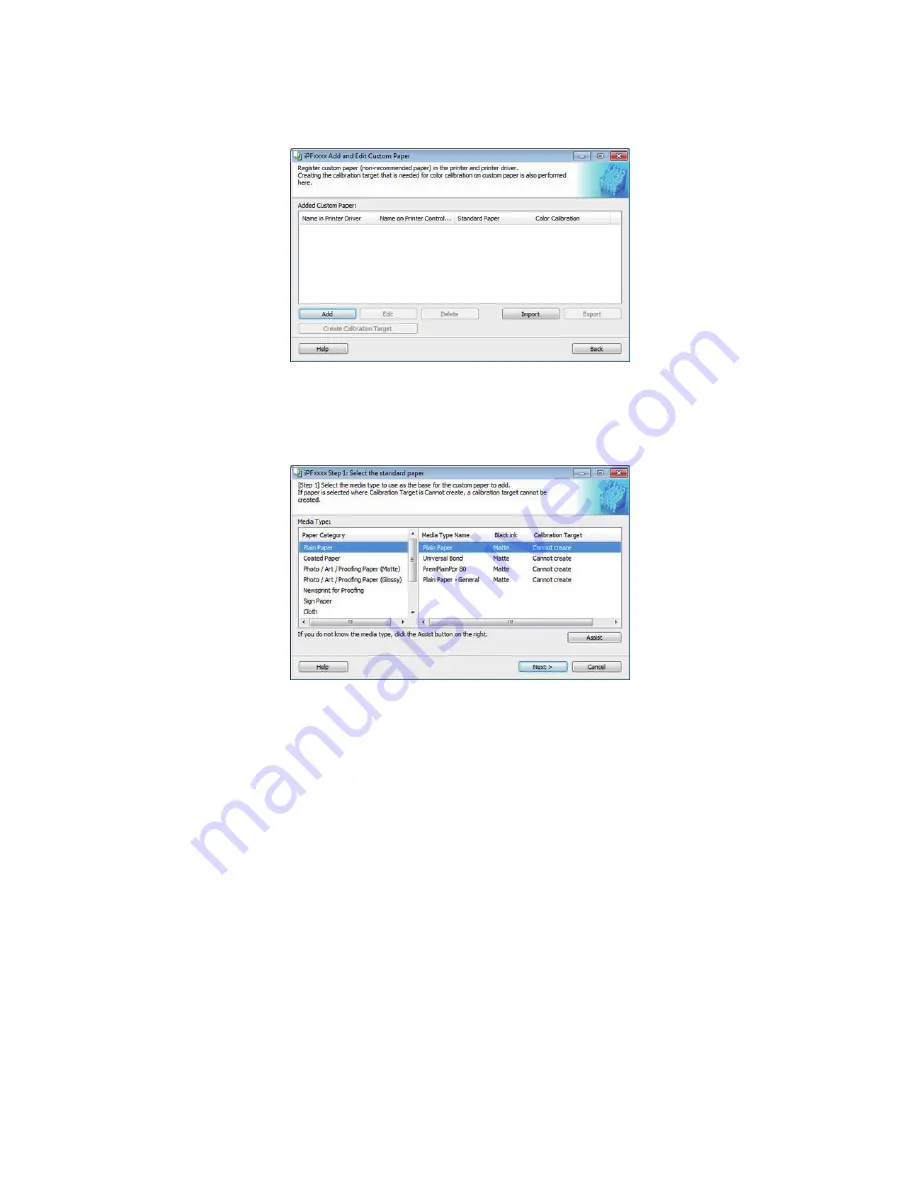
Add and Edit Custom Paper
dialog box has been displayed, click the
Add
Button.
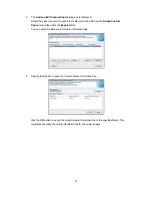
4. The
Step 1: Select the standard paper
dialog box is displayed. In
Paper Category
, select
the category of media type to use as the basis of the custom paper you are adding.
Select the category that you think is the closest to the custom paper you are adding.
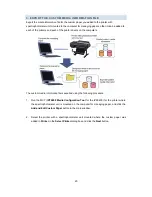
5. The media type names of the Canon genuine paper and feed confirmed paper within the
selected category are shown in
Media Type Name
. Select the media type to use as the
basis of the custom paper, and click the
Next
button.
・
If you do not know which media type to use as the basis of the custom paper, click the
Assist
button to open the
Media Type Selection Assistance
dialog box, and then set either
the
Weight (grammage)
or the
Thickness
. The MCT automatically selects the appropriate
paper from the selected paper category.
・
If
Cannot create
is displayed in
Calibration Target
for the selected standard paper, a
calibration target cannot be created for that custom paper. Select standard paper that a
calibration target can be created for.
・
For custom paper added using standard paper where
Can create for Auto Adjust (High
Precision)
is displayed in
Calibration Target
, the calibration target for executing color
calibration
Auto Adjust
cannot be created in the control panel and CCMC.


