background image

22


 Refreshing the Fixing Belt 

 If streaks appear on the output paper, or gloss unevenness occurs in the high density area of the printed heavy paper, 
follow the procedure below. 

1

Press   .

2

Press [Adjustment/Maintenance] 

 [Maintenance] 

 [Refresh Fixing Belt].

3

Press [Start].


NOTE


 The fixing belt is refreshed automatically every several sheets of paper is printed. You can adjust the refresh frequency 
and time in [Fixing Roller Auto Refresh Level]. 


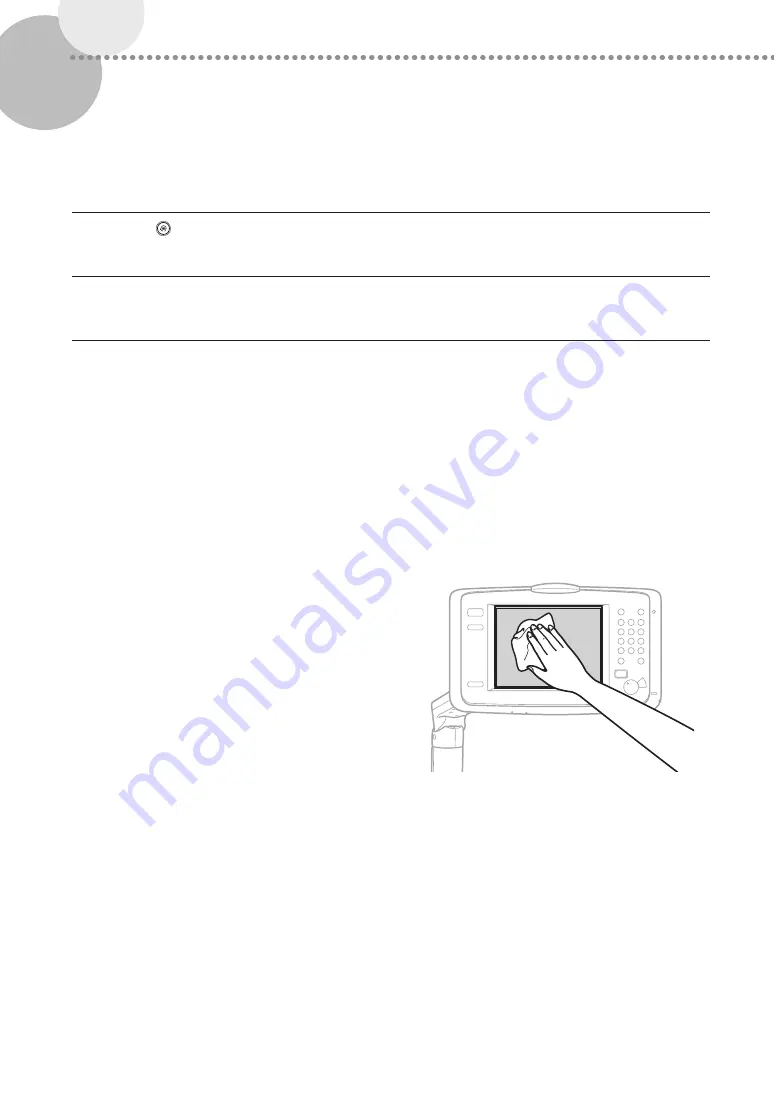
 Cleaning the Touch Panel Display 

Wipe the touch panel display with a cloth dampened in water 
or a mild cleaning agent, and then wipe with a soft, dry cloth.

Summary of Contents for imagePress C910

Page 1: ...t Please read Important Safety Instructions before operating this product After you finish reading this guide store it in a safe place for future reference The information in this document is subject...

Page 2: ...per Type Paper information which includes the basis weight finish fixing and curl correction level can be registered as the paper characteristics As the detailed information can be specified for each...

Page 3: ...n the User s Guide Quick Access to Frequently Used Settings Different settings are required depending on the printing purpose or paper types but accessing setting items located in various menus every...

Page 4: ...ation is described on the specified page of this manual OPTION Indicates an optional product which can be used with this machine Parts and Their Functions 6 External View 6 Internal View 7 Control Pan...

Page 5: ...is Manual The followings are examples of how keys and buttons are expressed in this manual Touch Panel Display Keys Key Name Copy Close Control Panel Keys Key Icon Buttons on Computer Operation Screen...

Page 6: ...lay and indicators required for operating the machine 3 Main Power Switch Press to the side to turn ON the power 4 Main Unit s Right Cover Open this cover when clearing a paper jam inside the main uni...

Page 7: ...n the fixing transport unit 3 Toner Replacement Cover Open this cover to replace the toner cartridge 4 Fixing Transport Unit Pull the fixing transport unit out to clear a paper jam 5 Waste Toner Conta...

Page 8: ...tion key Press to register and specify settings 4 Energy Saver key Press to set the Energy Saver mode or Sleep mode The mode activated after pressing the Energy Saver key can be selected beforehand Th...

Page 9: ...ng 18 Quick Menu key Press to retrieve favorite functions stored in Quick Menu Also if you are using authentication Quick Menu set for each individual user can be displayed 19 Main Menu key Press to r...

Page 10: ...cient paper loading When you want to cancel a job which is registered by mistake Job screen The Job screen enables you to check the status of jobs in the job list On this screen you can cancel a job i...

Page 11: ...r are turned OFF However when Quick Startup Settings for Main Power is enabled if you don t wait more than 20 seconds after the Main Power indicator is turned OFF quick startup is not performed NOTE T...

Page 12: ...Paper into the Paper Drawer on p 15 Registration Specify the loaded paper size and type for the paper drawer Registering Custom Paper Types on p 16 Paper Source This section describes available paper...

Page 13: ...13 Loading Paper POD Deck Lite XL A OPTION NOTE For details on paper that can be loaded see the User s Guide Basic Operations Available Paper Stock in the User s Guide...

Page 14: ...paper types registered in the machine If you edit the settings make sure to duplicate and register them as a new one beforehand 1 Press 2 Press Preferences Paper Settings Paper Type Management Settin...

Page 15: ...wer 2 Gently push the paper drawer back into the machine until it clicks into place in the closed position NOTE Make sure to fan the paper stack and align the edges before loading paper Curled paper m...

Page 16: ...press Set If you load paper other than standard paper select Custom Size or Envelope 4 Select the loaded paper type from the list press OK You can select the paper type from the simple or detailed set...

Page 17: ...17 Loading Paper 5 Confirm that the selected paper type is displayed in Details of Selected Paper press OK...

Page 18: ...eaning procedure below Clean with a cloth which is wrung after being dampened in water and then clean with a soft and dry cloth Use the provided glass cleaning cloth for simple cleaning 1 Shutting dow...

Page 19: ...the machine Shutting Down the Machine on p 11 2 Pull the lever and open the feeder cover 2 1 3 3 Clean the rollers and surrounding areas of them inside the feeder cover 1 Wet a soft cloth with water a...

Page 20: ...nt scan cover 1 Pull the lever above the feeder 2 Open the document scan cover 7 Open the inside cover 8 Clean the original scanning area of the feeder 9 Close the inside cover and document scan cover...

Page 21: ...Inside of the Main Unit If output paper becomes dirty follow the procedure below 1 Press 2 Press Adjustment Maintenance Maintenance Clean Inside Main Unit 3 Press Start NOTE Similarly perform Adjustm...

Page 22: ...justment Maintenance Maintenance Refresh Fixing Belt 3 Press Start NOTE The fixing belt is refreshed automatically every several sheets of paper is printed You can adjust the refresh frequency and tim...

Page 23: ...h the test button located on the rear of the machine Push the test button with the tip of a ball point pen or a similar object Briefly push the test button 3 Confirm that the breaker lever is switched...

Page 24: ...ide Supported Canon Genuine Toner Canon imagePRESS Toner T01 Black Canon imagePRESS Toner T01 Cyan Canon imagePRESS Toner T01 Magenta Canon imagePRESS Toner T01 Yellow Black Toner Cartridge Cyan Magen...

Page 25: ...ge X1 If you are using the imagePRESS C910 you cannot use the Staple Finisher AC Booklet Finisher AC Staple Cartridge for the Saddle Stitcher Unit The Staple P1 Staple Cartridge Y1 can be attached to...

Page 26: ...of a staple jam and procedures for clearing the jam are displayed Reducing the Frequency of Paper Jams If paper jams occur frequently the following reasons may be the cause There are torn pieces of p...

Page 27: ...d Canon Dealer on p 28 If a key for the Limited Functions mode is displayed If Limited Functions Mode is displayed you can temporally set the Limited Functions mode to continue to use some functions P...

Page 28: ...then ON contact your local authorized Canon dealer by following the procedure below 1 Note the error code Write down the error code EXXXXX XXXX 2 Turn OFF the main power Press the main power switch to...

Page 29: ...current operation is complete Could not perform the operation because the memory is full OK Delete unnecessary data from memory and then scan the whole pages again If the Main Power Does Not Turn ON I...

Page 30: ...e room where the machine is installed is heated rapidly and when the machine is moved from a cool or dry location to a hot or humid location Using the machine under these conditions may result in pape...

Page 31: ...slot are very hot during and immediately after use Avoid contact with these areas to prevent burns Also printed paper may be hot immediately after being output so use caution when handling it Failure...

Page 32: ...nd enter your eyes or mouth If toner gets into your eyes or mouth wash them immediately with cold water and immediately consult a physician If toner escapes from the toner cartridge make sure not to i...

Page 33: ...PRODUCT including the SOFTWARE is shipped transferred or exported into any country 2 Rights holders of the SOFTWARE retain in all respects the title ownership and intellectual property rights in and t...

Page 34: ...34...

Page 35: ......

Page 36: ...n ON L6Y 5Z7 Canada CANON EUROPA N V Bovenkerkerweg 59 1185 XB Amstelveen The Netherlands See http www canon europe com for details on your regional dealer CANON AUSTRALIA PTY LTD Building A The Park...

Reviews: