


Setting IPv4 Addresses
8W0J-01K
The machine's IPv4 address can either be assigned automatically using DHCP or entered manually.
By default, the IPv4 address is set automatically when connected to a wired or wireless LAN, but you can set it or
change it manually according to your usage environment and purpose.
This section describes how to configure the settings using the control panel.
You can also set the IPv4 address using Remote UI from a computer after it has been set on the machine. Managing
the Machine from a Computer (Remote UI)(P. 398)
Administrator privileges are required. The machine must be restarted to apply the settings.
Touch Panel Model(P. 77)
5 Lines LCD Model(P. 78)
Touch Panel Model
1
On the control panel, press [Menu] in the [Home] screen. [Home] Screen(P. 120)
2
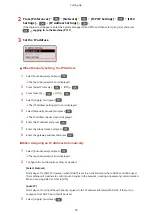
Press [Preferences] [Network] [TCP/IP Settings] [IPv4 Settings] [IP Address
Settings].
If the login screen appears, enter the System Manager ID and PIN, and then press [Log In]. Logging In to
3
Set the IP address.
When Manually Setting the IP Address
1
Press [Auto Acquire].
➠
The [Auto Acquire] screen is displayed.
2
Set [Select Protocol] to [Off].
3
Set [Auto IP] to [Off].
4
Press [Apply].
➠
The [IP Address Settings] screen is displayed.
5
Press [Manually Acquire].
➠
The IP address input screen is displayed.
6
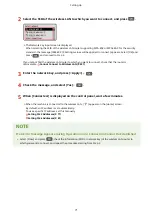
Enter the IP address, and press [Apply].
7
Enter the subnet mask, and press [Apply].
Setting Up
77
Summary of Contents for imageCLASS MF264dw
Page 72: ... Shared Key Encryption for WPA WPA2 TKIP AES CCMP IEEE 802 1X Authentication Setting Up 63 ...
Page 139: ...Basic Operations 130 ...
Page 204: ... The volume is adjusted Basic Operations 195 ...
Page 333: ...Copying 324 ...
Page 368: ...8 Log out from Remote UI Security 359 ...
Page 501: ... Confirm Destination Scan PC Settings Menu Items 492 ...