


2
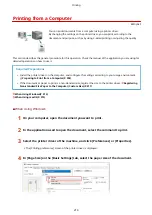
From the menu in the application used to open the document, click [Print].
➠
The printing dialog box appears.
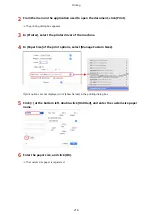
3
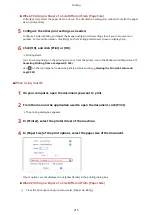
In [Printer], select the printer driver of the machine.
4
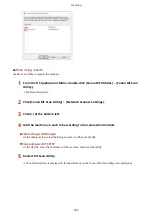
In [Paper Size] of the print options, select [Manage Custom Sizes].
If print options are not displayed, click [Show Details] in the printing dialog box.
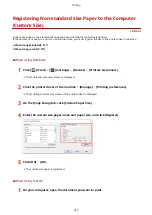
5
Click [+] at the bottom left, double-click [Untitled], and enter the custom size paper
name.
6
Enter the paper size, and click [OK].
➠
The custom size paper is registered.
Printing
218
Summary of Contents for imageCLASS MF264dw
Page 72: ... Shared Key Encryption for WPA WPA2 TKIP AES CCMP IEEE 802 1X Authentication Setting Up 63 ...
Page 139: ...Basic Operations 130 ...
Page 204: ... The volume is adjusted Basic Operations 195 ...
Page 333: ...Copying 324 ...
Page 368: ...8 Log out from Remote UI Security 359 ...
Page 501: ... Confirm Destination Scan PC Settings Menu Items 492 ...