


2
Change/correct the IP address of the machine:
a. Press [COPY]
➝
[ADDITIONAL FUNCTIONS].
b. Press [F3] or [F4] to select <06 SYSTEM SETTINGS>
➝
press [OK].
c. Press [F3] or [F4] to select <03 NETWORK SETTINGS>
➝
press [OK].
d. Press [F3] or [F4] to select <02 IP ADDRESS>
➝
press [OK].
e. Press [Clear] to clear the existing IP address.
f. Enter a new IP address using the numeric keys
➝
press [OK].
g. Restart the machine to update the network settings.
h. Print the EN CONFIG page to verify the IP address of the machine.
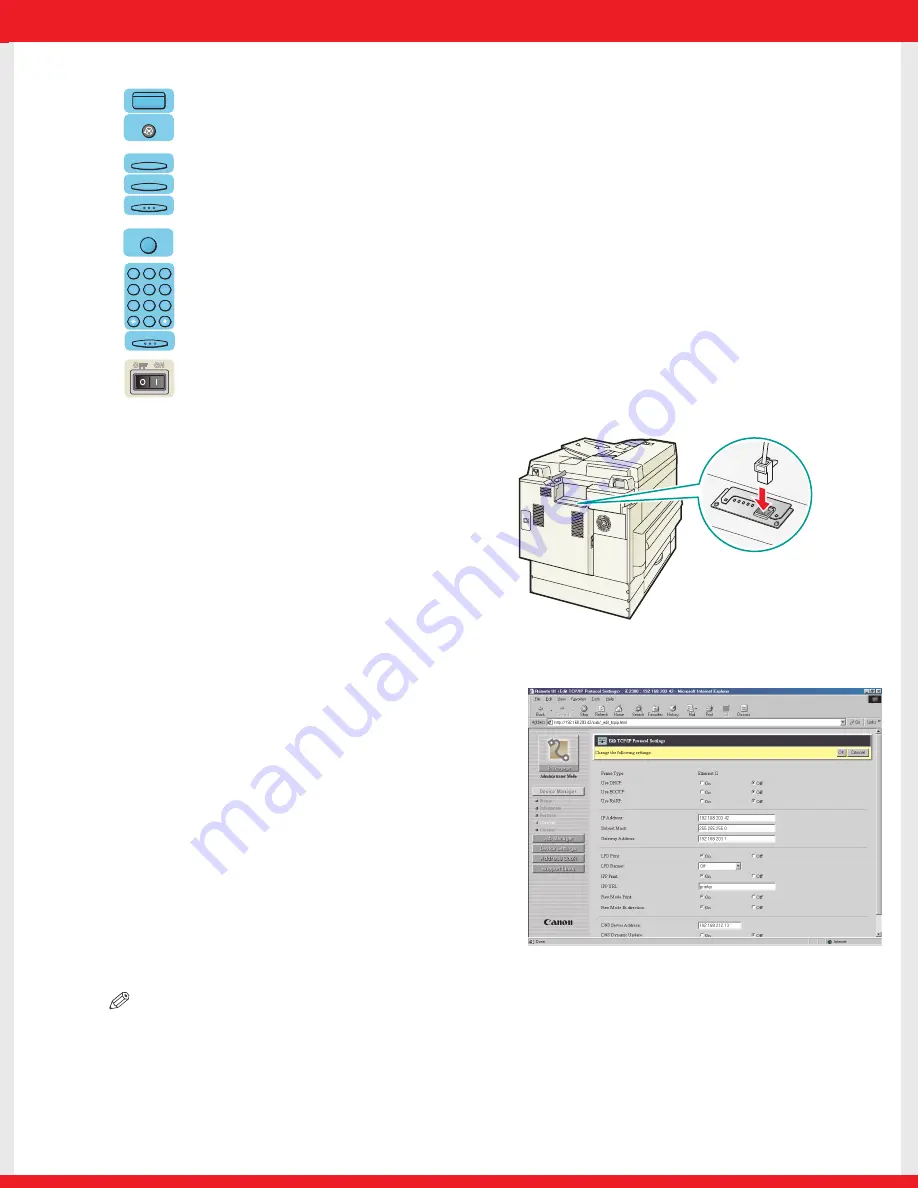
3
Connect a Category 5 rated (Cat 5) twisted-
pair LAN cable to the 10Base-T/100Base-TX
port on the back of the machine. Connect
the other end of the cable to a network
router or a hub.
4
Verify the network settings of the machine using the Remote UI:
*Machine is supplied with preinstalled web server software.
a. Start a web browser on a computer connected to the
network.
b. Type the IP address of the machine on the address bar
➝
press the Enter key on the keyboard.
c. The Remote UI screen should appear, confirming that the
network settings are set correctly.
d. Select [Administrator Mode]
➝
click [OK].
e. The Device Status page appears.
f. Click [Network] to view or change the network settings.
Installing the Printer Driver Software
NOTE
●
The following instructions and screens are for Windows 98 Second Edition (SE), although the installation process is
essentially the same for other versions of Windows OS as well. For details, see the
PCL Driver Guide
.
●
For Windows NT4.0/2000/XP, log in as Administrator to install the driver.
1
Insert the imageCLASS 2300 Driver Software CD-ROM into the CD-ROM drive.
2
Double-click the [My Computer] icon on the desktop. Double-click [CD-ROM]
➝
[iC2300.exe] to start
the CD-ROM Menu. Click [Next], and on the following screen that appears, click [ENGLISH].
10Base-T/100Base-TX port
C
Clear
1
2
3
4
5
6
7
8
9
0
@
.
GHI
PRS
ABC
JKL
TUV
DEF
MNO
WXY
SYMBOLS
OPER
OK
Additional Functions
COPY
F3
F4
OK
<Remote UI: Example>


