Clearing Paper Jams
2-16
2
Troubleshooting
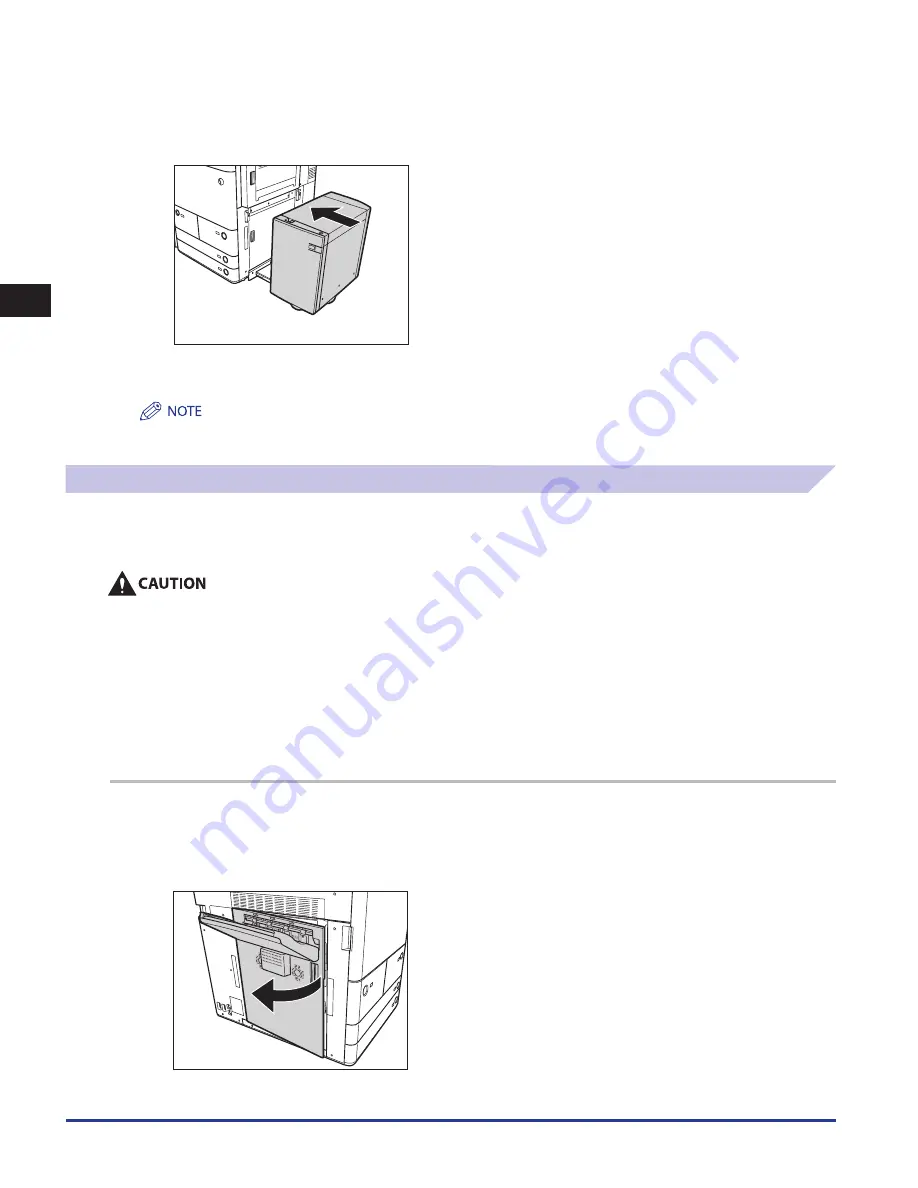
When the Paper Deck Unit-A1/POD Deck Lite-A1 is attached:
Reconnect the paper deck to the main unit.
6
Follow the instructions on the touch panel display .
The screen indicating the location of the paper jam repeatedly appears on the touch panel display until the paper jam is entirely
cleared. For more information, see “Screens Indicating the Locations of Paper Jams,” on p. 2-3.
Left Cover
If a paper jam occurs inside the left cover, a screen prompting you to remove the jammed paper appears on the touch panel
display. Check the location of the paper jam, and follow the procedure described below, and the procedure that appears on the
touch panel display, to remove the jammed paper.
There are some areas inside the machine which are subject to high-voltages . When removing jammed paper or when inspecting
the inside of the machine, do not allow necklaces, bracelets, or other metal objects to touch the inside of the machine, as this may
result in burns or electrical shock .
When removing jammed paper, take care not to cut your hands on the edges of the paper .
When removing paper which has become jammed inside the machine, take care not to cut your hands or injure yourself on the
inside of the machine . If you cannot remove the paper, contact your local authorized Canon dealer .
When removing paper which has become jammed inside the machine, take care not to allow the toner on the jammed paper
to come into contact with your hands or clothing, as this will dirty your hands or clothing . If they become dirty, wash them
immediately with cold water . Washing them with warm water will set the toner, and make it impossible to remove the toner stains .
When removing paper which has become jammed inside the machine, remove the jammed paper gently to prevent the toner on
the paper from scattering and getting into your eyes or mouth . If the toner gets into your eyes or mouth, wash them immediately
with cold water and immediately consult a physician .
1
Open the left cover of the main unit .
If the Copy Tray-P1 is attached to the main unit, remove all output paper from the tray. It may be necessary to lift the Copy Tray-P1 up,
depending on the paper jam. For more information, see e-Manual > Optional Products (imageRUNNER ADVANCE C9075 PRO/C9065 PRO),
Optional Products (imageRUNNER ADVANCE C7065/C7055).
●
☐
•
•
•
•
•
Summary of Contents for IMAGE RUNNER C9075 PRO
Page 2: ......
Page 3: ...imageRUNNER ADVANCE C9075 PRO C9065 PRO C7065 C7055 Maintenance Guide ...
Page 212: ...Printer Fax Driver Troubleshooting 2 124 2 Troubleshooting ...
Page 213: ...3 1 15 3 3 Appendix This section includes the index Index 3 2 ...
Page 216: ...Index 3 4 3 Appendix ...
Page 217: ......


