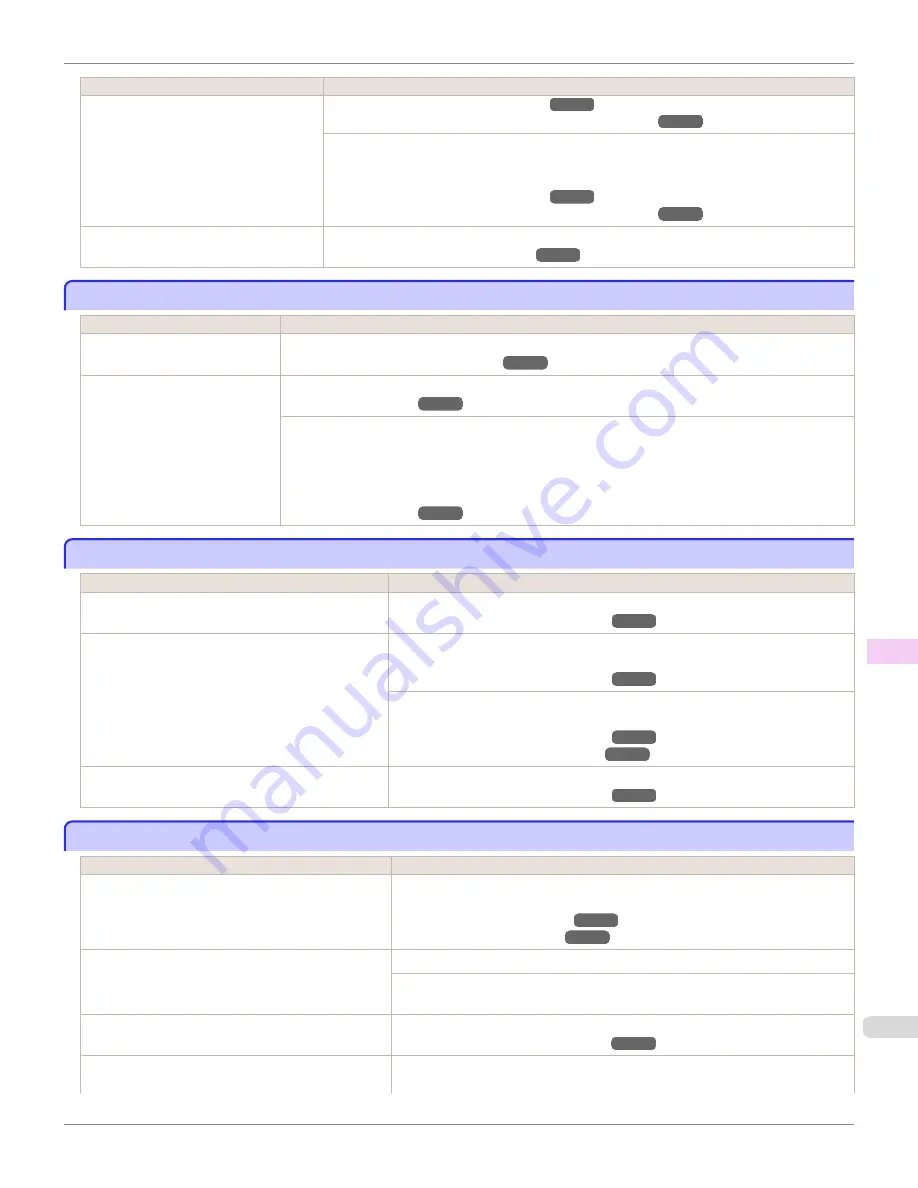
Cause
Corrective Action
You are printing on heavyweight paper
or paper that curls or wrinkles easily af-
ter absorbing ink.
(See "Adjusting the Vacuum Strength.")
(See "Troubleshooting Paper Abrasion and Blurry Images.")
For film-based media such as Tracing Paper, set the
VacuumStrngth
to
Standard
,
Strong
or
Strongest
in the Control Panel menu. If the paper still rubs against the printhead, set the
Head Height
in the Control Panel menu to a higher value than the current setting.
(See "Adjusting the Vacuum Strength.")
(See "Troubleshooting Paper Abrasion and Blurry Images.")
The Ejection Guide is soiled.
Clean the Ejection Guide.
(See "Cleaning the Printer Exterior.")
The surface of the paper is dirty
The surface of the paper is dirty
Cause
Corrective Action
The Paper Retainer is soiled.
Clean the Paper Retainer.
(See "Cleaning Inside the Top Cover.")
You are using a paper that does
not dry easily.
In the Control Panel menu, set
Roll DryingTime
to at least
1 min.
When paper that does not dry easily is used for printing, it may curl during printing and touch the
Output Tray.
In this case, in the Control Panel menu, complete the settings for
Dry time
and
Area
in
Scan Wait
Time
.
However, note that printing will now take longer.
The back side of the paper is dirty
The back side of the paper is dirty
Cause
Corrective Action
The Platen has become dirty after borderless print-
ing or printing on small paper.
Open the Top Cover and clean the Platen.
(See "Cleaning Inside the Top Cover.")
The Platen has become soiled because you have
set
Width Detection
to
Off
in the Control Panel
menu.
Set
Width Detection
to
On
in the Control Panel menu, and then open the Top
Cover and clean the Platen.
(See "Cleaning Inside the Top Cover.")
Open the Top Cover and clean the Platen. After this, manually advance the roll
onto the Platen before printing.
(See "Cleaning Inside the Top Cover.")
(See "Feeding Roll Paper Manually.")
The Paper Retainer is soiled.
Clean the Paper Retainer.
(See "Cleaning Inside the Top Cover.")
Printed colors are inaccurate
Printed colors are inaccurate
Cause
Corrective Action
Color adjustment has not been activated in the
Ad-
vanced Settings
of the printer driver.
In the
Advanced Settings
of the printer driver, access
Color Settings
in
Color
Mode
to adjust colors.
Colors have not been adjusted on the computer or
monitor.
Refer to the computer and monitor documentation to adjust the colors.
Adjust the settings of the color management software, referring to the software
documentation as needed.
The Printhead nozzles are clogged.
Print a test pattern to check the nozzles and see if they are clogged.
(See "Checking for Nozzle Clogging.")
Application Color Matching Priority
is set to
Off
in
the Windows printer driver.
Click
Special Settings
in the
Layout
sheet of the printer driver, and set
Applica-
tion Color Matching Priority
to
On
in the dialog box that is displayed.
iPF685
The surface of the paper is dirty
Problems with the printing quality
643
Summary of Contents for image Prograf iPF680 Series
Page 30: ...iPF685 User s Guide 30 ...
Page 156: ...iPF685 User s Guide 156 ...
Page 276: ...iPF685 User s Guide 276 ...
Page 360: ...iPF685 User s Guide 360 ...
Page 436: ...iPF685 User s Guide 436 ...
Page 476: ...iPF685 User s Guide 476 ...
Page 490: ...iPF685 User s Guide 490 ...
Page 572: ...iPF685 User s Guide 572 ...
Page 626: ...iPF685 User s Guide 626 ...
Page 680: ...iPF685 User s Guide 680 ...


