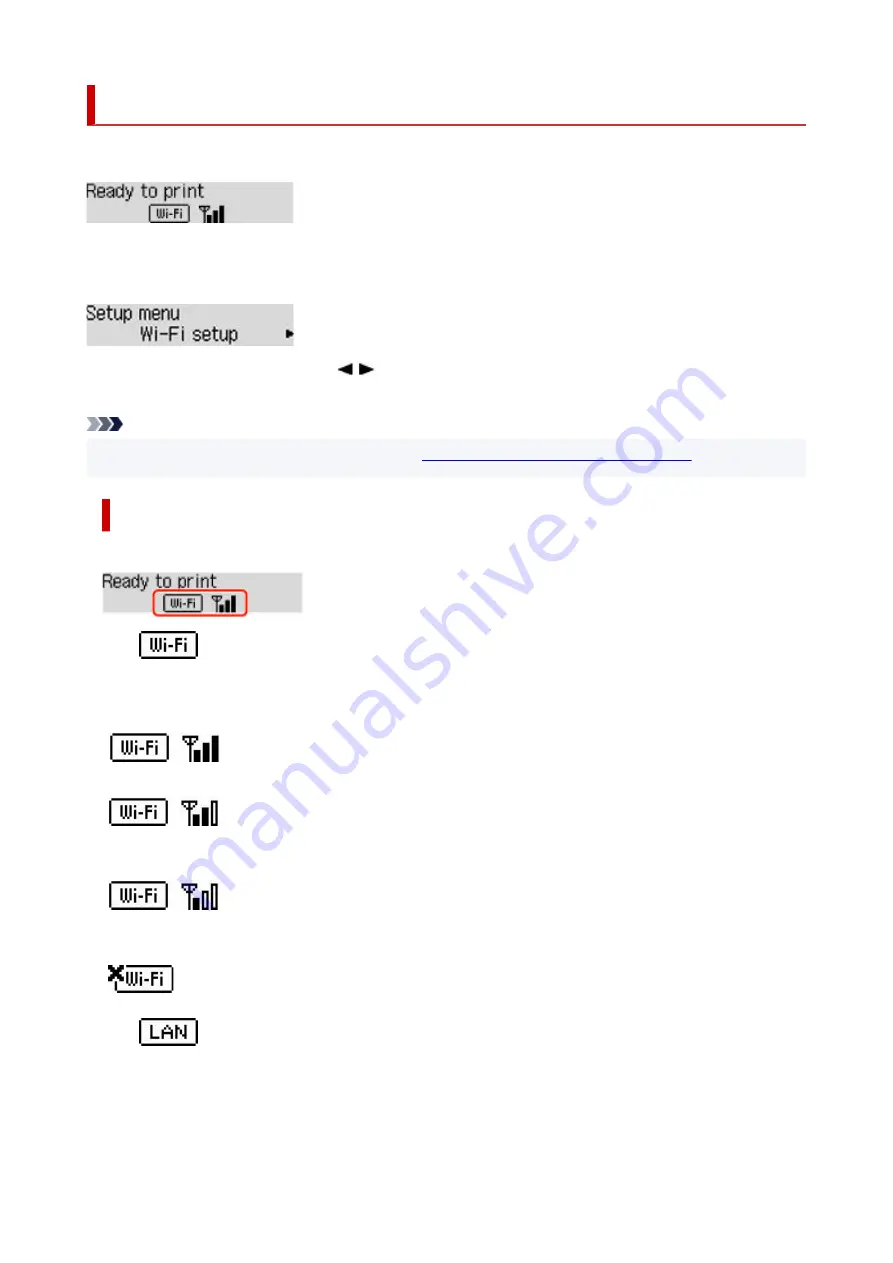
LCD and Operation Panel
The standby screen appears when the printer is turned on.
When the
Setup
button is pressed, the display switches to setup menu screen.
Setup
In a menu or settings screen, use the
button to select an item or option, and then press the
OK
button
to proceed with the procedure.
Note
• For details on how to change settings, refer to
Changing Settings from Operation Panel
•
Network Status Indication
Wi-Fi setting and the network status indicate by the icon in the standby screen.
If the
icon appears on the standby screen, it indicates that Wi-Fi is enabled and the printer is
connected to the wireless router.
Depending on the signal state, the icon will change.
Signal strength:
81 % or more
You can use the printer over Wi-Fi without any problems.
Signal strength:
51 % or more
The problem such as the printer cannot print may occur according to the network status. We
recommend placing the printer near the wireless router.
Signal strength:
50 % or less
The problem such as the printer cannot print may occur. Place the printer near the wireless
router.
Wi-Fi is enabled but the printer is not connected to the wireless router.
If the
icon appears on the LCD, it indicates that the wired LAN is enabled.
167
Summary of Contents for GX5050
Page 1: ...GX5000 series Online Manual English...
Page 44: ...For macOS Refer to Changing the Connection Mode in Setup Guide 44...
Page 47: ...Restrictions Notices when printing using web service Notice for Web Service Printing 47...
Page 53: ...For macOS Refer to Changing the Connection Mode in Setup Guide 53...
Page 57: ...4 If you see a message other than the above follow the instructions 4 57...
Page 79: ...TR9530 series TS3300 series E3300 series 79...
Page 80: ...Handling Paper Ink Tanks etc Loading Paper Refilling Ink Tanks 80...
Page 97: ...Refilling Ink Tanks Refilling Ink Tanks Checking Ink Level Ink Tips 97...
Page 109: ...Adjusting Print Head Position 109...
Page 120: ...120...
Page 124: ...124...
Page 127: ...Safety Safety Precautions Regulatory Information WEEE 127...
Page 151: ...151...
Page 155: ...Main Components Front View Rear View Inside View Operation Panel 155...
Page 159: ...Repairing Your Printer I Print Head Holder The print head is pre installed 159...
Page 168: ...Note When Wi Fi wired LAN or both are disabled the icon icon or both are not displayed 168...
Page 197: ...6 Select ON and then press the OK button 6 197...
Page 275: ...Printing Using Canon Application Software Easy PhotoPrint Editor Guide 275...
Page 315: ...For details about the functions of your printer see Specifications 315...
Page 347: ...Try printing again once the current job is complete 347...
Page 367: ...When transporting the printer for repairing it see Repairing Your Printer 367...


