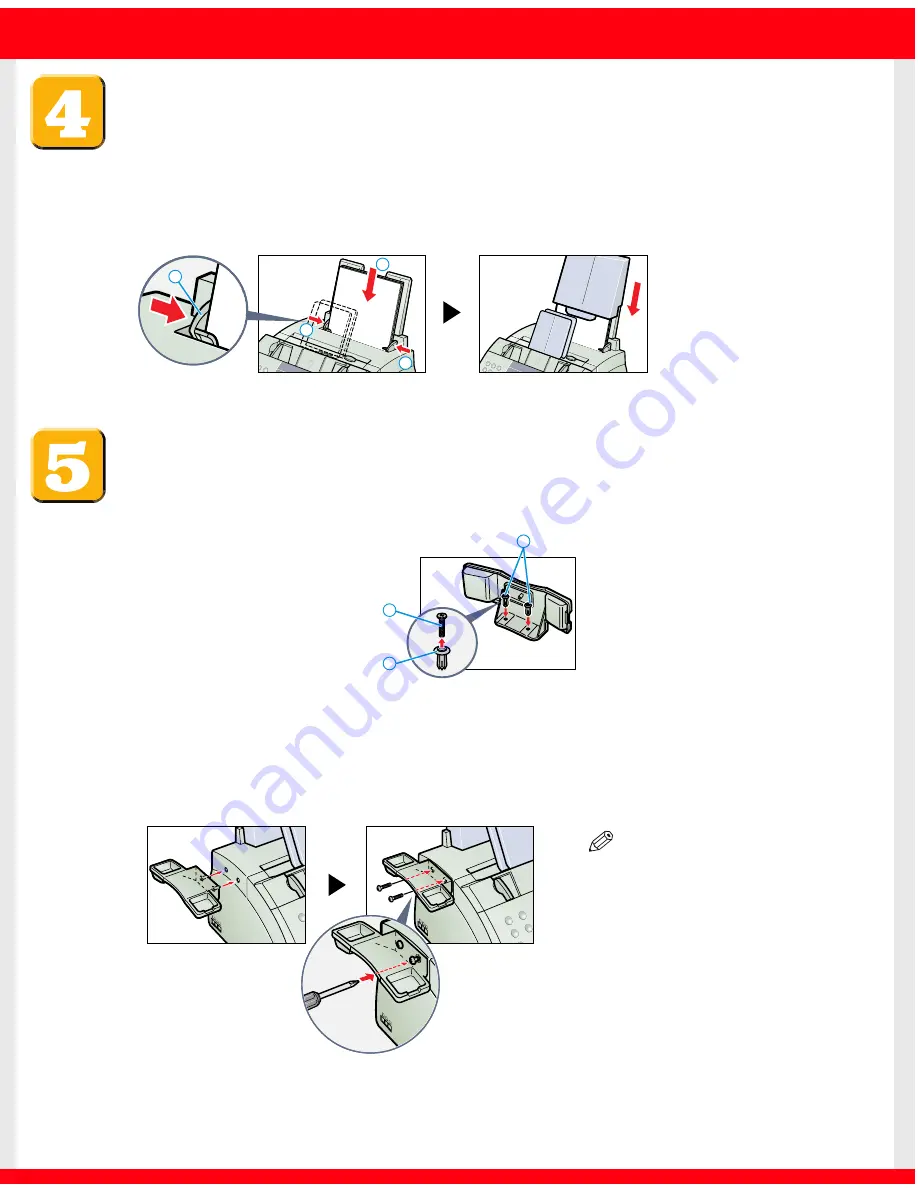
Load paper.
1
Insert a stack of paper into the multi-purpose tray
1
(print side facing you and
top edge first), then adjust the paper guides
A
to the width of the paper
2
.
2
Attach the multi-purpose tray cover to prevent dust accumulating inside the
machine.
Attach the handset to the machine.
1
Remove the screws
A
from the plugs
B
and insert the plugs into the holes on
the handset cradle.
2
Turn the machine so that the left side is facing you and the right side is against a
wall.
3
Insert the plugs (with the handset cradle) into the holes on the machine.
4
Use a cross-point screwdriver or a coin to push the screws into the plugs.
Make sure the screws are pushed in as far as they will go.
1
2
2
A
B
B
A
NOTE
• If the screws are not pushed fully
into the plugs the handset cradle
will not be securely attached to
the machine.


