Photo Operations
166
Deleting Photos
You can delete a photo you no longer need. When you do so, however, the custom picture file embedded in it
will also be deleted. Photos can be deleted one at a time from the photo playback screen or [Photos] index
screen.
Deleting a Photo from the Playback Screen
1 Display the photo to be deleted (
A
164).
2 Press the joystick to open the photo menu.
3 Select [Delete] and then press the joystick.
4 Select [OK] and then press the joystick.
• Select [Cancel] instead to cancel the operation.
• The selected photo is deleted.
• If a custom picture file is embedded in the photo, it is also deleted.
5 When the confirmation message appears, press the joystick.
Deleting a Photo from the Index Screen
1 Open the [Photos] Index Screen (
A
2 Move the orange selection frame to the photo to be deleted.
3 Press the joystick to open the photo menu.
4 Select [Delete] and then press the joystick.
5 Select [OK] and then press the joystick.
• Select [Cancel] instead to cancel the operation.
• The selected photo is deleted.
• If a custom picture file is embedded in the photo, it is also deleted.
6 When the confirmation message appears, press the joystick.
Deleting Multiple Photos
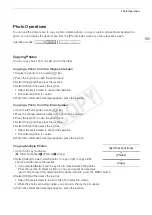
1 Open the [Delete] submenu.
[
w
Other Functions]
>
[Photos]
>
[Delete]
2 Select [Select] to select which photos to delete or [All] to delete all the
photos and then press the joystick.
• If you selected [Select], use the joystick to move between the photos.
Press the joystick to select a photo to delete and repeat as necessary
(up to 100 photo). After selecting all the desired photos, press the MENU button.
3 Select [OK] and then press the joystick.
• Select [Cancel] instead to return to the photo selection screen.
• While the photos are being deleted, you can press the joystick to cancel.
4 When the confirmation message appears, press the joystick.
IMPORTANT
• Be careful when deleting photos. Deleted photos cannot be recovered.
• Photos that were protected using other devices cannot be deleted with the camcorder.
[
w
Other Functions]
[Photos]
[Delete]
COP
Y
Summary of Contents for EOS C100 Mark II
Page 1: ...Instruction Manual HD Camcorder PUB DIE 0463 000 COPY ...
Page 12: ...12 COPY ...
Page 46: ...Adjusting the Black Balance 46 COPY ...
Page 106: ...Using Accessories 106 COPY ...
Page 124: ...Saving and Loading Camera Settings 124 COPY ...
Page 144: ...Saving Clips to a Computer 144 COPY ...
Page 162: ...Playback via Browser 162 COPY ...
Page 168: ...Photo Operations 168 COPY ...


