ArcSoft VideoImpression
Quick Start Guide
- 9 -
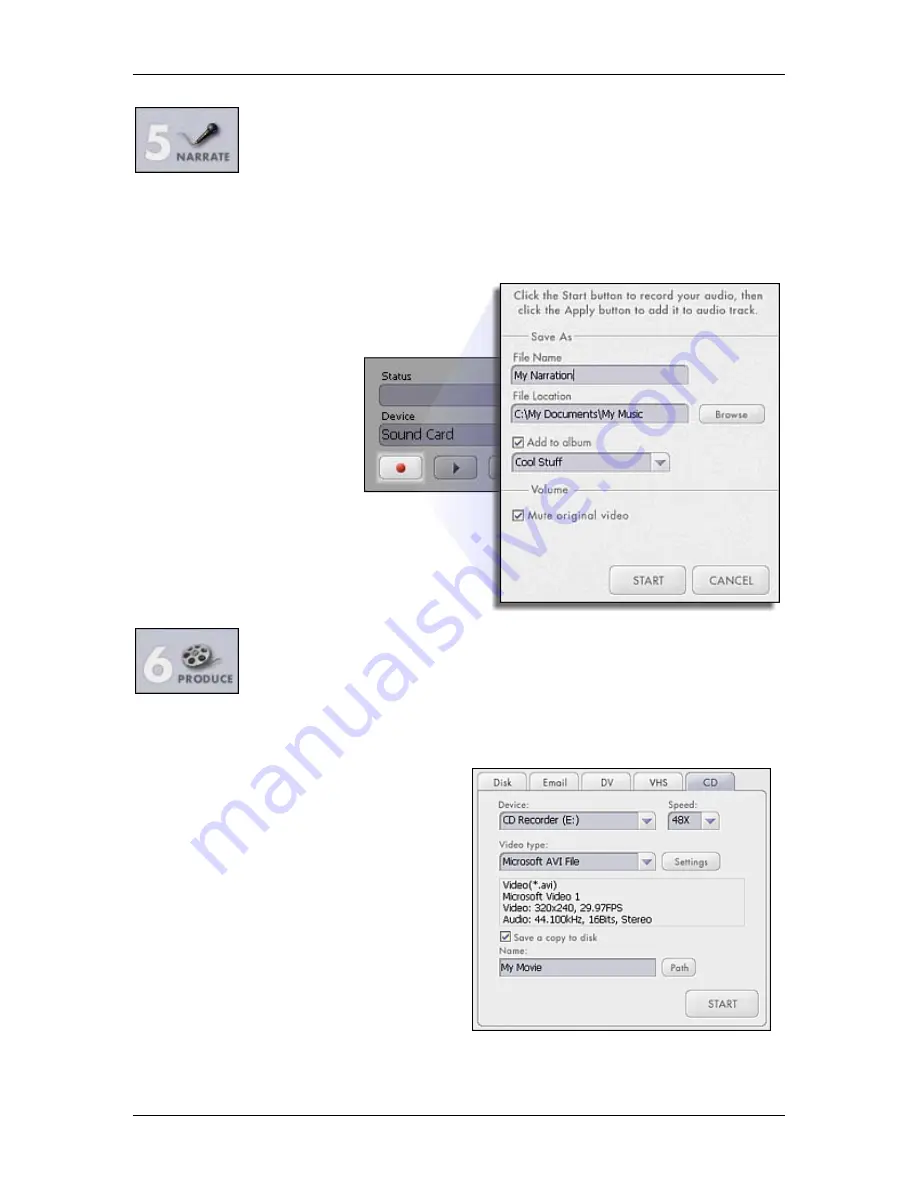
STEP 5 – NARRATE
In addition to being able to add audio files to the Storyboard, you can also record audio directly
within the program. To record audio:
1. Click the Audio Settings button and verify the audio configuration (in general, higher
settings will yield higher audio quality but larger file sizes).
2. Click the red Record button.
3. Set the file name and
save location for the
recorded file. If you
want, you can have
the file automatically
added to an album for
easy access in
another project.
4. Click the Start button
and begin your
narration. Press the
Stop button to stop
recording.
5. Click the Add button
to add the recorded
audio to the
Storyboard.
STEP 6 – PRODUCE
The final step lets you save your movie in a variety of ways. Consult the Help file for details on
the specifics of each case. For this guide, we’ll save a movie as a VCD. When you do this, you
can pop the CD into most commercial DVD players to see your movie on your TV!
1. Click on the CD tab.
2. Select the device/drive to which the
movie will be written or “burned.”
3. Choose the burn speed.
4. Choose the file type. (Remember, we’re
creating a VCD, so choose “Video CD
File.”)
5. Click Start when you’re ready!
Congratulations, you’re done! Pop your VCD into your DVD player and enjoy your movie!
Summary of Contents for DIGITAL IXUS 500
Page 2: ......
Page 3: ......
Page 4: ......
Page 11: ...3 ...
Page 165: ...MEMO 157 ...
Page 170: ...Canon CDI E117 02B 0204CH80 2004 CANON INC PRINTED IN JAPAN ...
Page 172: ...Canon Direct Print User Guide Printing Using a Direct Camera Printer Connection ...
Page 207: ...Canon CDI M128 02B 0204CH200 2004 CANON INC PRINTED IN JAPAN ...
Page 216: ...Connect the camera to the computer Download images to the computer Print the images ...
Page 315: ...CDI E116 02B 0204CH247 5 Canon 2004 CANON INC PRINTED IN JAPAN ...
Page 316: ......
Page 333: ...660ft Version 2 Windows 98SEfMel2000JXP f jJ ...


