Continued on the following page >>
5. Viewing Multiple Images (Multi-View Screen)
– 49 –
5
Display the print preview.
Touch
[MULTI VIEW]
.
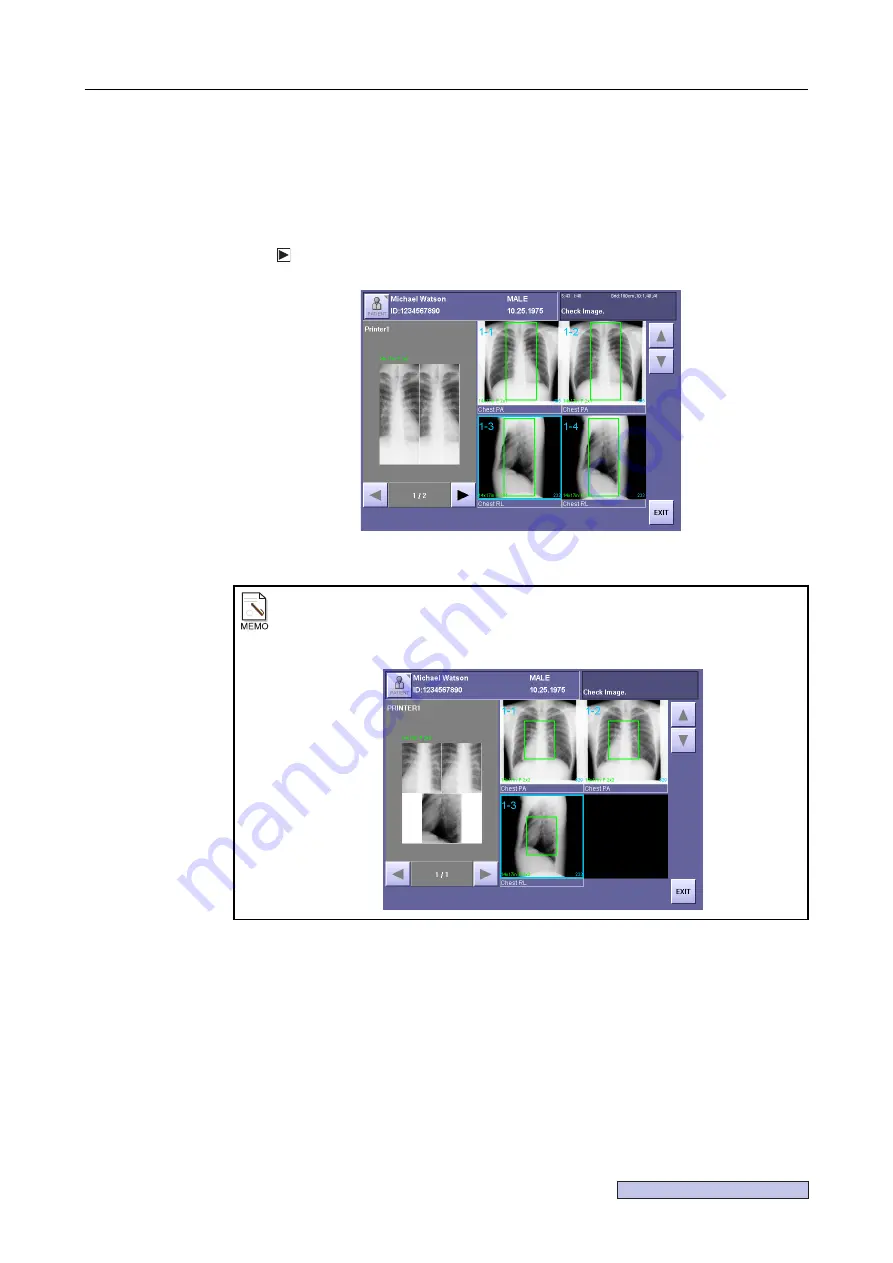
The figure below shows an example in which a 14×17 portrait image has been made into a
4-image exposure using the
2x1
multi-format. On the print preview screen of this example,
the images for output numbers 1 and 2 are cut off and assigned to a single film.
In addition, a preview of the output number 3 and 4 images can be displayed by touching
below the print preview.
Multi-Format
5.4.2 Choosing Multi-Format after the Exposure
The method for changing the print setting after the exposure is described below.
1
Display the preview image screen or the CALL IMAGES screen.
Display the preview image screen
(
→
or the CALL IMAGES screen
(
→
.
2
Open the print setting window.
Touch
[PRINT SETTING]
.
3-image layout
If the 2x2 multi-format is selected for a three-image layout, the third image is located
in the center of the second row.
Summary of Contents for CXDI-1
Page 9: ...Starting Up Shutting Down 1 Starting Up Shutting Down the CXDI ...
Page 15: ...Exposure and Output 2 Taking an Image 3 Output Control Process Viewer ...
Page 38: ...2 Taking an Image 30 ...
Page 60: ...5 Viewing Multiple Images Multi View Screen 52 ...
Page 70: ...6 Browsing Completed Studies Study List 62 ...
Page 71: ...Processing the Image 7 Processing the Image QA Mode Screen ...
Page 103: ...CXDI Adjustment 8 Calibration 9 Self test ...
Page 110: ...8 Calibration 102 ...
Page 116: ...9 Self test 108 ...
Page 117: ...Troubleshooting 10 Before Calling a Service Engineer 11 Questions and Answers ...
Page 136: ...11 Questions and Answers 128 ...
Page 156: ...B Using the Rejection Reason Input Function 148 ...
Page 162: ...C Using the Sensor Unit Attach Detach Function 154 ...
Page 169: ......


