


4. Browsing Images (Preview Image Screen)
– 38 –
4.3 Selecting Image Output Destination
Destination of images can provisionally be changed in a unit of study.
1
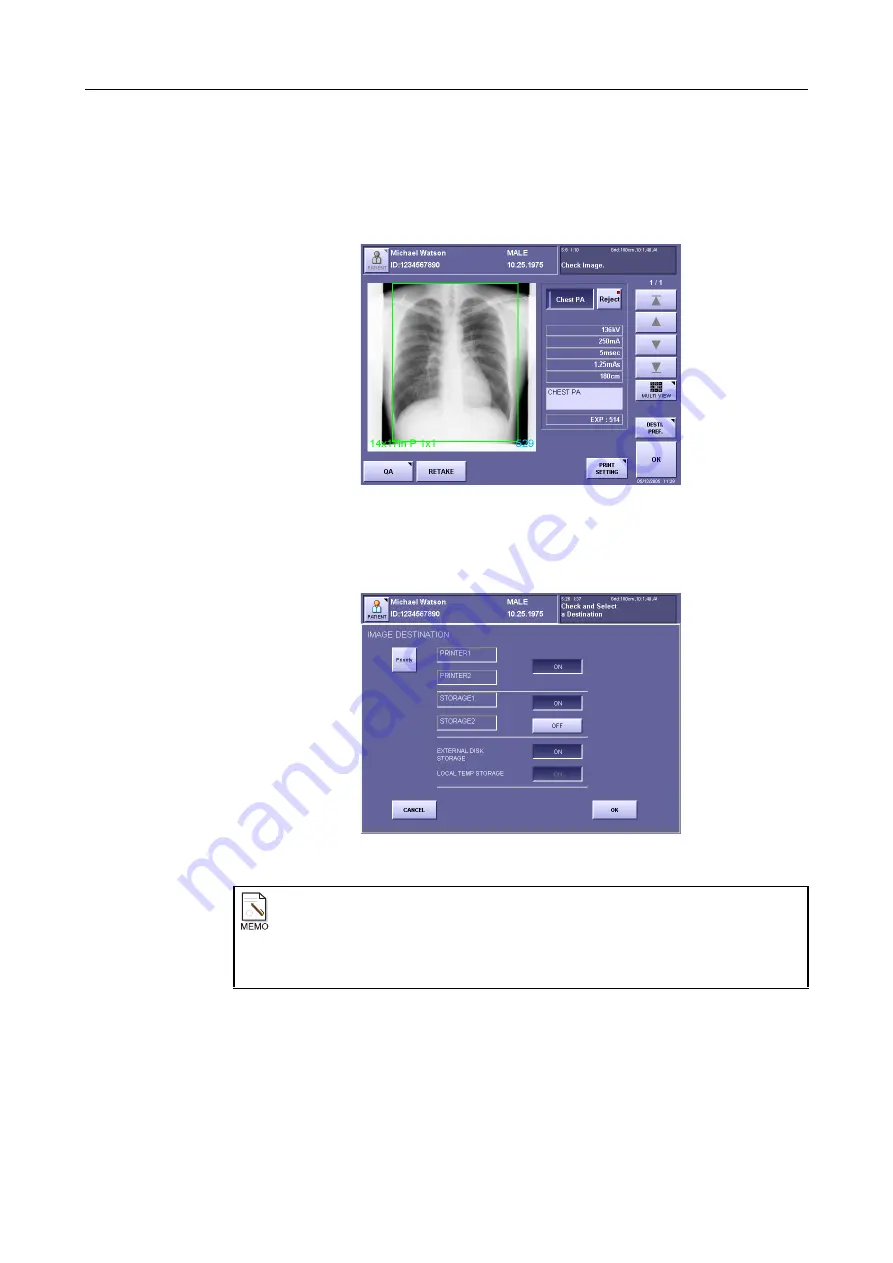
Display the preview image screen.
Preview Image Screen
2
Open the IMAGE DESTINATION window.
Touch
[DESTI. PREF.]
.
IMAGE DESTINATION Window
3
Set the priority.
Each time you touch
[Priority]
the button switches between highlighted display (white
characters) and normal display. The selected study is given output priority when this
button is highlighted.
When [DESTI. PREF.] is not displayed
Depending on the installation setup by a service engineer,
[DESTI. PREF.]
may not be
displayed. In these cases, touch
[OK]
to close the preview image screen, then touch
[END STUDY]
at the exposure screen. The IMAGE DESTINATION window opens
and you can select the image output destination.
Summary of Contents for CXDI-1
Page 9: ...Starting Up Shutting Down 1 Starting Up Shutting Down the CXDI ...
Page 15: ...Exposure and Output 2 Taking an Image 3 Output Control Process Viewer ...
Page 38: ...2 Taking an Image 30 ...
Page 60: ...5 Viewing Multiple Images Multi View Screen 52 ...
Page 70: ...6 Browsing Completed Studies Study List 62 ...
Page 71: ...Processing the Image 7 Processing the Image QA Mode Screen ...
Page 103: ...CXDI Adjustment 8 Calibration 9 Self test ...
Page 110: ...8 Calibration 102 ...
Page 116: ...9 Self test 108 ...
Page 117: ...Troubleshooting 10 Before Calling a Service Engineer 11 Questions and Answers ...
Page 136: ...11 Questions and Answers 128 ...
Page 156: ...B Using the Rejection Reason Input Function 148 ...
Page 162: ...C Using the Sensor Unit Attach Detach Function 154 ...
Page 169: ......


