background image

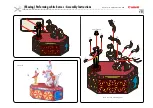
Caution :

 Do not attach the back 

              (part 6) at this stage.

Insert the support under each horse 
into the square hole in the base and 
glue the hind legs in place.

From inside the base, 
align part 39 with flaps 
on part 41 and glue 
firmly in place.

* Using an empty box or a 
   similar item for a base makes 
   it easier to work with this model 
   when it is upside down.

* Horses are easier to attach if you 
   glue one leg at a time.

Glue the front (part 3) to the base.

(Moving) Performing white horses : Assembly Instructions

©

 Canon Inc. 

©

 Hideharu Naitoh & G&P

Summary of Contents for CREATIVE PARK (Moving) Performing white horses

Page 1: ... line Glue spot Red dot Glue parts with the same number together Glue spot Green dot Glue within the same part Glue spot Blue dot Glue to the rear of the other part Glue The glue spot colored dot shows where to apply the glue Tools and materials Assembly tip Caution Scissors set square glue We recommend stick glue pencil used ballpoint pen toothpicks tweezers useful for handling small parts Before...

Page 2: ...Caution When viewed from the side parts 16 and 17 should be aligned exactly Moving Performing white horses Assembly Instructions Canon Inc Hideharu Naitoh G P ...

Page 3: ...ng white horses Assembly Instructions Canon Inc Hideharu Naitoh G P Caution Do not attach the front part 3 and back part 6 to the base at this stage Align the star marks when gluing part 14 to part 8 Parts 16 17 and 18 ...

Page 4: ...ed flaps when gluing parts 20 and 22 Wrap the end of a 20cm piece of thread around the axle two or three times Glue the thread firmly in place Moving Performing white horses Assembly Instructions Canon Inc Hideharu Naitoh G P ...

Page 5: ...Parts 20 to 22 Make two sets Make two sets Make two sets Parts 23 to 26 Moving Performing white horses Assembly Instructions Canon Inc Hideharu Naitoh G P ...

Page 6: ...orses bodies part 30 flat to prevent warping as you glue on the other parts Make two sets Parts 40 and 41 Make two sets Confirm movement Moving Performing white horses Assembly Instructions Canon Inc Hideharu Naitoh G P ...

Page 7: ...Caution Fold the legs carefully as you glue them together to prevent twisting Make two sets Make two sets Moving Performing white horses Assembly Instructions Canon Inc Hideharu Naitoh G P ...

Page 8: ...part 28 and parts 42 through 44 at this stage Caution Glue the legs so that they are exactly aligned when viewed from the side Make two sets Moving Performing white horses Assembly Instructions Canon Inc Hideharu Naitoh G P ...

Page 9: ...nside the base align part 39 with flaps on part 41 and glue firmly in place Using an empty box or a similar item for a base makes it easier to work with this model when it is upside down Horses are easier to attach if you glue one leg at a time Glue the front part 3 to the base Moving Performing white horses Assembly Instructions Canon Inc Hideharu Naitoh G P ...

Page 10: ...ned with the upper and lower inner wings on the right side marked with a star and glue in place Insert the end of the 20cm thread into the slot and glue it firmly in place The star indicates the left arm Confirm movement three parts two parts Moving Performing white horses Assembly Instructions Canon Inc Hideharu Naitoh G P ...

Page 11: ...ot on part 27 and lightly take up the tension on both threads With both threads inserted into part 27 gently turn the handle to move the trainer s arms and confirm the movement of the horses Apply glue to part 27 and glue thread firmly in place Trim off any dangling ends of thread Make two sets Moving Performing white horses Assembly Instructions Canon Inc Hideharu Naitoh G P ...

Page 12: ...Glue on all the remaining parts Parts 50 to 52 Finished Moving Performing white horses Assembly Instructions Canon Inc Hideharu Naitoh G P ...

Reviews: