background image

2-3

2

Checking the customer site

Checking the customer site

Before you install the ColorPASS, check site conditions and inform the customer of any 
installation requirements.

Copier model

Is the service mode COPIER>OPTION>REMOTE set to 2?

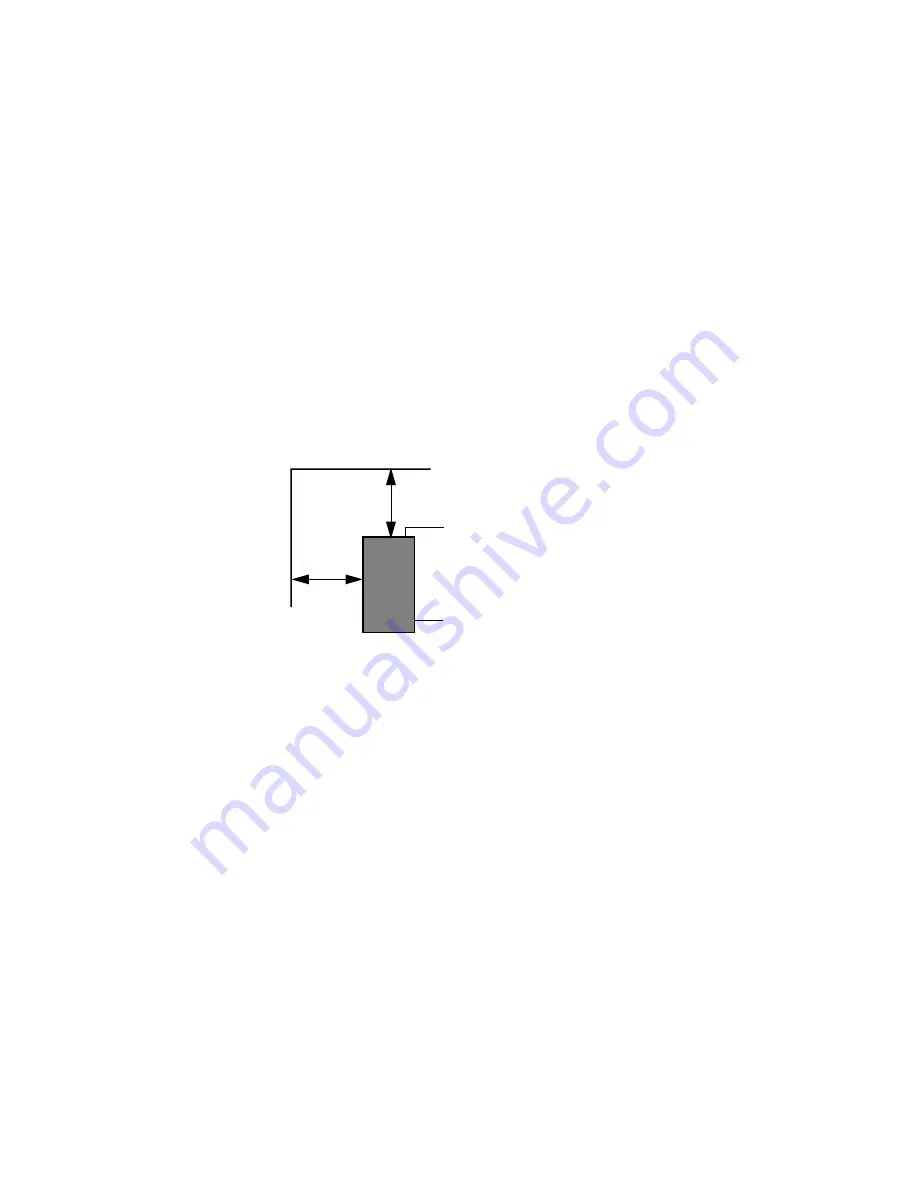
Is there space near the copier for the ColorPASS?

Make sure that there is space for the ColorPASS. Allow enough space at the back panel 
for the cables to route easily and at the side panel so that the ColorPASS does not 
interfere with use of or service to the copier (such as clearing a paper jam). You may need 
to move the copier away from the wall so that its interface connectors are accessible. 

Does the copier require service or adjustments?

Print the copier color test page before you install the ColorPASS.

If the copied image indicates that the copier needs adjustment, inform the customer. 
After getting approval, complete the copier service needed. 

Power

Is there a dedicated, grounded electrical outlet for the ColorPASS near the copier?

Locate the grounded electrical outlet that will supply power to the ColorPASS. You 
should not run the ColorPASS and the copier on the same circuit. Make sure to use a 
surge suppressor for the ColorPASS if the customer has provided one.

• Do not use a 3-prong adapter in a 2-hole ungrounded outlet.

• Do not use an extension cord.

• Do not plug the ColorPASS into a circuit with heating or refrigeration equipment 

(including water coolers).

• Do not plug the ColorPASS into a switchable wall outlet. Doing so may result in the 

ColorPASS being powered off accidentally.

Back panel

Side panel

20cm+ (8 in.)

ColorPASS

20cm+ (8 in.)

Summary of Contents for COLORPASS-Z6000 PS-NX6000

Page 1: ...ColorPAS S Z6000 PS NX 6000 Color Ser ver Installati o n a n d Ser vi c e G u i d e for Canon col or co p ier s A guide for ser vice technicians Part Number 45035311 ...

Page 2: ......

Page 3: ...rintMe Enterprise PrintMe Networks RIPChips ScanBuilder SendMe Splash Unimobile Velocity Velocity Balance Velocity Build Velocity Estimate Velocity Exchange Velocity OneFlow Velocity Scan VisualCal WebInstaller WebScan WebSpooler WebStatus and WebTools are trademarks of Electronics for Imaging Inc Canon is a registered trademark of Canon Inc All other terms and product names may be trademarks or r...

Page 4: ...eiver Connect the equipment into an outlet on a circuit different from that to which the receiver is connected Consult the dealer or an experienced radio TV technician for help In order to maintain compliance with FCC regulations shielded cables must be used with this equipment Operation with non approved equipment or unshielded cables is likely to result in interference to radio and TV reception ...

Page 5: ...demarks whether registered or unregistered or any other rights franchises or licenses in respect of the Software Coded Font Programs Typefaces or Trademarks You may not adapt or use any trademark or trade name which is likely to be similar to or confusing with that of Electronics for Imaging or any of its suppliers or take any other action which impairs or reduces the trademark rights of Electroni...

Page 6: ...uent equivalent regulation shall apply The name of the Contractor is Electronics for Imaging Third Party Beneficiary You are hereby notified that Adobe Systems Incorporated a California corporation located at 345 Park Ave San Jose California 95110 Adobe is a third party beneficiary to this Agreement to the extent that this Agreement contains provisions which relate to your use of the Font Programs...

Page 7: ...ion Installation sequence 2 1 Checking the customer site 2 3 Setting customer expectations 2 4 Unpacking the ColorPASS 2 5 Front and back panels 2 7 Chapter 3 Connecting the ColorPASS Preliminary checkout 3 1 Connecting to the copier 3 3 Verifying the connection 3 4 Printing the Test Page and Configuration page 3 4 Installing additional options 3 7 Connecting to the network 3 7 Using the Control P...

Page 8: ...rd installation and updating the system 4 29 Replacing parts on the motherboard 4 34 Motherboard CPU 4 36 Motherboard battery 4 40 Motherboard jumpers 4 41 Fan 4 42 Power supply 4 43 Checking voltages 4 43 Removing and replacing the power supply 4 44 Hard disk drive 4 46 DVD drive 4 51 Jewel 4 54 Control Panel buttons 4 55 System software service 4 56 Restoring backup system software 4 57 Installi...

Page 9: ...diagnostics 5 22 Test E mail 5 23 Printing the Test Page 5 25 Appendix A Specifications Hardware features A 1 Networking and connectivity A 1 User software A 1 Safety and emissions compliance A 1 Appendix B Replacing top and side plastics Procedures B 1 Index ...

Page 10: ......

Page 11: ...S Chapter 2 Preparing for Installation Unpacking and the steps you need to take before you install the unit Chapter 3 Connecting the ColorPASS Connecting the ColorPASS to the copier and the network and verifying that the system is working correctly overview of the Control Panel Chapter 4 Service Procedures Removing and replacing procedures for ColorPASS components installing system software Chapte...

Page 12: ... site The term Control Panel refers to the area on the front of the ColorPASS including the green red activity light the display window LCD liquid crystal display and the buttons to the right and left of the display window The term side panel refers to both the plastic and metal pieces of the side panel joined together The term plastics refers to just the plastic piece The term system software ref...

Page 13: ...ning the ColorPASS an incorrect IP address may cause unpredictable errors on any or all devices connected to the network Always disconnect power before opening the ColorPASS Use care when handling parts of the ColorPASS as some edges on the unit may be sharp For example be careful when Accessing the DVD drive keep the drive door closed when not in use Plugging in cables at the back of the unit Rem...

Page 14: ...sk drive enclosure The gaskets are designed to reduce possible electromagnetic interference EMI Handle printed circuit boards by their opposing edges only and avoid touching the contacts on the edge of the board Protect the thermal material on the base of the heatsink If you remove the CPU cooling assembly for instance when transferring the CPU to a new motherboard avoid touching the thermal mater...

Page 15: ...with remote user software running on networked PC and Mac OS computers Print files in color gray scale and black and white Use the copier as a high resolution color scanner with Fiery Scan software Use 136 resident fonts 126 Adobe Type 1 PostScript and 10 TrueType plus two Adobe Multiple Master fonts used for font substitution when printing PDF files Fiery Downloader or any third party LaserWriter...

Page 16: ... data transfer to and from the copier interface board and runs the interpreter The interpreter rasterizes the page description file and then compresses the image pattern into memory The interpreter sends compressed raster data through the image frame buffer memory to the copier interface board The copier interface board decompresses the image data and sends it to the copier through the copier inte...

Page 17: ...ortable Document Format PDF or Tagged Image File Format TIFF These files can be downloaded directly to the ColorPASS Motherboard Power supply External Devices Print Device ColorPASS 3 3 5 12V DC AC power Copier Graphics Controller USB Reset RTC PCI Bus 0 HDD Super I O Monitor User Interface Board Keyboard and Mouse Option SEC_IDE Memory Parallel Port DVD South Bridge 32 bit I O Controller North Br...

Page 18: ...which they were created Fiery Downloader also enables the user to manage the printer fonts installed on the ColorPASS Fiery Spooler Mac OS only Enables users to view the order and priority of print jobs customize printer settings for jobs delete jobs move jobs between queues and view job accounting information Fiery Remote Scan Standalone application and plug in modules for supported TWAIN complia...

Page 19: ... files Reference pages that users can print to view the range of colors available on the ColorPASS For the most predictable color results refer to these pages when defining colors in applications ColorWise Pro Tools Enables users to use calibration and color management tools It also enables users to edit and download ICC profiles Fiery Graphic Arts Package Optional software for calibrating print d...

Page 20: ......

Page 21: ...ke your job as easy as possible Installation problems are easier to avoid and diagnose if you proceed from the component to the system level and verify functionality at each stage Figure 2 1 on page 2 2 outlines the recommended installation procedure for connecting the ColorPASS to the copier Because the ColorPASS is a node on the customer s computer network make sure you coordinate your scheduled...

Page 22: ...ration page page 3 4 Network administrator installs user software on networked computers that print to the ColorPASS see the Quick Start Guide Network administrator connects the ColorPASS to the network and verifies the connection see page 3 7 and the Configuration Guide Network administrator configures Setup options see the Configuration Guide Check installation requirements and verify site condi...

Page 23: ...copier color test page before you install the ColorPASS If the copied image indicates that the copier needs adjustment inform the customer After getting approval complete the copier service needed Power Is there a dedicated grounded electrical outlet for the ColorPASS near the copier Locate the grounded electrical outlet that will supply power to the ColorPASS You should not run the ColorPASS and ...

Page 24: ...administrator needs to be available during the installation for network connectivity Equipment downtime and impact on the network can be minimized if the network administrator installs a network connector for the ColorPASS and confirms network functionality with the connector in place before the date scheduled for the ColorPASS installation The network administrator should have a networked compute...

Page 25: ...ftware and user documentation 3 Give the media package to the customer or the network administrator Let the customer or network administrator know that in order to take full advantage of the ColorPASS the user software must be installed on computers that will print to the ColorPASS 4 Set aside the remaining components from the top container 5 Remove the top container and any packing materials Set ...

Page 26: ...2 6 2Preparing for Installation FIGURE 2 2 Contents of ColorPASS shipping box ColorPASS Power cable s Copier interface cable Media package ...

Page 27: ...nt panel USB ports ES 1000 Keyboard option Not used Power cable connector Monitor option Serial port ED 100 Parallel port dongle Mouse option Copier interface board Back panel Activity light Line selection buttons Up button Menu button Jewel Down button DVD drive Reset button Power button Empty slot Empty slot Empty slot Empty slot Empty slot Empty slot 10 100 1000BaseT Note Front panel doors not ...

Page 28: ......

Page 29: ... CONNECT POWER AND START THE COLORPASS 1 Connect one end of the AC power cable to the power connector at the back of the ColorPASS and the other end to a wall power outlet FIGURE 3 1 Connecting the power cable 2 Open the doors on the ColorPASS front panel Press on the left door until the latch clicks and then open both doors FIGURE 3 2 Opening the front panel doors Chapter 3 Connecting the ColorPA...

Page 30: ...o confirm that the ColorPASS is operating properly When the ColorPASS reaches the Idle screen you are ready to shut down and connect the network and copier interface cables as described on page 3 3 Setup options should be configured after making these connections The network administrator is responsible for configuring Setup according to the network and user environment For Setup information refer...

Page 31: ...interface board to the interface port on the copier TO CONNECT TO THE COPIER 1 Power off the copier Check with the network administrator or supervisor before powering off the copier 2 Connect one end of the copier interface cable to the interface connector on the copier and the other end to the copier interface connector on the back of the ColorPASS FIGURE 3 4 Copier interface cable connection Cop...

Page 32: ...ides on the HDD hard disk drive Configuration page printing the Configuration page can be helpful during installation setup and service After you install the ColorPASS and before any default settings are changed you can obtain a record of the defaults by printing the Configuration page After you make the physical connection to the network the network administrator can customize Setup options accor...

Page 33: ...r the job 7 Examine the quality of the Test Page from the copier If the Test Page prints you know that the ColorPASS is functional and that the connection between the ColorPASS and the copier is good When you examine the Test Page keep in mind that All color patches should be visible even though they may be very faint in the 5 and 2 range Each color s patch set should show uniform gradation from p...

Page 34: ...Menu button once see Using the Control Panel on page 3 9 The Functions menu appears 5 Press the line selection button to the right of Print Pages and then select Configuration page The ColorPASS sends the Configuration page to the copier and displays the RIP and Print status screens so you can monitor the job Print Pages Scan Job Suspend Printing Resume Printing Functions Use the Up and Down butto...

Page 35: ...g to the network The ColorPASS has an external 10 100 1000BaseT Ethernet network connector for an unshielded twisted pair UTP cable When the network cable is connected see Figure 3 5 the Ethernet interface automatically detects the speed of the network environment Network speed is indicated by two LEDs on the Ethernet network connector For additional network information see the Configuration Guide...

Page 36: ...ove the plug 4 Power on the ColorPASS and allow it to boot without interruption 5 When Idle is displayed on the ColorPASS Control Panel configure Setup options It is the network administrator s responsibility to configure Setup according to the network and user environment Refer the network administrator to the Configuration Guide for Setup information 6 After configuring Setup options verify the ...

Page 37: ...olorPASS and Setup information are displayed in the ColorPASS display window Activity can be monitored in the display window and functions of the ColorPASS such as printing a Test Page and installing or updating system software can be controlled using the buttons on the Control Panel FIGURE 3 6 The ColorPASS Control Panel Display window Line selection buttons Up button Menu button Down button Acti...

Page 38: ... off Line selection buttons Use the four line selection buttons on the right side of the Control Panel to select the command displayed on the corresponding line of the display window A special character appears in the display window next to a button when it is available Up and Down buttons Use these buttons to scroll to different screens in multi screen lists to select Setup options from a list an...

Page 39: ...ame of the current screen with the icon for that screen highlighted Icons for other active screens are also displayed but are not highlighted The screens display the following information FIGURE 3 7 Control Panel screens during printing If an error occurs the Alert screen is displayed with a message describing the error Cancel Job Jane D Copies 1 100 Print Server Name Idle Cancel Job Job name User...

Page 40: ... of the user who sent the job that is currently being processed Pages Total The number of copies of the current page that have been printed so far and the total number of copies of this page that were requested RIP Status When the ColorPASS is processing a job the RIP Status screen is activated This screen displays the following Cancel Job Press the top line selection button to cancel the job curr...

Page 41: ...sy Processing or Printing Number of MB The space in megabytes available on the HDD Version The system software version running on the ColorPASS Functions The Functions screen is always active but it appears in the display window only when the user has pressed the Menu button to select it Use the Up and Down buttons to scroll through the list of menu command options Press the line selection button ...

Page 42: ...es information about all current Setup settings calibration simulation profile and the Ethernet address of the ColorPASS The Configuration page also provides version information for the BIOS chip and information on any options installed in the ColorPASS Job Log Prints the log of the last 55 jobs by default For more information about the Job Log see the Job Management Guide Control Panel Map Prints...

Page 43: ...page 3 17 Clear Server Clears all jobs from the server queues It also clears the Job Log all jobs saved on the server hard disk drive and the index of all archived jobs Clear Server does not clear the settings configured in Setup Run Setup Allows access to the Setup options in order to configure the network and printing environment Typically it is the network administrator s responsibility to conf...

Page 44: ... Control Panel the ColorPASS is currently processing a job Idle is displayed on the Control Panel when the ColorPASS is finished processing the job 2 At the Idle screen press the Menu button once to display the Functions menu 3 Scroll to select Shut Down from the Functions menu 4 At the next screen select Shut Down System NOTE If you are recycling power wait at least 10 seconds before powering bac...

Page 45: ...THE COLORPASS 1 If the ColorPASS is already on make sure it is not receiving processing or printing a document When Printing or Ripping appears on the Control Panel the ColorPASS is currently processing a print job Wait until the job is complete and Idle is displayed in the Info screen 2 Press the Menu button once select Shut Down from the Functions menu and then select Reboot System Allow the sys...

Page 46: ......

Page 47: ...ary If you determine that a component you have removed is not faulty make sure to reinstall it When performing the service procedures described in this chapter follow the precautions listed in Precautions on page xiii The tools required to service the system are listed in Tools you will need on page xiv System software System software is installed on the HDD at the factory A backup of the system s...

Page 48: ...e ribbon cable 5 Power reset and speaker cables 6 HDD bracket 7 Side panel left 8 HDD 9 HDD ribbon cable 10 Board extender 11 Copier interface board 12 CPU cooling assembly 13 Battery 14 Motherboard 15 CPU 16 DIMMs 17 UIBcable 18 Fan 19 Board guide 20 Chassis 21 Power supply 3 8 15 9 16 18 4 19 17 2 10 NOTE The right side panel is not shown in this illustration ...

Page 49: ...slide the DVD drive a few inches out the front of the chassis Follow standard electrostatic discharge ESD precautions when handling internal components Always attach a grounding strap to your wrist and attach the other end to a good ground See Precautions on page xiii If the ColorPASS is powered on be sure to shut down the system before you open it Always use the procedures To shut down the ColorP...

Page 50: ...e Functions menu 3 Scroll to select Shut Down from the Functions menu 4 At the next screen select Shut Down System NOTE If you are recycling power wait at least 10 seconds before powering back on If you are unable to access the Shut Down menu to shut down the ColorPASS for example if the system hangs power off by holding down the power button for up to 8 seconds You are now ready to remove or atta...

Page 51: ...and switches speaker DVD drive motherboard To remove the motherboard you need to slide the DVD drive a few inches out the front of the chassis NOTE If you need to replace the top panel or the plastic piece of a side panel for example if the plastic piece is damaged follow the procedures in Appendix B Replacing top and side plastics 4 Remove the two screws that secure the side panel s to the chassi...

Page 52: ...4 6 4Service Procedures FIGURE 4 2 Removing the left side panel Left side panel Screws ...

Page 53: ... FIGURE 4 3 ColorPASS side view and back panel view USB ports ES 1000 Motherboard connectors PCI1 Empty PCI2 Copier interface board PCI3 Empty PCI4 Empty PCI5 Empty Back panel view Side view Power supply Keyboard option Not used Power cable connector Serial port ED 100 Parallel port dongle Mouse option Copier interface board Empty slot Slot 1 PCI2 Slot 3 PCI1 Slot 2 PCI3 Slot 4 PCI4 Slot 5 PCI5 Sl...

Page 54: ...itches and cables Speaker UIB user interface board UIB cable DVD drive Motherboard To remove the motherboard you need to slide the DVD drive a few inches out the front of the chassis NOTE You do not need to remove the front panel in order to remove the HDD power supply DIMM s copier interface board fan battery HDD and DVD drive ribbon cables or CPU and CPU cooling assembly ...

Page 55: ...nt panel away from the chassis as the power reset and speaker cables are still connected to the front panel If you need to remove the front panel completely for example when replacing the front panel with a new one disconnect the power reset and speaker cables from connectors on the motherboard thread the cables out through the hole in the front of the chassis and then remove the front panel compl...

Page 56: ...nd reset switches NOTE Make sure to orient the power and reset buttons and switches correctly when installing them The power and reset buttons should be level with the surface of the front panel when properly oriented 3 If necessary thread the power reset and speaker cables through the hole in the front of the chassis and then connect them to the appropriate pins on the motherboard For connection ...

Page 57: ... Connector PCI3 Empty Connector PCI4 Empty Connector PCI5 Empty 4 Inspect ribbon cables to see if they are intact Faulty ribbon cables are easily overlooked Check the contact point between the cable and the connector to ensure that they have not separated If a ribbon cable appears damaged substitute it with a tested cable 5 Make sure that all ribbon cables and power supply cables are seated proper...

Page 58: ...r FAN3 3 DVD drive ribbon cable DVD drive Motherboard SEC_IDE Secondary IDE connector 4 HDD ribbon cable HDD Motherboard PRI_IDE Primary IDE connector 5 UIB ribbon cable User interface board Motherboard connector JP20 6 Power reset and speaker cables Front panel Motherboard PWR RST and SPKER pins 7 CPU fan cable CPU fan Motherboard connector FAN1 or FAN4 4 3 1a NOTE Power supply and copier interfa...

Page 59: ...vers on each side of the DIMM FIGURE 4 7 DIMM and socket 3 Pull the DIMM straight out of the socket 4 To replace a DIMM insert the DIMM straight into the socket and close the levers at each side to lock it into place NOTE The socket is keyed so that the DIMM fits only one way See notches in the figure above Make sure that the levers close securely around the ends of the DIMM and that each DIMM is ...

Page 60: ...e sure not to damage any cables when replacing the side panel Fold the cables inside the chassis before replacing the side panel 5 Replace the two screws that attach the side panel to the chassis Do not leave side panels off after servicing An airflow channel is created by the panels and the fan Leaving the ColorPASS open could reduce the operational life expectancy of internal components 6 Connec...

Page 61: ...4 15 4Restoring and verifying functionality after service FIGURE 4 8 Replacing the left side panel Round corner on chassis Screws Left side panel ...

Page 62: ...ter 5 Troubleshooting FIGURE 4 9 ColorPASS connection verification steps Check the Setup options See the Configuration Guide Power on and check startup See To connect power and start the ColorPASS on page 3 1 Connect the ColorPASS to the copier See Connecting to the copier on page 3 3 Connect the ColorPASS to the network See Connecting to the network on page 3 7 and the Configuration Guide Print t...

Page 63: ...nstructions provided with those boards Copier interface board The copier interface board see Figure 4 10 provides the print interface between the ColorPASS and the copier The copier interface board is installed in connector PCI2 on the motherboard and occupies one back panel slot The interface connector at slot 3 on the back panel connects to a cable that attaches to the copier FIGURE 4 10 Copier ...

Page 64: ...board straight out of its motherboard connector 6 Place the board in an antistatic bag TO REPLACE THE COPIER INTERFACE BOARD 1 If you are replacing the old copier interface board with a new one unpack the new board and attach the plastic board extender with the screws provided Mount the board extender on the component side of the copier interface board 2 Reseat the copier interface board in connec...

Page 65: ... LCD Four line selection buttons Up and Down buttons Menu button Jewel lights The UIB cable routes from a connector on the back of the user interface board to connector J20 on the motherboard see Figure 4 6 on page 4 12 FIGURE 4 11 Diagram of the user interface board front and back Back Front Line selection button pads User Interface Board cable connector Activity lights LEDs Display window Up but...

Page 66: ... four screws that secure the UIB to the media bracket 4 While supporting the UIB remove the fourth screw FIGURE 4 12 Removing replacing the user interface board 5 Disconnect the UIB cable from the connector on the UIB Press outward on the connector levers on each side of the connector see Figure 4 13 and then detach the connector Avoid pulling on the cable FIGURE 4 13 Detail of ribbon cable connec...

Page 67: ... mounting posts see Figure 4 12 on page 4 20 3 Replace the four screws that secure the UIB to the bracket see Figure 4 12 on page 4 20 Make sure you use the same screws you removed earlier 4 Correctly orient the UIB buttons and then mount them on the UIB FIGURE 4 14 Removing replacing the UIB buttons 5 Replace the front panel see Figure 4 4 on page 4 9 6 Reassemble the ColorPASS see page 4 14 and ...

Page 68: ...tors on PCI bus 0 One 133 100 66Mhz PCI connector on PCI bus 1 One 100 66MHz PCI connector on PCI bus 2 Removing the motherboard The motherboard attaches to the side of the chassis below the power supply Before you remove the motherboard you must remove All boards installed on the motherboard All cables connected to the motherboard these include the motherboard power cable CPU power cable front pa...

Page 69: ...PCI2 9 Empty PCI3 10 Empty PCI4 11 Empty PCI5 12 CPU power P2 13 CPU fan power FAN1 or FAN4 14 Battery BT1 15 DIMM1 16 DIMM2 17 DIMM3 18 DIMM4 19 Motherboard power P1 20 UIB cable JP20 21 BIOS chip U27 22 SPKER connection pins 23 RST PWR connection pins 24 PRI_IDE for HDD 25 SEC_IDE for DVD drive 26 Front panel fan power FAN3 MH Mounting holes 10 holes 8 1 7 6 3 9 10 16 12 20 NOTE Connectors not l...

Page 70: ...rface Remove any other option boards that may be installed in remaining connectors on the motherboard 4 Remove the plastic cable clamp securing internal cables Set the cable clamp aside for use later 5 Remove the power and ribbon cables from the back of the HDD You need to remove these cables to provide clearance for removing the motherboard 6 Remove the following cables connected to the motherboa...

Page 71: ... page 4 52 You need to move the DVD drive to provide clearance for removing the motherboard 3 Remove the 10 mounting screws securing the motherboard to the chassis for screw locations see Figure 4 15 on page 4 23 4 Remove the motherboard from the chassis Lift the edge of the motherboard see Figure 4 16 Make sure the back panel connectors on the motherboard clear the chassis while lifting it out of...

Page 72: ...her ColorPASS If the new motherboard does not solve the problem do not update the system Return the new motherboard and unused dongle to inventory Do not reinstall system software before updating the system Doing so can result in a permanent Invalid License error Do not replace the HDD and the motherboard at the same time Doing so in the wrong order and without updating the system will cause the s...

Page 73: ...ndoffs located in the base of the chassis 4 Insert the 10 motherboard mounting screws that secure the motherboard to the chassis Partially tighten each screw before completing tightening any one screw Do not overtighten the screws doing so could damage traces on the motherboard 5 If you are installing a new motherboard install the following components from the old motherboard DIMM s see page 4 34 ...

Page 74: ...eplace the power and ribbon cables to the backs of the HDD and DVD drive 3 Secure the ribbon cables and the HDD and DVD drive power cables with the plastic cable clamp you removed earlier 4 Replace the following board in its motherboard connector Copier interface board in motherboard connector PCI2 see page 4 18 NOTE When installing boards make sure that the board connectors are properly aligned w...

Page 75: ...n page 4 30 Update the system requires the dongle and the Restore Update Server Software CD shipped with the new motherboard Update the system after verifying it in Service Mode The ColorPASS will not function permanently until you update the system The update process uses the Restore Update Server Software CD along with the dongle to transfer required settings from the old motherboard onto the ne...

Page 76: ...CE MODE AND VERIFY THE SYSTEM 1 Unpack the dongle that shipped with the new motherboard and connect it to the parallel port on the back panel see Figure 4 17 Remove any other dongle that may be connected to the parallel port and set it aside Tighten the two screws on the dongle to secure it to the parallel port FIGURE 4 17 Connecting the dongle Dongle To parallel port ...

Page 77: ...nd 4 above while in Service Mode you may conclude that the old motherboard was not the source of the problem and therefore does not need to be replaced If so reinstall the old motherboard and return the new motherboard and dongle to inventory For more details on solving system problems see Chapter 5 Troubleshooting If installing a new motherboard solved the problem you are troubleshooting and you ...

Page 78: ...the parallel port on the back of the ColorPASS see Figure 4 17 on page 4 30 4 Power on the ColorPASS using the power button on the front panel The Update menu appears 5 Scroll to Update system and then select OK The Update system screen displays 6 Select OK The update takes approximately 30 seconds while the message Do NOT power off displays on the Control Panel Do not power off during the update ...

Page 79: ...erboard in the system is new has not been updated and the system is not in Service Mode It appears for approximately 15 seconds before you see the message It is now safe to power off the system Unrelated to the system update procedure this message also appears anytime you attempt to install the wrong system software that is software designed for another product Hardware mismatch Shutdown in progre...

Page 80: ...these procedures shut down and open the ColorPASS see page 4 4 and page 4 5 DIMMs The motherboard has four DIMM sockets DIMM 1 DIMM 4 The ColorPASS ships with 512MB of memory installed as follows DIMM 1 Empty DIMM 2 Empty DIMM 3 256MB DIMM DIMM 4 256MB DIMM FIGURE 4 18 Motherboard DIMM sockets Approved DIMMs are available from your service representative DIMM1 DIMM2 DIMM3 DIMM4 ...

Page 81: ... straight into the socket and close the levers at each side to lock it into place NOTE The socket is keyed so that the DIMM fits only one way See notches in the figure above Make sure that the levers close securely around the ends of the DIMM and that each DIMM is fully seated in its socket 4 Reassemble the ColorPASS see page 4 14 and verify its functionality see page 4 16 Lever Lever DIMM Socket ...

Page 82: ...s socket disconnect the CPU fan cable from the motherboard and remove the cooling assembly from the CPU socket see page 4 37 The CPU cooling assembly consists of a fan a clamp a heatsink and a bracket FIGURE 4 20 CPU cooling assembly Follow standard ESD precautions while handling the motherboard and all components Clamp CPU fan Heatsink Bracket CPU ...

Page 83: ...have to let the components cool before attempting to remove them 5 Lift the CPU socket lever to release the CPU from the socket see Figure 4 21 on page 4 38 6 Grasp the CPU by its edges and gently lift it from the socket Move the levers on the clamp to the open position spine up Use a small flathead screwdriver to bend the four hooks out of the slots in the bracket one at a time Make sure not to d...

Page 84: ...cket lever 2 Insert the CPU into the socket Make sure you align the arrow indicating pin 1 on the CPU with pin 1 in the CPU socket see Figure 4 21 3 Lower the socket lever to secure the CPU FIGURE 4 21 Replacing a CPU Arrow CPU CPU socket Socket lever Pin 1 ...

Page 85: ...p are in the open position spine up Align the heatsink so that the fan cable is near motherboard connectors FAN1 and FAN4 Place the heatsink on the CPU and inside the bracket Make sure the heatsink is fully seated in the bracket on all sides Press down on the clamp until all four hooks engage the slots in the bracket Avoid using excessive force when pressing down on the clamp Close the levers simu...

Page 86: ...brikat og type Levér det brugte batteri tilbage til leverandøren VAROITUS Paristo voi räjähtää los se on virheellisesti asennettu Vaihda paristo ainoastaan laitevalmistajan suosittelemaan tyyppiin Hävitä Käytetty paristo valmistajan ohjeiden mukaisesti ADVARSEL Eksplosjonsfare ved feilaktig skifte av batteri Benytt samme batteritype eller en tilsvarende type anbefalt av apparatfabrikanten Brukte b...

Page 87: ...OS and password Normal operation no jumper installed JP9 PCI PCI X mode PCI Bus 1 Slot 1 Normal operation PCI mode enabled jumper installed This setting should not be changed JP10 PCI PCI X mode PCI Bus 2 Slot 2 Normal operation PCI mode enabled jumper installed This setting should not be changed JP24 Enable Disable Intel 82551QM 8254OEM NIC chip Normal operation enabled no jumper installed This s...

Page 88: ...he fan cable from motherboard connector FAN3 3 Release the fan from the fan bracket by bending the hooks on the bracket FIGURE 4 23 Removing the fan 4 Remove the fan from the chassis TO REPLACE THE FAN 1 Align the fan An arrow on the side of the fan indicates the airflow direction Make sure the fan is positioned so that the arrow points inside the ColorPASS and the fan cable can reach motherboard ...

Page 89: ...ectors of the power supply cables not on the board or component connectors The following table describes the power connectors TABLE 4 1 ColorPASS power connectors Connector Pins Color Voltage 1 2 11 Orange 3 3V 3 5 7 13 15 16 17 Black GND 4 6 19 20 Red 5V 8 Gray POWER GOOD 9 Purple 5VSB 10 Yellow 12V 12 Blue 12V 14 Green PS ON 18 White 5V 1 Black GND 2 Black GND 3 Yellow 12V 4 Yellow 12V 1 Yellow ...

Page 90: ...ly to the chassis see Figure 4 24 on page 4 45 8 While supporting the power supply remove the fourth screw Set the screws aside so you can replace them later 9 Lift the power supply out of the chassis Carefully gather the power supply cables as you remove the power supply TO REPLACE THE POWER SUPPLY 1 Support the power supply inside the chassis and align the mounting holes with the four holes on t...

Page 91: ...port beam see Figure 4 24 on page 4 45 Gather the cable against the support beam with the tie wrap and then thread the tie wrap to secure the cable 8 Reassemble the ColorPASS see page 4 14 and verify its functionality see page 4 16 FIGURE 4 24 Removing the power supply Screw 1 of 4 Power supply Back panel Power supply cables Chassis support beam ...

Page 92: ...roblem and you suspect either the HDD or the motherboard are at fault use the following order to troubleshoot replace the HDD install system software and then check to see if the problem persists If it does perform other procedures such as replacing the motherboard see page 4 26 Proper handling Improper handling can damage the HDD Handle the HDD with extreme care Use proper ESD practices when grou...

Page 93: ...e If you are replacing the HDD with a new one you will need The appropriate system software and documentation for the ColorPASS you are servicing A compatible version of the user software for the networked computers that will be printing to the ColorPASS HDD bracket Front panel Motherboard DVD drive HDD ...

Page 94: ...t the cable straight out from the HDD 5 Slide the HDD bracket off the shelf and lift it out of the chassis See Figure 4 26 Unlock the HDD bracket by removing the reusable tie wrap securing the latch to the chassis support beam moving the latch toward the back panel and then sliding the bracket off the bracket shelf Avoid striking the DIMM s as you remove the HDD bracket NOTE You will encounter sli...

Page 95: ... on the HDD cover Loosening these HDD screws will break the seal and void the HDD warranty Do not touch the drive with magnetic objects such as magnetic screwdrivers and avoid placing items such as credit cards and employee ID cards that are sensitive to magnets near the HDD Replacement HDDs are not shipped with system software pre installed After installing the drive you need to install the appro...

Page 96: ...it by moving the latch toward the front panel Avoid striking the DIMM s as you replace the HDD bracket NOTE You will encounter slight resistance as you slide the bracket onto the shelf The resistance is caused by two tension points on the bottom of the bracket The resistance helps control the bracket s movement during removal and installation 5 Secure the latch to the chassis support beam with the...

Page 97: ... 51 4DVD drive DVD drive The DVD drive is mounted in an enclosure inside the chassis above the HDD The DVD drive is used to install system software onto the HDD FIGURE 4 28 ColorPASS DVD drive DVD drive ...

Page 98: ...wer supply cable from the DVD drive 4 Remove the DVD drive ribbon cable from the DVD drive by pulling the connector not the cable straight out 5 Press the latches on the sides of the DVD drive and slide the DVD drive out the front of the chassis Make sure not to damage the EMI gasket around the DVD enclosure FIGURE 4 29 Removing replacing the DVD drive DVD drive Latch ...

Page 99: ...ee Figure 4 29 on page 4 52 3 Slide the DVD drive into the chassis until the latches click into place Make sure not to damage the EMI gasket around the DVD enclosure 4 Connect the DVD drive ribbon cable to the DVD drive 5 Connect the 4 pin power supply cable to the DVD drive The connectors are keyed to fit only one way 6 Replace the front panel see page 4 10 7 Reassemble the ColorPASS see page 4 1...

Page 100: ...RONT PANEL JEWEL 1 Remove the front panel see page 4 9 2 From the back of the front panel push the jewel out through its slot in the front panel 3 From the front of the panel place the new jewel in the slot and press down until it snaps into place Make sure to correctly orient the jewel The jewel s lower tabs are larger than the upper tabs 4 Replace the front panel see page 4 10 5 Reassemble the C...

Page 101: ...d control capability from the Control Panel TO REPLACE CONTROL PANEL BUTTONS 1 Remove the front panel see page 4 9 2 Attach the buttons to the UIB Insert the pointed tabs on the underside of the buttons into the appropriate holes on the UIB Make sure to orient the buttons to match the channels in the front panel FIGURE 4 32 Replacing Control Panel buttons 3 Replace the front panel see page 4 10 4 ...

Page 102: ...administrator using Fiery Downloader To determine which additional fonts were downloaded to the ColorPASS print the Font List before you install or restore the system software and again after you complete the system software installation Any fonts not listed after installation will need to be reinstalled For more information see the Printing Guide Configuration Because the existing setup configura...

Page 103: ...print the following from the Functions menu if possible Configuration page lists any installed options patches or upgrades records the customer s current Setup configuration The Setup configuration is reset to the default configuration when you restore the backup system software Font List lists the fonts currently on the HDD These include the original fonts that came installed on the ColorPASS plu...

Page 104: ...gment takes approximately 7 to 10 minutes Wait for the Idle screen to display 10 Install any required software patches or updates according to the instructions provided with the patch or update CD Check the Update Information section of the Configuration page you printed earlier to see if there are any patches or updates that you need to reinstall For detailed installation instructions see the doc...

Page 105: ... reset to the default configuration when you install system software Font List lists the fonts currently on the HDD These include the original fonts that came installed on the ColorPASS plus any additional fonts that the customer may have installed All fonts are deleted when you restore or install system software The network administrator can use Fiery Downloader to reinstall customer supplied fon...

Page 106: ...s Wait 10 seconds then press the power button to power the ColorPASS back on After you power on the ColorPASS organizes the software on the system and then reboots once twice if the FACI option is enabled to complete software installation This segment takes approximately 7 to 10 minutes Wait for the Idle screen to display 8 Install any required software patches or updates according to the instruct...

Page 107: ... This chapter does not attempt to provide troubleshooting information for attached computers such as PCs or Mac OS computers for copiers or for extensive networks You should refer problems in these areas to the appropriate service departments and network administrators When performing the service procedures described in this chapter follow the precautions listed in Precautions on page xiii The ter...

Page 108: ...hecked the external and internal connections this section goes on to provide a comprehensive list of internal and external checks that may help you fix the problem This section includes the following Checking external connections on page 5 3 Describes the quick checks you can do to make sure the problem is not caused by a loose connection at the back of the ColorPASS Checking internal components o...

Page 109: ... see Figure 5 2 The power cable is plugged into the wall power outlet The LED on the network connector is blinking to indicate network activity FIGURE 5 2 Back panel of the ColorPASS If all the connectors are properly in place and the power is on proceed to the next stage of troubleshooting USB ports ES 1000 Keyboard option Not used Power cable connector Monitor option Serial port ED 100 Parallel ...

Page 110: ...own and open the ColorPASS page 4 4 and page 4 5 2 Before you touch any components inside the ColorPASS attach a grounding strap to your wrist and discharge any static electricity on your body by touching a metal part of the ColorPASS 3 Inspect the inside of the ColorPASS see page 4 11 Make sure no foreign materials have been dropped into the chassis Look for obviously loose boards and reseat each...

Page 111: ... TABLE 5 1 Verifying the system Conditions to verify Part and additional page references When problem occurs verify that Power switch is on Power cable is connected properly into the power outlet Chassis fans are operating Network link activity LED on RJ 45 connector is blinking All external cables required are present in correct connectors and well seated Cables cable connectors and mating connec...

Page 112: ... firmly attached Each fan required including fan cable is well positioned not upside down installed in the correct connector and appears undamaged Boards required on the motherboard are present well seated and in the correct slots Each DIMM is well seated Battery is installed BIOS is well seated Motherboard with Restore Update CD and single use dongle page 4 22 DIMM s is well seated DIMM edge conn...

Page 113: ...ards Installed in the correct connector Fan fan cable cable connector and mating connector appear undamaged Front panel fan page 4 42 The power supply required is Present Correctly installed Appears undamaged Cable connectors are Firmly connected Appear undamaged Installed in the correct devices Power supply page 4 43 TABLE 5 1 Verifying the system Conditions to verify Part and additional page ref...

Page 114: ...DE connector Appears undamaged Hard disk drive HDD page 4 46 The drive required is Present Correctly installed Appears undamaged Jumpered as the master secondary according to label Activity LED lights on power up DVD ribbon cable is Firmly connected to motherboard SEC_IDE Secondary IDE connector Appears undamaged DVD drive page 4 51 TABLE 5 1 Verifying the system Conditions to verify Part and addi...

Page 115: ...rect connector Is well seated Appears undamaged including connectors UIB cable page 4 12 HDD ribbon cable page 4 12 Copier interface cable page 3 3 DVD drive ribbon cable page 4 12 Power cable s page 2 6 TABLE 5 1 Verifying the system Conditions to verify Part and additional page references ...

Page 116: ...t Are installed in the correct connector Are well seated Appear undamaged including connectors For items below see the document included with the FACI kit if applicable Mouse if applicable Monitor if applicable Keyboard if applicable Monitor power cord not pictured TABLE 5 1 Verifying the system Conditions to verify Part and additional page references ...

Page 117: ...ing during the startup sequence note the screen displayed and then check Figure 5 3 on page 5 11 for the possible problems and suggested actions FIGURE 5 3 Normal startup sequence xx xx xx Server Name Please wait 54744MB X 0 Info Server Name Idle 54744MB X 0 Info Booting xx xx xx Code in motherboard BIOS tests initializes and configures areas on the motherboard System software on the HDD completes...

Page 118: ...e system to not function It is unlikely that both the HDD and the motherboard are defective therefore avoid replacing both to solve one problem If troubleshooting strategies checking cables and connections and so forth do not solve the problem and you suspect either the HDD or the motherboard are at fault use the following order to troubleshoot replace the HDD install system software and then chec...

Page 119: ...ives are receiving power from the power supply 3 Listen for the power supply fan and feel for air at the back of the unit where the power supply is located If you do not feel air from the power supply fan and the drives are not receiving power you may have a faulty power supply which you will need to replace see page 4 44 4 Check the vent on the back panel to make sure air is coming out the back o...

Page 120: ...e following Missing incorrect or faulty DIMM System software is corrupted Faulty HDD Faulty CPU Faulty motherboard 1 Recheck all cables and connections 2 Check for missing or faulty DIMM and reseat the DIMM to remove any oxidation on the connector see page 4 34 3 If the problem persists restore backup system software see page 4 57 4 If the problem persists reinstall system software see page 4 59 C...

Page 121: ...ld motherboard in the ColorPASS Control Panel Messages Check power cable appears on the Control Panel Possibly one of the following The copier is not powered on The copier is on but is not ready to print Problem with the connection between the ColorPASS and the copier 1 Make sure the copier is powered on and ready to print 2 Recheck that the copier interface cable is present and properly connected...

Page 122: ...rect dongle on the ColorPASS parallel port and repeat the system update procedure see page 4 32 2 Obtain a new dongle 3 If the problem persists and you are sure you have the correct dongle you may need to replace the motherboard see page 4 22 Hardware mismatch Shutdown in progress appears on the Control Panel This message is displayed if the BIOS chip from the old motherboard was transferred to th...

Page 123: ...may need to replace the motherboard see page 4 22 System performance System performs slowly and or hangs periodically Possibly one of the following Board or cable connections are loose or faulty System software is corrupted Missing or faulty DIMM s CPU is overheated or faulty Motherboard is faulty 1 Recheck all cables and connections 2 Make sure CPU is firmly seated in its socket and that the fan ...

Page 124: ...rPASS motherboard is faulty 1 If the green LED on the 10 100 1000BaseT port is not lit on the ColorPASS back panel check the cable connection to the back panel and the network Make sure the cable is the correct type 2 If the network cable is the correct type and is properly connected to the back of the ColorPASS connect a new network cable to the back of the ColorPASS 3 If the problem persists hav...

Page 125: ...If the network cable is the correct type and is properly connected to the back of the ColorPASS connect a new network cable to the back of the ColorPASS 3 If the problem persists have the network administrator change the default in ColorPASS Network Setup 4 If the problem persists make sure that the network administrator has checked other devices on the network If other devices are not functioning...

Page 126: ...ee page 3 16 One minute after the ColorPASS reaches Idle power the copier back on 3 If the problem persists replace the copier interface cable see page 3 3 4 If the problem persists replace the copier interface board see page 4 17 5 If the problem persists you may need to service the copier ColorPASS appears on the list of printers on the customer s workstation but certain jobs do not print A Post...

Page 127: ...vice if necessary see copier service documentation Print quality is poor Possibly one of the following A file or application problem 1 Print a ColorPASS Test Page see page 5 25 2 If the quality of the ColorPASS Test Page is good the error condition may be caused by a file or an application problem 3 Make sure the appropriate printer description file is installed For details see the User Software I...

Page 128: ...nu button once to display the Functions menu 2 Select Run Diagnostics from the Functions menu 3 At the Diagnostics screen select Test I F board 4 If the screen displays the message Video diags failed do the following Power off the ColorPASS and open the system Reseat the copier interface board Power on the ColorPASS and run the test again If the test still fails you may need to replace the copier ...

Page 129: ...his diagnostic to be available For more information see the Configuration Guide TO RUN TEST E MAIL 1 At the Idle screen press the Menu button once to display the Functions menu 2 Select Run Diagnostics from the Functions menu 3 At the Diagnostics screen select Test E mail The following screen appears on the Control Panel Print Pages Scan Job Suspend Printing Resume Printing Functions Shut Down Cle...

Page 130: ...e Status column A successful transmission indicates that the ColorPASS will be able to send an e mail over the network A failed transmission indicates a problem with the ColorPASS Setup options Have the Network Administrator confirm Setup options and see the Configuration Guide for more information Print Pages Scan Job Suspend Printing Resume Printing Functions Shut Down Clear Server Run Setup Run...

Page 131: ...t Page Examining the Test Page confirms that the ColorPASS is functional and that the connection between the ColorPASS and the copier is good When you examine the Test Page keep in mind that All color patches should be visible even though they may be very faint in the 5 and 2 range Each color s patch set should show uniform gradation from patch to patch as the color lightens from 100 to 0 Poor ima...

Page 132: ......

Page 133: ...ctor on the ColorPASS back panel is supported the unsupported connector is plugged to prevent inadvertent use Do not remove the plug User software A complete description of user software is provided in User Software Installation Guide For optimal performance current versions of the user software should be maintained on every network computer used to print to the ColorPASS Safety and emissions comp...

Page 134: ......

Page 135: ...only need to separate the pieces to replace damaged plastics You do not need to separate the pieces to open the ColorPASS for routine service TO DISASSEMBLE A SIDE PANEL 1 Shut down the ColorPASS see page 4 4 2 Remove the side panel see page 4 5 3 Place the panel on a flat padded surface 4 Remove the screw that attaches the metal piece to the plastic piece 5 Separate the metal and plastic pieces P...

Page 136: ...lace it on top of the plastic piece Align the hook and post holes in the metal piece with the hooks and posts on the plastic piece Press down and slide the metal piece to engage the hooks and posts 3 Attach the metal piece with the screw removed earlier FIGURE B 2 Assembling a side panel Hook holes 2 of 5 Post holes Posts Hook 1 of 5 Plastic piece Metal piece Screw ...

Page 137: ...4 5 3 Remove the screw that attaches the top panel to the chassis 4 Lift the top panel off of the chassis Slide the top panel toward the back panel of the chassis to disengage the hooks 5 Reverse these steps to replace the top panel with a new one FIGURE B 3 Removing replacing the top panel Top panel Chassis back panel Screw Hook ...

Page 138: ......

Page 139: ...ower supply 4 43 speaker 4 10 4 12 UIB ribbon 4 2 4 12 UTP 3 8 cancel printing 3 12 processing 3 12 category 5 cable 3 8 checklist for service calls 2 3 Color Charts 3 14 color management files 1 5 color reference files 1 5 components checking 5 4 exploded view 4 2 Configuration page 3 4 3 14 configuring Setup options 3 8 connections network 2 4 twisted pair 10 100 1000BaseT 3 8 connections checki...

Page 140: ... drive 4 51 to 4 53 removing 4 52 replacing 4 53 ribbon cable 4 12 4 52 E E mail diagnostics 3 15 5 23 E mail log 3 14 5 23 EMI approvals A 1 EPS files 1 3 errors check power and cable 5 20 hardware mismatch 4 33 5 16 no service dongle 4 33 5 16 unknown platform 4 33 5 16 used dongle 4 33 5 16 wrong missing dongle 4 33 5 16 ESD electrostatic discharge safety precautions xiii 4 11 Ethernet cable 3 ...

Page 141: ...local area network xiii 3 7 LED 2 7 3 9 to 3 10 4 19 line selection buttons 2 7 3 9 to 3 10 4 19 M media bracket 4 20 to 4 21 Media package 2 5 to 2 6 memory configuration 4 34 A 1 replacing 4 13 4 35 reseating 4 13 4 35 menu button 2 7 3 9 to 3 10 4 19 menus Functions 3 11 3 14 motherboard battery 4 23 4 40 cautions about replacing 4 26 connectors 4 7 4 11 4 23 description 4 22 DIMMs 4 13 4 34 to...

Page 142: ...nt screen 3 11 to 3 12 R reassembling the system 4 14 rebooting hard reset 3 17 reset rebooting hard 3 17 restarting soft 3 17 reset button 3 2 4 9 to 4 10 motherboard connector for 4 23 restarting soft reset 3 17 Restore Update CD restoring system software 4 56 to 4 57 updating system with new motherboard 4 29 4 32 Resume Printing option 3 15 reusable tie wrap 4 18 4 44 to 4 45 4 48 4 50 ribbon c...

Page 143: ...4 50 TIFF files 1 3 tools required for service installation xiv top panel B 1 troubleshooting preliminary on site checkout 5 2 twisted pair 10 100 1000BaseT 2 4 3 7 to 3 8 U unpacking 2 5 up button 2 7 3 9 to 3 10 4 19 updating the system 4 29 user documentation 2 5 to 2 6 user interface board UIB activity light 4 19 buttons on 4 21 description 4 19 display window 4 19 line selection buttons move ...

Page 144: ...I 6 Index ...

Reviews: