background image

Installation Services tool.  You may use the Remote Boot Installation Services tool only to deploy the SOFTWARE to
one or more DEVICEs on which you are licensed to run the SOFTWARE (i.e. DEVICEs to which the appropriate
Certificate of Authenticity is affixed).  Please refer to the DEVICE documentation, if provided with your DEVICE, or
contact Canon Electronics Inc. for additional information.

Security Updates.  

Content providers are using the digital rights management technology (“Microsoft DRM”) contained

in this SOFTWARE to protect the integrity of their content (“Secure Content”) so that their intellectual property,
including copyright, in such content is not misappropriated.  Owners of such Secure Content (“Secure Content Owners”)
may, from time to time, request MS, Microsoft Corporation or their subsidiaries to provide security related updates to the
Microsoft DRM components of the SOFTWARE (“Security Updates”) that may affect your ability to copy, display and/
or play Secure Content through Microsoft software or third party applications that utilize Microsoft DRM.  You therefore
agree that, if you elect to download a license from the Internet which enables your use of Secure Content, MS, Microsoft
Corporation or their subsidiaries may, in conjunction with such license, also download onto your DEVICE such Security
Updates that a Secure Content Owner has requested that MS, Microsoft Corporation or their subsidiaries distribute.  MS,
Microsoft Corporation or their subsidiaries will not retrieve any personally identifiable information, or any other
information, from your DEVICE by downloading such Security Updates.

NetMeeting/Remote Assistance/Remote Desktop Features. 

 The SOFTWARE may contain NetMeeting, Remote

Assistance, and Remote Desktop technologies that enable the SOFTWARE or other applications installed on the Device
to be used remotely between two or more computing devices, even if the SOFTWARE or application is installed on only
one Device.  You may use NetMeeting, Remote Assistance, and Remote Desktop with all Microsoft products; provided
however, use of these technologies with certain Microsoft products may require an additional license.  For both
Microsoft products and non-Microsoft products, you should consult the license agreement accompanying the applicable
product or contact the applicable licensor to determine whether use of NetMeeting, Remote Assistance, or Remote
Desktop is permitted without an additional license.

Consent to Use of Data.  

You agree that MS, Microsoft Corporation and their affiliates may collect and use technical

information gathered in any manner as part of product support services related to the SOFTWARE.  MS, Microsoft
Corporation and their affiliates may use this information solely to improve their products or to provide customized
services or technologies to you.  MS, Microsoft Corporation and their affiliates may disclose this information to others,
but not in a form that personally identifies you.

Internet Gaming/Update Features.  

If the SOFTWARE provides, and you choose to utilize, the Internet gaming or

update features within the SOFTWARE, it is necessary to use certain computer system, hardware, and software informa-
tion to implement the features.  By using these features, you explicitly authorize MS, Microsoft Corporation and/or their
designated agent to use this information solely to improve their products or to provide customized services or technolo-
gies to you.  MS or Microsoft Corporation may disclose this information to others, but not in a form that personally
identifies you.

Internet-Based Services Components.  

The SOFTWARE may contain components that enable and facilitate the use of

certain Internet-based services.  You acknowledge and agree that MS, Microsoft Corporation or their affiliates may
automatically check the version of the SOFTWARE and/or its components that you are utilizing and may provide
upgrades or supplements to the SOFTWARE that may be automatically downloaded to your Device.

Links to Third Party Sites. 

 The SOFTWARE may provide you with the ability to link to third party sites through the

use of the SOFTWARE.  The third party sites are not under the control of MS, Microsoft Corporation or their affiliates.
Neither MS nor Microsoft Corporation nor their affiliates are responsible for (i) the contents of any third party sites, any
links contained in third party sites, or any changes or updates to third party sites, or (ii) webcasting or any other form of
transmission received from any third party sites.  If the SOFTWARE provides links to third party sites, those links are
provided to you only as a convenience, and the inclusion of any link does not imply an endorsement of the third party
site by MS, Microsoft Corporation or their affiliates.

Additional Software/Services.  

The SOFTWARE may permit


Canon Electronics Inc., MS, Microsoft Corporation or

their affiliates to


provide or make available to you SOFTWARE updates, supplements, add-on components, or Internet-

based services components of the SOFTWARE after the date you obtain your initial copy of the SOFTWARE (“Supple-
mental Components”).

If Canon Electronics Inc. provides or makes available to you Supplemental Components and no other EULA
terms are provided along with the Supplemental Components, then the terms of this EULA shall apply.

If MS, Microsoft Corporation or their affiliates make available Supplemental Components, and no other EULA
terms are provided, then the terms of this EULA shall apply, except that the MS, Microsoft Corporation or
affiliate entity providing the Supplemental Component(s) shall be the licensor of the Supplemental
Component(s).

Canon Electronics Inc., MS, Microsoft Corporation and their affiliates reserve the right to discontinue any Internet-based
services provided to you or made available to you through the use of the SOFTWARE.

This EULA does not grant you any rights to use the Windows Media Format Software Development Kit (“WMFSDK”)
components contained in the SOFTWARE to develop a software application that uses Windows Media technology.  If
you wish to use the WMFSDK to develop such an application, visit http://msdn.microsoft.com/workshop/imedia/
windowsmedia/sdk/wmsdk.asp, accept a separate license for the WMFSDK, download the appropriate WMFSDK, and
install it on your system.

Summary of Contents for CD-4070NW

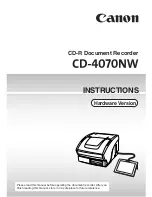
Page 1: ...Hardware Version CD R Document Recorder INSTRUCTIONS Please read this manual before operating the document recorder After you finish reading this manual store it in a safe place for future reference ...

Page 2: ...Do not make any changes or modifications to the equipment unless otherwise specified in the manual If such changes or modifications should be made you could be required to stop operation of the equipment Canon U S A Inc One Canon Plaza Lake Success NY 11042 U S A Tel No 516 328 5600 RADIO INTERFERENCE REGULATIONS For 120V models This digital apparatus does not exceed the Class B limits for radio n...

Page 3: ...permits official documents and private documents is also punishable Works such as books music paintings woodblock prints maps drawings films and photographs are used individually within households and in other equivalent limited scopes For this reason use other than for recording is forbidden This machine uses lithium batteries To protect the environment and natural resources contact your local au...

Page 4: ...at SOFTWARE is of US origin You agree to comply with all applicable international and national laws that apply to the SOFTWARE including the U S Export Administration Regulations as well as end user end use and country destination restrictions issued by U S and other governments For additional information on exporting the SOFTWARE see http www microsoft com exporting Limited Use of Particular SOFT...

Page 5: ...ze the Internet gaming or update features within the SOFTWARE it is necessary to use certain computer system hardware and software informa tion to implement the features By using these features you explicitly authorize MS Microsoft Corporation and or their designated agent to use this information solely to improve their products or to provide customized services or technolo gies to you MS or Micro...

Page 6: ...cribes the general features of the CD 4070NW It also explains how to scan documents and troubleshoot problems such as paper jams Instructions Software Version explains screen displays and how to use the touch panel Please read these manuals thoroughly before operating the document recorder in order to familiarize yourself with its capabilities and to make the most of its many functions After readi...

Page 7: ...oming unreadable In either case it is impossible to retrieve data from a damaged disc If you must write on the disc always use a felt tip pen or a pen with a soft point Also please be careful when handling discs 3 Make backups CD R discs can store a large volume of information Therefore a scratch on the disc can result in a large amount of data being lost We strongly recommend making frequent back...

Page 8: ... Eject Discs 23 Inserting Discs 23 Ejecting Discs 25 Chapter 4 Using the CD 4070NW Document Handling 27 Preparing the Paper Feed and Document Eject Trays 28 Setting the Document Eject Guide 29 Document Feeding 31 Patch Code Sheets 35 Patch Code Pattern Functions 35 Creating Patch Code Sheets 36 Using Patch Code Sheets 36 Chapter 5 Clearing Paper Jams 39 Chapter 6 Cleaning Cleaning the Exterior 41 ...

Page 9: ... operations that may lead to injury to persons or damage to property if not performed correctly In order to use the machine safely always pay attention to these cautions DISC SECURITY Indicates a precaution that you must observe to ensure that data recorded on a disc is safely managed IMPORTANT Indicates operational requirements and restrictions Be sure to read these items carefully in order to op...

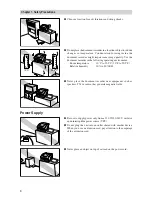
Page 10: ...eration maintenance and ventilation as shown in the illustration below The document recorder should not be exposed to direct sunlight If this is unavoidable install heavy curtains on the windows Do not locate the document recorder in dusty locations Dust entering the document recorder may adversely affect internal components Do not place the document recorder near locations subject to high tempera...

Page 11: ...ment Room temperature 10 C to 32 5 C 50 F to 90 5 F Relative humidity 20 to 80 RH Never place the document recorder near equipment such as speakers TVs or radios that generate magnetic fields Power Supply Be sure to supply power only from a 120 V 220 240 V outlet or an uninterruptible power source UPS Do not plug the unit into an outlet shared with another device When you use an extension cord pay...

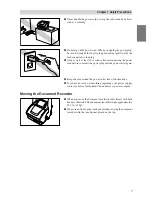
Page 12: ...wer cord before you insert the power plug into the power outlet again Keep the area around the power outlet free of obstructions If you are not sure of something regarding your power supply contact your local authorized Canon dealer or power company Moving the Document Recorder When you move the document recorder hold it firmly with both hands as illustrated The document recorder weighs approximat...

Page 13: ... use flammable aerosol products near the document recorder Before you clean the document recorder turn the power OFF and disconnect the power cord from the power outlet To clean the document recorder use a firmly wrung soft cloth moistened with water or a neutral detergent Never use flammable substances such as alcohol paint thinner or benzene If the document recorder exhibits abnormal symptoms in...

Page 14: ... electrical shock When you remove the power cord grip it by the plug head Never attempt to disconnect the power cord from the power outlet by pulling on the power cord Otherwise the power cord may become damaged by exposure of the core leads or broken leads and may cause a fire or electrical shock Keep the area around the power outlet clear of all obstacles so you can disconnect the power cord eas...

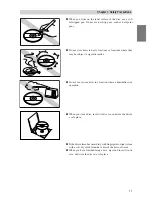
Page 15: ...ange Book DISC SECURITY Damaged discs whose data can no longer be read cannot be repaired Canon assumes no liability for damaged discs Never use scratched or chipped discs Doing so might damage the document recorder or cause it to malfunction Use only discs carrying the Recordable mark on this unit You cannot use discs carrying the ReWritable mark Handling Precautions Do not drop or subject discs ...

Page 16: ...y may be subject to cigarette smoke Do not use or store discs in a location where a humidifier is in operation When you store a disc insert it in its case and store the disc in a safe place If the disc surface becomes dirty with fingerprints wipe it clean with a soft dry cloth from the center of the disc outwards When you have finished using a disc eject and insert it in its case and store the dis...

Page 17: ...nd saves storage space Color Grayscale Support Documents can be scanned at 24 bit color and 256 level grayscale When scanning at 24 bit color 24 bit color scanning is supported only for the front side of the document If 24 bit color is selected and then both sides of a document are scanned the back side is scanned at 256 level grayscale Dropout Color Front Side Only This function lets you skip dro...

Page 18: ... Function on p 14 Uninterruptible Power Source UPS Support The document recorder provides support for a UPS so that even if power is suddenly lost while in use your important data is preserved without bringing the system down For details on how to use a UPS please contact your local authorized Canon dealer Barcodes Optional The barcode input assist function See Barcode Optional MICR and OCR Input ...

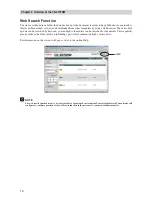
Page 19: ... can be searched by keyword so even high volume discs can be searched for documents This capability greatly reduces the labor involved in finding a particular document on high volume discs For information on the various web pages refer to the online Help NOTE The web search function needs to be configured for your network environment Your local authorized Canon dealer will configure or confirm ope...

Page 20: ...issing contact your local authorized Canon dealer 1 The power cord varies according to country of purchase 2 For U S A and Canada only The package contents may change without notice CD 4070NW Instructions Hardware Version Software Version Document Eject Guide Auxiliary Paper Support Plate CD R Disc for Recording Quick Reference Guide Power Cord 1 Warranty Card 2 ...

Page 21: ...nnecting the Network Cable and Peripherals on p 20 Power Switch Touch Panel See Touch Panel on p 18 and Touch Panel on p 19 CD R Drive L T R A 4 B 4 Document Eject Tray Extension Prevents ejected documents from falling Paper Feed Tray Place the document to be scanned on here Paper Feed Tray Extension Pull this tray out if the document hangs over the edge of the main tray Paper Side Guides Adjust t...

Page 22: ...dpi Back View RJ 45 Network Connector Connect a 10Base T 100Base TX twisted pair cable here 15 pin D Sub Connector Connect a VGA monitor here PS 2 Connector Purple Connect a PS 2 keyboard here PS 2 Connector Green Connect a PS 2 mouse here Power Cord Connector This is used for connecting the power cord supplied ...

Page 23: ...Dial Adjusts the screen contrast Stand Reset Switch Turns the power OFF when a malfunction or emergency occurs NOTE The unit disables discs from being ejected with the eject button See Ejecting Discs on p 25 CD R Drive CD Tray Eject Button Use when inserting a disc LED Lights when the drive is being used ...

Page 24: ...might scratch the screen surface and cause the screen to malfunction When touching buttons take care to touch only the required area Touching other areas on the screen may cause a malfunction You can use the stands to adjust the angle of the touch panel If a screen is not displayed when the power turns ON or there is no response by touching the touch panel push a long thin object such as the tip o...

Page 25: ...ct a mouse and keyboard before turning the scanner ON Your local authorized Canon dealer will configure or confirm the network settings in the presence of your network administrator A mouse and keyboard are required in order to configure the network environment and other settings Connecting the Power Cord Connect the power cord provided with the document recorder to the power connector on the rear...

Page 26: ...ON 2 The Startup screen is displayed followed by the Main screen IMPORTANT Do not touch the document recorder or touch panel until the Main screen is displayed If at least 5 seconds have elapsed after turning the power on and the touch panel still remains blank press the reset switch located at the rear of the toch panel If after you turn the power back ON again nothing is still displayed please c...

Page 27: ...s disconnect the power cord from the power outlet beforehand for safety NOTE Always remove the CD R disc before exiting the application Always wait at least 10 seconds after turning the power OFF before you turn the power back ON 1 Press Quit on the Main screen The Quit confirmation message is displayed 2 Press OK NOTE If a disc is loaded an Error message is displayed Press OK Eject OK remove the ...

Page 28: ...the Eject button on the Main screen and remove the disc See Ejecting Discs on p 25 2 Place the disc in the CD tray with the label facing up DISC SECURITY When handling CD R discs never touch the label side Data is recorded on the label side of the CD R If the label side becomes dirty or scratched any data on the disc may be lost If this happens lost data cannot be recovered so be careful when hand...

Page 29: ...e disc that was inserted Blank disc Today s date is assigned as the initial value for the disc s name For details on how to change the disc name see the CD R Document Recorder CD 4070NW Instructions Software Version Loaded disc The volume of data on the disc is displayed in blue Protected or Locked disc You cannot write documents to a disc indicated by this icon Abnormal disc The CD 4070NW cannot ...

Page 30: ... it Do not touch the unit until writing to the disc has completed normally 1 Press Eject on the Main screen The Eject Disc screen is displayed NOTE Do not use the eject button on the CD drive to eject a disc The document recorder disables discs from being ejected with the eject button 2 Press OK Data that is not already written to the disc is now written NOTE Selecting Inhibit re write in the Ejec...

Page 31: ...SECURITY After ejecting a disc insert it in its case and store in a safe place Damaged discs whose data can no longer be read cannot be restored Canon assumes no liability for damaged discs 5 Press the eject button or lightly push the CD tray to close it ...

Page 32: ...kness and weight Documents whose ink has not yet dried may cause a malfunction Make sure that the ink has dried before the original is scanned Graphite from the surface of a document written in pencil may stain the scanning rollers After scanning an document written in pencil or some other sort of writing material be sure to clean the scanning rollers When recording both sides of documents made fr...

Page 33: ... tray toward you CAUTION Other than documents do not place heavy objects on the paper feed tray Doing so may result in them falling unexpectedly causing injury or damaging the document recorder 3 If you are going to scan long originals pull out the paper feed tray extension 4 Hold the edge of the document eject tray extension and open it LTR A4 B4 LTR A4 B4 LTR A4 B4 ...

Page 34: ...ot using the document recorder close the paper feed tray and document eject tray extension to avoid damage to the document recorder Setting the Document Eject Guide To avoid paper jams when scanning thin or long documents set the document eject guide supplied with the document recorder 1 Hold the edge of the document eject tray extension and open it 2 Attach the auxiliary paper support plate to th...

Page 35: ... eject guide follow the above procedure in reverse NOTE After the original eject guide is set in place the method of scanning is the same as when you make regular scans However note that particularly thick and rigid documents may not stack on the extension easily In this case we recommend removing the document eject guide before use Before you close the document eject tray extension or paper feed ...

Page 36: ...g Documents are recorded by loading one page at a time manually into the paper feed tray Use when scanning documents made from paper that does not feed properly paper that is prone to cause paper jams or from thin paper CAUTION Avoid wearing loose baggy clothing and accessories that may become caught on the document recorder during operation Clothing or accessories may become entangled in the docu...

Page 37: ...ted the paper feed tray exit raises ready for manual feeding Standard and Automatic Feeding 5 Adjust the paper side guides to match the width of the document you are going to scan If you are recording standard size documents align the document with the document positioning mark NOTE To avoid paper jams do not set the edge of the document in the area shown in the illustration LTR A4 B4 LTR A4 B4 ...

Page 38: ... Document Recoder CD 4070NW Instructions Software Version Recording starts NOTE If feeding stops while recording due to a system error or paper jam resolve the problem confirm that the last document page fed was correctly recorded and then continue recording Take care that documents with low paper thickness do not fall from the document eject tray 8 When no more document pages remain If you select...

Page 39: ...o specify the recording name see CD R Document Recorder CD 4070NW Instructions Software Version 7 Place one sheet face up with the top inserted into the document recorder The sheet starts to feed immediately NOTE Particularly thin documents or curled documents are sometimes not fed successfully If this happens hold down the leading edge of the document with your hand when placing them for scanning...

Page 40: ...he patch code detected the file is automatically segmented NOTE For information on using patch code sheets see the CD R Document Recorder CD 4070NW Instructions Software Version Patch Code Pattern Functions The following two patch codes work in different ways PATCH T FILE A When this pattern is detected on a patch code sheet file segmentation occurs from the next document Sheets printed with this ...

Page 41: ...n the detectable area specified below Units inches units in parentheses are millimeters 0 2 5 mm 3 7 94 mm 0 2 5 mm 0 2 5 mm Patch Code Range in which patch code detection is enabled Take care not to get patch code sheets dirty especially within the detectable area In order for the sheets to be scanned properly make sure they do not get folded or crumpled If the image density is too light or dark ...

Page 42: ...een is displayed 4 Press Mode The Set recording mode screen is displayed 5 Press More The More Settings screen is displayed 6 Specify the Batch Separation settings press OK The Set recording name screen is displayed NOTE Selecting Manual for Paper supply disables segmentation using patch sheets ...

Page 43: ... paper feed tray 8 Specify the recording name press Start Recording starts and files are segmented whenever a patch code is detected on a page For information on how to specify the recording name see CD R Document Recorder CD 4070NW Instructions Software Version LTR A4 B4 ...

Page 44: ...utting your hand on the edge of the paper 1 Remove the documents on the document eject tray 2 Close the document eject tray extension if it is open If the document eject guide is installed there is no need to remove it and close the document eject tray extension Proceed to the next step 3 Raise the top of the document feeder until it locks in the open position Clearing Paper Jams Chapter 5 LTR A4 ...

Page 45: ...med paper Remove it carefully If the paper becomes ripped be sure to remove any remaining paper scraps in the document recorder 5 Grasp the top of the document feeder and push it down gently into the original position 6 Push down on top of the document feeder until you hear it lock into the closed position NOTE After the problem is resolved confirm that the last page was recorded before continuing...

Page 46: ...lso cause a fire or electrical shock Cleaning the Exterior Clean off any dirt on the document recorder s exterior using a firmly wrung soft cloth moistened with water or a neutral detergent Then wipe dry with a clean dry soft cloth Cleaning the Touch Panel Clean the edges and rear of the touch panel using a firmly wrung soft cloth moistened with water or a neutral detergent Then wipe dry with a cl...

Page 47: ...document eject tray extension if it is open 2 Raise the top of the document feeder until it locks in the open position 3 Use a clean dry soft cloth to wipe the scanning glasses areas illustrated by CAUTION Be sure to clean both scanning glasses the one below and the one above Never spray cleaning agents or water directly on the scanning glasses Otherwise precision equipment such as the light sourc...

Page 48: ...e the rollers areas illustrated by with a firmly wrung soft cloth moistened with water Turn all the rollers in the directions shown in the illustration at 1 2 and 3 as you wipe them clean Then wipe dry with a clean dry soft cloth ...

Page 49: ...lease contact your local authorized Canon dealer Cannot Operate the Document Recorder Press the reset switch located at the rear of the touch panel to turn the power OFF in the following situations See Touch Panel on p 19 If the touch panel cannot be used due to a system error for example If the touch panel display freezes and or access to the CD R drive LED lights takes a long time Pressing Quit ...

Page 50: ...directly from the CD 4070NW or over the Web possible causes are given below Confirm each possible cause and take the appropriate action Cause You tried searching a disc just after inserting it in the CD 4070NW Action The search index is still being built Wait a while without operating the CD 4070NW until this operation finishes Cause The system was shut down uncleanly e g due to a power outage whi...

Page 51: ...200 dpi Color 200 x 200 dpi 100 x 100 dpi Scanning Speed Document Size LTR A4 LTR A4 Black and White Simplex 300 x 150 dpi 43 pages minute 42 pages minute 200 x 200 dpi 32 pages minute 32 pages minute 240 x 240 dpi 27 pages minute 26 pages minute 300 x 300 dpi 21 pages minute 21 pages minute Duplex 300 x 150 dpi 87 sides minute 85 sides minute 200 x 200 dpi 65 sides minute 64 sides minute 240 x 24...

Page 52: ...ns With Stand Closed 1 8 x 8 3 x 6 7 H x W x D 46 7 mm x 210 6 mm x 169 mm H x W x D With Stand Open 4 1 x 8 3 x 7 1 H x W x D 103 mm x 210 6 mm x 181 mm H x W x D Weight Approximately 33 1 lb 15 kg Power Supply 120 V AC 60 Hz 0 7 A 220 240 V AC 50 60 Hz 0 4 A Noise Not more than 65 dB Operating Environment Temperature 10 C to 32 5 C 50 F to 90 5 F Humidity 20 to 80 RH Network Network Microsoft Wi...

Page 53: ...1 mm 6 7 169 mm 4 1 103 mm 10 4 265 mm 9 3 237 mm 12 5 318 mm 8 3 210 6 mm 13 9 352 mm 16 2 412 mm 1 8 46 7 mm Cable length approximately 39 1000 mm When the paper feed tray and paper feed tray extension are open When the auxiliary paper support plate is installed Touch Panel With Stand Extended Touch Panel With Stand Flat ...

Page 54: ...W 27 Web search function 14 Air Vent 16 Auxiliary paper support plate 29 Backup management 13 Barcodes 13 CD R drive 16 18 CD tray 18 Cleaning 41 Exterior 41 Rollers 42 Scanning glasses 42 Touch panel 41 Connecting peripherals 20 Specifications 46 Contrast dial 18 Consumables 47 Disc Handling 10 Inserting discs 23 Ejecting discs 25 Document 27 Document eject guide 15 Document eject tray 16 28 Docu...

Page 55: ...Chapter 8 Appendix 50 MEMO ...

Page 56: ...Chapter 8 Appendix 51 Patch code patterns For details on how to use these patterns see Patch Code Sheets on p 35 PATCH T FILE A PATCH II FILE B ...

Page 57: ...0 EG AMSTELVEEN THE NETHERLANDS CANON LATIN AMERICA INC 703 WATERFORD WAY SUITE 400 MIAMI FLORIDA 33126 U S A CANON AUSTRALIA PTY LTD 1 THOMAS HOLT DRIVE NORTH RYDE SYDNEY N S W 2113 AUSTRALIA CANON SINGAPORE PTE LTD 1 HARBOUR FRONT AVENUE 04 01 KEPPEL BAY TOWER SINGAPORE 098632 CANON HONGKONG COMPANY LTD 19TH FLOOR THE METROPOLIS TOWER 10 METROPOLIS DRIVE HUNGHOM KOWLOON HONG KONG PUB CE IE 444 0...

Reviews: