


Checking the Package Contents
1
Scanner
2
USB Interface Cable
3
Stand
4
CanoScan Setup Utility CD-ROM
5
Quick Start Guide
Vérification du contenu de l’emballage
1
Scanner
2
Câble d’interface USB
3
Support
4
CD-ROM de l’Utilitaire d’installation CanoScan
5
Guide de démarrage rapide
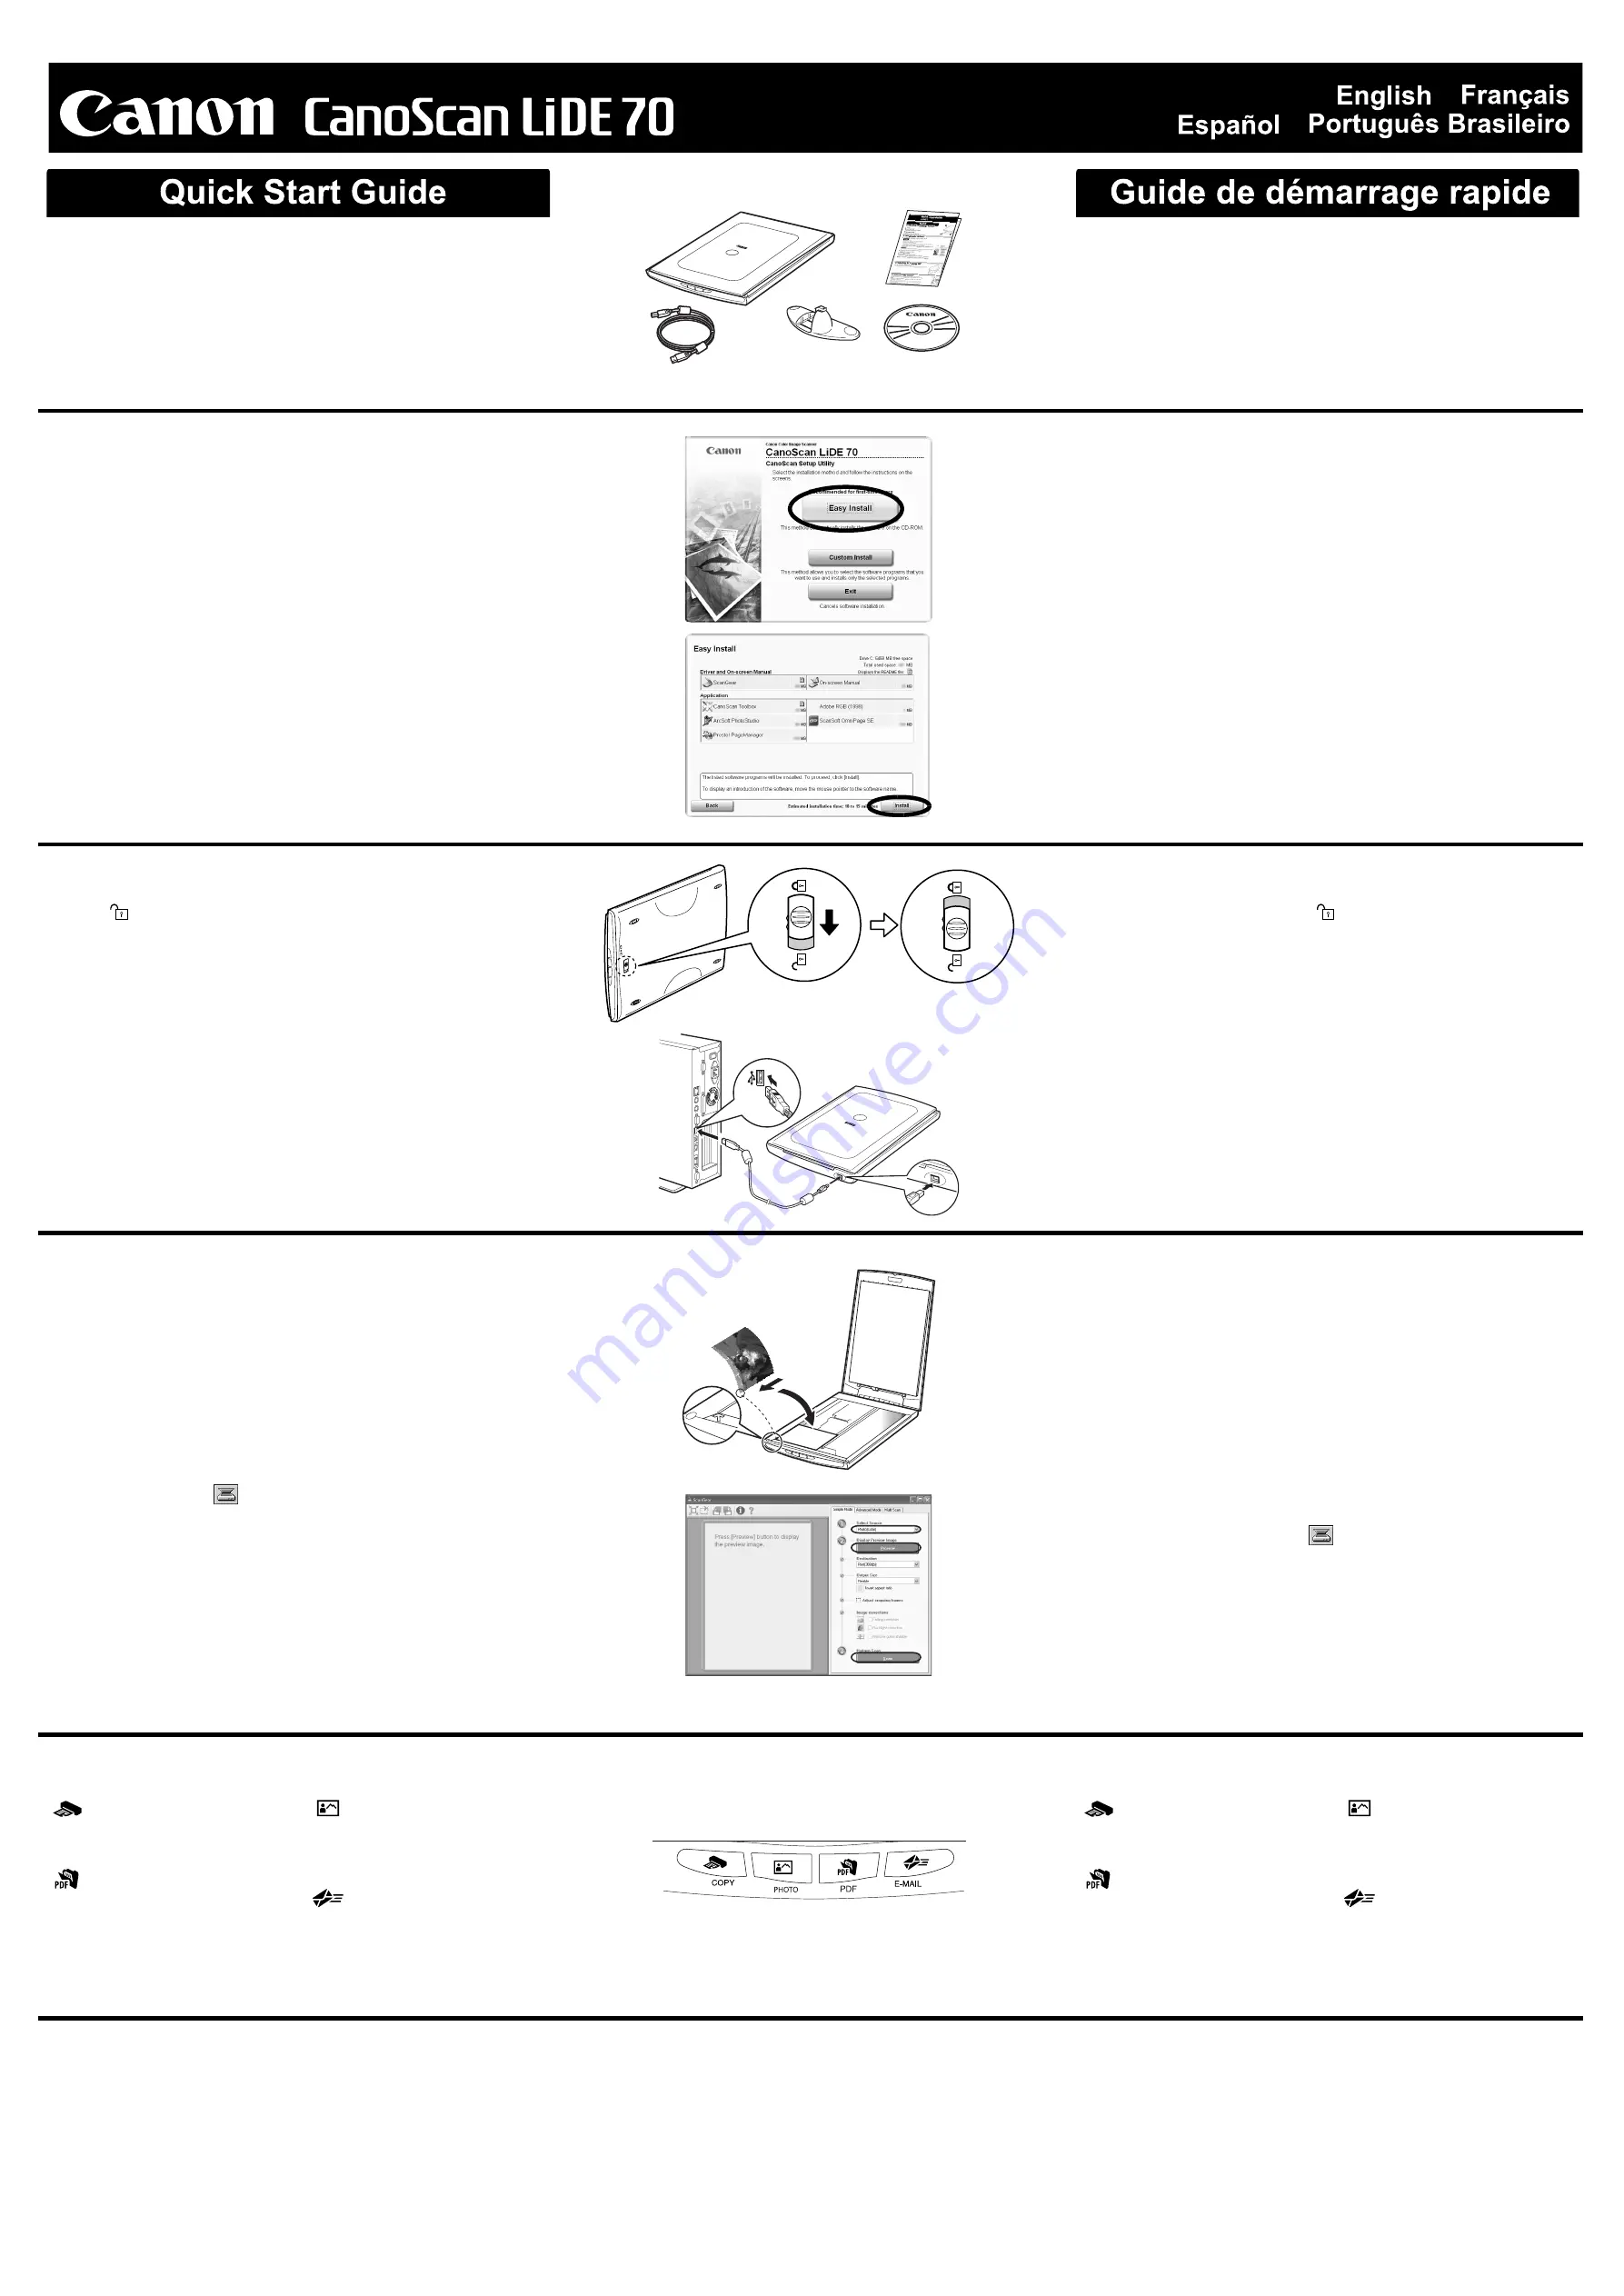
Installing the Software
• Do NOT connect the scanner to a computer before installing the software.
• Quit all running applications before installation, including anti-virus software.
• For Windows 2000/XP, log in as an administrator to install the software.
1
Place the CanoScan Setup Utility CD-ROM in the drive.
If prompted, select your language and place of residence.
CanoScan Setup Utility program starts.
• For Macintosh: Double-click the [Setup] icon. Enter the administrator ID and
password on the authentication dialog box.
2
Click [Easy Install] on the main menu.
3
Click [Install] to start installation.
Carefully read the License Agreement, and then click [Yes] to proceed.
4
Follow the on-screen instructions to perform the installation.
5
When the installation is complete, click [Restart] to restart your computer.
Installation du logiciel
• Ne connectez PAS le scanner à un ordinateur avant d’installer le logiciel.
• Quittez toutes les applications en cours avant l’installation, notamment le logiciel
antivirus.
• Sous Windows 2000/XP, ouvrez une session en tant qu’administrateur pour
installer le logiciel.
1
Placez le CD-ROM de l’Utilitaire d’installation CanoScan dans le lecteur.
Si vous y êtes invité, sélectionnez votre langue et votre lieu de résidence.
L’Utilitaire d’installation CanoScan démarre.
• Sous Macintosh : cliquez deux fois sur l’icône [Setup] (Installation). Entrez l’ID
d’administrateur et le mot de passe dans la boîte de dialogue d’authentification.
2
Cliquez sur [Easy Install] (Installation rapide) dans le menu principal.
3
Cliquez sur [Install] (Installer) pour démarrer l’installation.
Lisez attentivement le contrat de licence, puis cliquez sur [Yes] (Oui) pour
continuer.
4
Suivez les instructions affichées pour mener à bien l’installation.
5
Une fois l’installation terminée, cliquez sur [Restart] (Redémarrer) pour
relancer votre ordinateur.
Preparing the Scanner
1
Slide the lock switch on the bottom of the scanner toward the unlock
mark (
).
• Always lock the scanner when carrying or transporting it.
2
Connect the scanner to the computer with the supplied USB cable.
• Only use the USB cable provided with the scanner. Use of other cables may
lead to a malfunction.
• The scanner does not have a power switch. The power is activated as soon as
the computer is turned on.
• When the scanner is connected to the USB 1.1 port on Windows XP and
“HI-SPEED USB Device Plugged into non-HI-SPEED USB Hub” message
appears, ignore the message. The scanner operates in this condition without
problems.
Préparation du scanner
1
Faites glisser le bouton de verrouillage situé sur le dessous du scanner
vers le repère de déverrouillage (
).
• Verrouillez toujours le scanner lorsque vous le portez ou le transportez.
2
Raccordez le scanner à l’ordinateur à l’aide du câble USB fourni.
• Utilisez exclusivement le câble USB fourni avec le scanner. L’utilisation
d’autres câbles peut provoquer un dysfonctionnement.
• Le scanner n’est pas doté d’un interrupteur. Il est activé dès que l’ordinateur
est mis sous tension.
• Si le scanner est raccordé au port USB 1.1 sous Windows XP et si le
message « Périphérique USB à haut débit connecté à un concentrateur USB
à débit réduit » s’affiche, ignorez-le. Le scanner fonctionne ainsi sans
problème.
Try Scanning
1
Place a document on the document glass and close the document cover.
2
Start ArcSoft PhotoStudio.
For Windows: Select [start]-[(All) Programs]-[ArcSoft PhotoStudio 5.5], then
click [PhotoStudio 5.5].
For Macintosh: Open [Applications]-[PhotoStudio] folders, then double-click the
[PhotoStudio] icon.
3
Click [File] menu, [Select Source] and select the scanner model.
For Windows: Do not select the one that includes [WIA] in the model name.
4
Click the acquire icon
to start ScanGear.
5
Select the type of document you are scanning in [Select Source] and
click [Preview].
6
Click [Scan] to start scanning.
• Do not move the scanner while it is operating.
7
When prompted to close ScanGear, click [OK].
8
Save the scanned image in ArcSoft PhotoStudio and close the window.
Essai de numérisation
1
Posez un document sur la vitre du scanner et fermez le couvercle du
scanner.
2
Lancez ArcSoft PhotoStudio.
Sous Windows : sélectionnez [start] (Démarrer) - [(All) Programs] ((Tous les)
Programmes
)
- [ArcSoft PhotoStudio 5.5], puis cliquez sur [PhotoStudio 5.5].
Sous Macintosh : ouvrez les dossiers [Applications] - [PhotoStudio], puis
cliquez deux fois sur l’icône [PhotoStudio].
3
Dans le menu [File] (Fichier), cliquez sur [Select Source] (Sélectionner
source) et sélectionnez le modèle du scanner.
Sous Windows : ne sélectionnez pas un nom de modèle contenant [WIA].
4
Cliquez sur l’icône d’acquisition
pour lancer ScanGear.
5
Sélectionnez le type de document que vous numérisez dans [Select
Source] (Sélectionner source) et cliquez sur [Preview] (Aperçu).
6
Cliquez sur [Scan] (Numériser) pour lancer la numérisation.
• Ne touchez pas le scanner pendant son fonctionnement.
7
Si vous êtes invité à fermer ScanGear, cliquez sur [OK].
8
Enregistrez l’image numérisée dans ArcSoft PhotoStudio et fermez la
fenêtre.
Using the Scanner Buttons
Utilisation des touches du scanner
Refer to the Scanning Guide (on-screen manual) for further information
about ScanGear, CanoScan Toolbox, Scanner Buttons, Troubleshooting
and Setting the Stand. To start the Scanning Guide, double-click the on-
screen manual icon on the desktop.
In this guide, Windows XP screen shots are used to illustrate explanations
common to all operating systems.
Reportez-vous au Guide de numérisation (manuel en ligne) pour plus
d’informations sur ScanGear, CanoScan Toolbox, les touches du scanner,
le dépannage et le réglage du support. Pour démarrer le Guide de
dépannage, double-cliquez sur l’icône du manuel en ligne, sur le bureau de
l’ordinateur.
Dans ce guide, des captures d’écran provenant de Windows XP sont
utilisées pour illustrer les explications communes à tous les systèmes
d’exploitation.
/
/
1
4
5
2
3
Top
Haut
Bottom
Bas
COPY Button
Prints (copies) the scanned image
with a printer.
PDF Button
Saves the scanned image as a PDF
file.
PHOTO Button
Opens the scanned image in the
bundled application program,
ArcSoft PhotoStudio.
E-MAIL Button
Attaches the scanned image to a
new e-mail message.
QT5-0804-V02 ©CANON INC. 2007 PRINTED IN VIETNAM
IMPRIME AU VIETNAM
• For Mac OS X 10.3/10.2.8: Refer to Troubleshooting in the Scanning Guide (on-
screen manual) before using.
Touche COPY
Imprime (copie) l’image numérisée à
l’aide d’une imprimante.
Touche PDF
Enregistre l’image numérisée sous la
forme d’un fichier PDF.
Touche PHOTO
Ouvre l’image numérisée dans
l’application livrée, ArcSoft
PhotoStudio.
Touche E-MAIL
Joint l’image numérisée à un
nouveau message électronique.
• Sous Mac OS X 10.3/10.2.8 : reportez-vous à la section Dépannage du Guide de
numérisation (manuel en ligne) avant utilisation.


