


20
Print Head Maintenance
If Blurring Occurs or If a Specific Color Does Not Print
Perform
Print Head Cleaning
to improve the print quality. Ensure that the printer is turned on and
follow the instructions below.
• Windows: Open the printer driver settings screen and click the
Maintenance
tab. Click
Cleaning
. See page 12 for details on how to open the setting screen.
• Macintosh: Open the
BJ Printer Utility
dialog box and ensure that
Cleaning
is selected from
the pop-up menu. Click
Cleaning
. See page 13 for details on how to open the BJ Printer Utility.
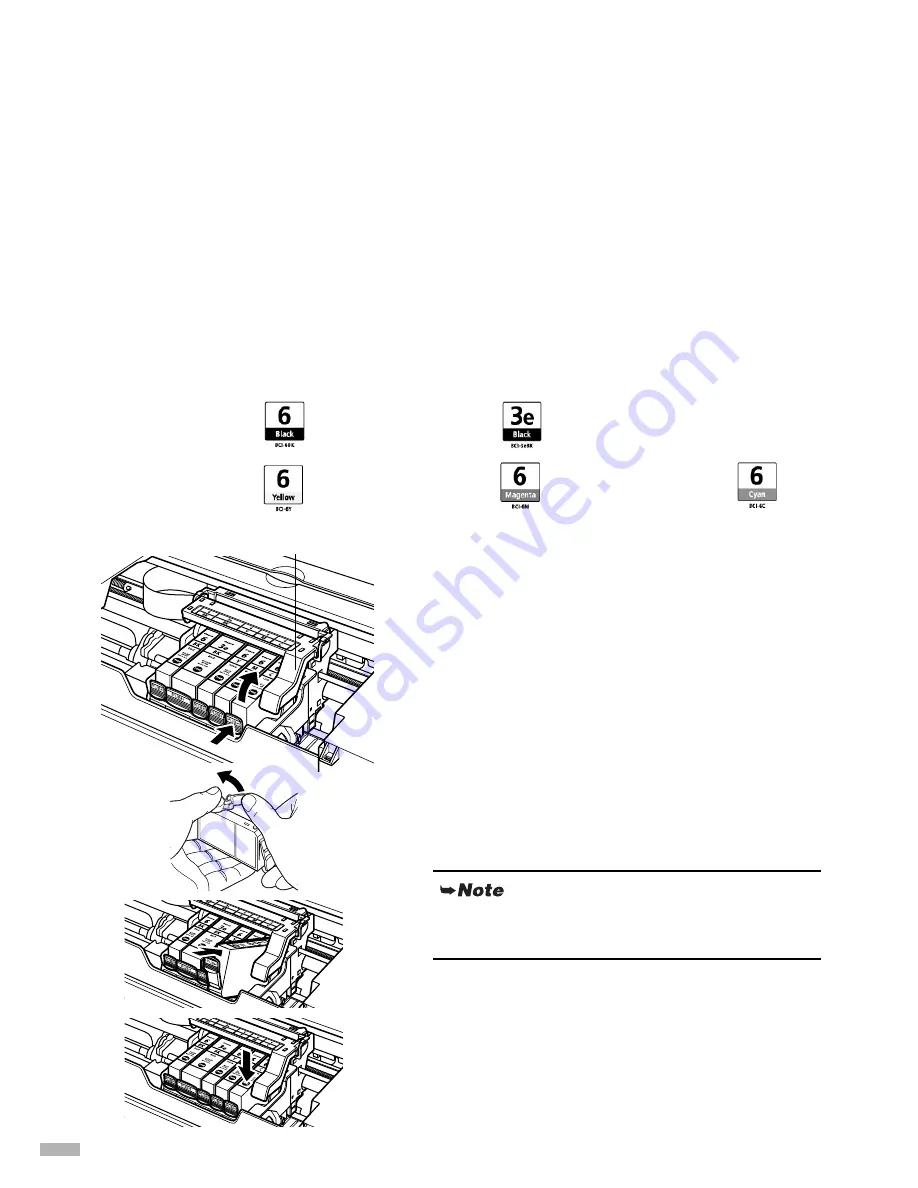
When the Printer Runs out of Ink
Replace the empty ink tank with a new one. Specify the following ink tanks when purchasing.
1
Open the Paper Output Tray.
2
Open the Top Cover and pull down the
Inner Cover, then remove the empty ink
tank.
Do not touch the Print Head Lock Lever.
3
Install the new ink tank.
Put back the Inner Cover and close the Top Cover when
finished.
Black : BCI-6BK
Black : BCI-3eBK
Yellow : BCI-6Y
Magenta : BCI-6M
Cyan : BCI-6C
For more details about maintenance, refer to the
User’s Guide
.
Print Head Lock Lever
Summary of Contents for 9615A001
Page 30: ......


