15
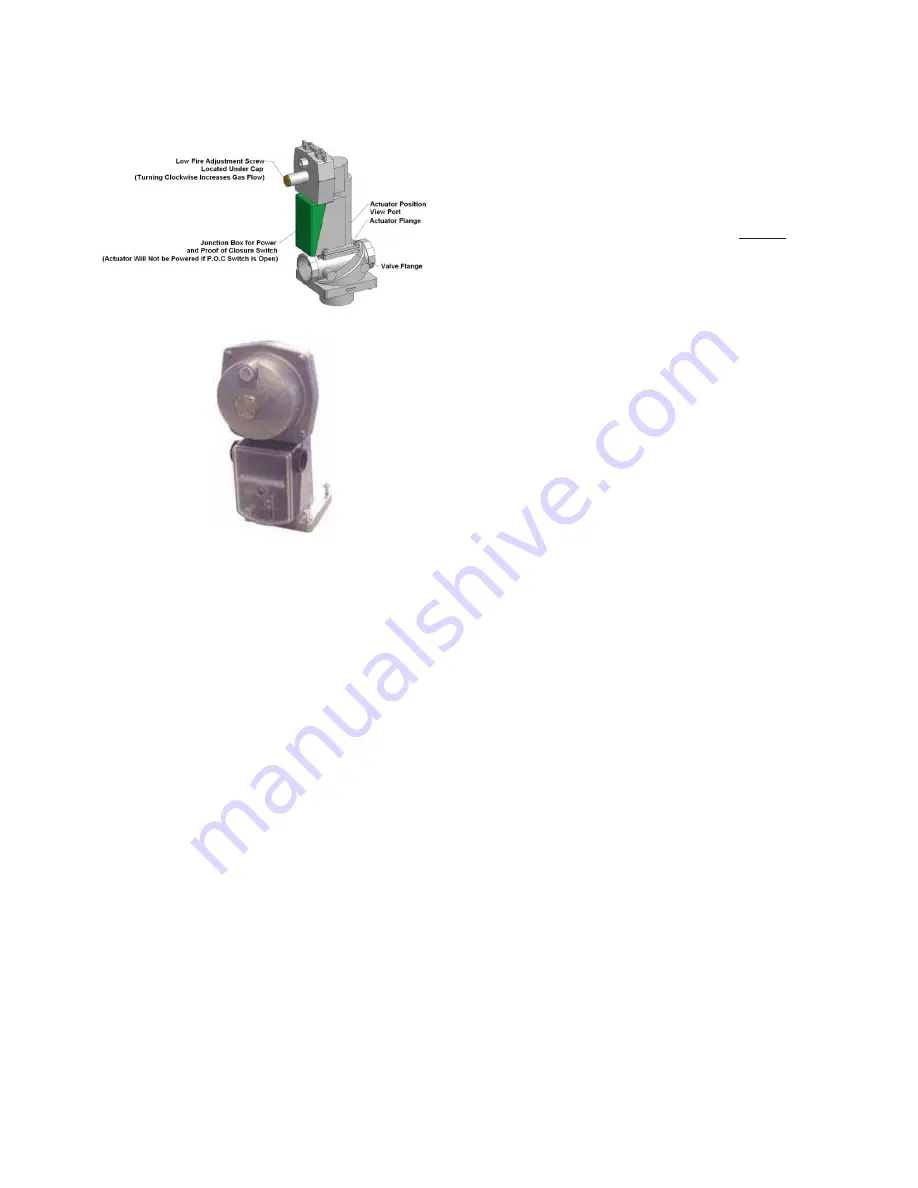
Figure 9: DF2000-60041:1 Air/Gas Ratio Control Valve
Figure 10: DR3500 – 5000 SKP25 Regulating Gas
Valve Actuator &SSOV
3.5 DIFFERENTIAL AIR PRESSURE (DF2000 -6004)
•
The DynaFlame® operates on the principle of differential
pressures. Operation of the fan generates a signal which
is matched on the gas side by the 1 to 1 air/gas ratio
control valve.
•
The differential air pressure measurement is made
between the high and low pressure taps across the fan
discharge and the flue vent. All differential air pressures
are noted at full firing rate. There are two pressure taps at
the fan discharge and care must be taken to tee into the
correct line. The correct line may be identified by tracing it
back to the ratio control valve where the identification of
the tapping is stamped into the die cast actuator.
•
The differential gas pressure measurement is made
between the high and low pressure taps across the in- line
metering gas orifice. Check this value to confirm that it
matches the differential air pressure while the appliance is
firing.
•
The controls on this appliance may fire the burner from
35% up to 100% for non-condensing and from 20% up to
100 % for near-condensing and condensing of rated input.
•
Differential manifold gas pressure will be reduced as
burner input is reduced.
•
All reference gas pressure measurements must be made
at 100% of rated burner input.
•
The differential gas manifold pressure is pre-set at the
factory through the ratio gas valve. Adjustment of manifold
pressure is not normally required for proper operation. In
the field it may be necessary to adjust the low fire
adjustment screw located on the ratio control valve
actuator in order to achieve acceptable light off under soft
start field conditions.
•
Always check settings posted on boiler test label.
3.6
GAS MANIFOLD DIFFERENTIAL
PRESSURE ADJUSTMENT (DF2000 –
DF6004)
Tampering with gas valve adjustments after startup and
commissioning will void the warranty on the gas valve
assembly and the burner.
The appliance’s manifold gas pressure IS NOT field
adjustable after startup and commissioning. The gas valve
pressure ratios have been factory set with an internal bias
adjustment to ensure a 1:1 air/gas ratio on operation.
Tampering with this adjustment by a non-factory trained
technician will void the warranty on the gas valve
assembly and the burner. An appliance supplied with a
properly sized gas line, properly sized meter and a
minimum gas supply pressure (See Table 8 for minimum
allowable inlet gas supply pressure) while firing at full rate
will ensure full burner input. The manifold pressure
supplied to the burner is a differential pressure. This
pressure is the result of the difference in two gas pressure
measurements. A differential manifold gas pressure
measurement should not be made until you have
measured the gas supply pressure. Gas supply pressure
must be at least at minimum allowed with all appliances on
the gas line firing at full rate before a manifold pressure
measurement is made. Use the following procedure to
check gas supply pressure with a manometer connected
to the inlet pressure tap on the gas line connection at the
rear of the appliance.
3.7
CHECKING GAS SUPPLY PRESSURE
•
Turn the main power switch to “OFF” position.
•
Shut off gas supply at the manual gas cock in the gas
piping to the appliance. If fuel supply is LP gas, shut
off gas supply at the tank.
•
Models 500 – 3000: Remove the 1/8" hex plug from
the gas pressure test port located on the inlet gas
supply connection at the rear of the appliance. Install
a fitting in the inlet pressure tapping suitable to
connect to a manometer or magnahelic gauge. Range
of scale should be 0 to 14 inch W.C. or greater to
check inlet pressure
•
Models 3500 – 5000: Remove the 1/8” hex plug
downstream of the SKP25. Install a fitting in the inlet
pressure tapping suitable to connect to a manometer
or magnahelic gauge. Range of scale should be 0 to
14 inch W.C. or greater to check inlet pressure
•
Turn on gas supply at the field installed manual gas
cock; turn on LP gas at tank if required.
•
Turn the power switch to “ON” position.
•
Adjust the thermostat set point to call for heat.
•
Observe the gas supply pressure as the burner fires
at 100% of rated input.
•
Ensure inlet pressure is within specified range.
Minimum and maximum gas supply pressures are
specified in Gas Supply section of this manual.
•
If gas pressure is out of range, contact the gas utility,
gas supplier, qualified installer or service agency to
determine necessary steps to provide proper gas
pressure to the control.
•
If gas supply pressure is within normal range, proceed
to remove gas manometer and replace pressure tap
fittings in the gas piping to the appliance.
•
Turn on gas supply at the manual valve; turn on LP
gas at tank if required.
Summary of Contents for DFH/W500
Page 2: ......
Page 40: ...35...
Page 71: ...66 PART 12 EXPLODED VIEW...
Page 72: ...67 3 44 10 45 46 47 28 31 26 52 57 58 59 54 60 61 SOLA Control Panel 39 4...
Page 82: ...77 PART 13 ELECTRICAL DIAGRAMS...
Page 83: ...78...
Page 85: ...80...
Page 86: ...81...
Page 87: ...82...


