background image

14

FR

Renvoi secteur sur embase IEC. Permet d‘alimenter d‘autres projecteurs CAMEO, branchement en cascade. Assurez-vous que la consommation 

totale de tous les appareils connectés ne dépasse pas la valeur en Ampères (A) indiquée sur l‘appareil. 

ES

Toma IEC de salida. Sirve para alimentar otros focos CAMEO. Asegúrese de que el consumo total de todos los equipos conectados no supere los 

amperios especificados del equipo. 

PL

Gniazdo sieciowe wyjściowe IEC. Gniazdo służy do zasilania dodatkowych reflektorów CAMEO. Należy upewnić się, że całkowity pobór mocy 

wszystkich podłączonych urządzeń nie przekracza wartości podanej na urządzeniu w amperach (A). 

IT

Presa di uscita rete IEC. Serve per l'alimentazione elettrica di altri fari CAMEO. Assicurarsi che il totale della potenza assorbita di tutti i 

dispositivi collegati all'apparecchio non superi il valore indicato in Ampere (A). 

OPERATION / BEDIENUNG / UTILISATION / OPERACIÓN / OBSŁUGA / UTILIZZO

EN

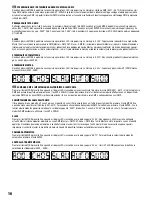
DMX CONTROL AND ADJUSTMENT OF DMX START ADDRESS

Press the MODE button repeatedly until the LED indicator lights up and displays the DMX start address on the display (A001 - A512). The DMX start 

address can be adjusted as desired by using the UP and DOWN buttons. The synchronous control of several projectors of the same model through a 

DMX controller (eg DMX console) can be achieved by adjusting the projectors on an identical DMX-starting address and connecting them using DMX 

cables.

CONVERSION OF THE DMX MODE

The projector has a 2-channel and 5-channel mode. If you want to switch between these two modes, press the MODE button repeatedly until they 

reach the address selection (A001-A512). To enter the submenu, select the DMX mode and press the ENTER button. Depending on the operating 

mode, either “CH02” (2-channel mode) or “CH05” (5-channel mode) will appear on the display. Use the UP and DOWN buttons to select the desired 

DMX mode. 

SLAVE

Press the MODE button repeatedly until the LED indicator lights up and displays “SLAV” on the display. Once the slave unit has been connected to 

the master unit (same model) with the help of a DMX cable (Master = DMX OUT, Slave = DMX IN), and the master unit has been set to one of the 

standalone modes (automatic control or music control), the slave unit follows the master unit. There is no need for selecting a special setting on the 

master unit, since the device operates automatically as the Master for both Auto and Music Control modes.

AUTOMATIC CONTROL

Press the MODE button repeatedly until the LED indicator lights up and displays “AUTO” on the display. To change the speed of the automatic mode, 

press the ENTER button. 

MUSIC CONTROL

Press the MODE button repeatedly until the LED indicator lights up and displays “SUxx” on the display. Using the UP and DOWN buttons, adjust the 

sensitivity (SU00 - SU99).


DE

DMX-STEUERUNG UND EINSTELLEN DER DMX-STARTADRESSE

Drücken Sie die MODE-Taste so oft, bis das LED-Display leuchtet und im Display die DMX-Startadresse angezeigt wird (A001 - A512). Die DMX-Star-

tadresse kann mit Hilfe der Tasten UP und DOWN wunschgemäß eingestellt werden. Die synchrone Ansteuerung mehrerer Scheinwerfer des gleichen 

Modells durch ein DMX-Steuergerät (z.B. DMX-Mischpult) erreichen Sie, indem Sie die Scheinwerfer auf eine identische DMX-Startadresse einstellen 

und mit Hilfe von DMX-Kabeln verbinden.

UMSTELLUNG DES DMX-MODUS

Der Scheinwerfer verfügt über einen 2-Kanal und eine 5-Kanal Modus. Wenn Sie zwischen diesen beiden Modi wechseln möchten, drücken Sie 

die MODE-Taste so oft, bis sie zur Adressauswahl kommen (A001-A512). Um in das Untermenü zur Auswahl des DMX Modus zu kommen drücken 

Sie die ENTER-Taste. Nun erscheint je nach aktiviertem Betriebsmodus entweder „CH02“ (2-Kanal Modus) oder „CH05“ (5-Kanal Modus) auf dem 

Display. Mit den UP- und DOWN-Tasten können Sie den gewünschten DMX-Modus auswählen.

SLAVE

Drücken Sie die MODE-Taste so oft, bis das LED-Display leuchtet und im Display „SLAV“ angezeigt wird. Sobald Sie die Slave- mit der Master-Einheit 

(gleiches Modell) mit Hilfe eines DMX-Kabels (Master = DMX OUT, Slave = DMX IN) verbunden haben und die Master-Einheit auf eine der Standalone 

Betriebsarten (automatische Steuerung bzw. Musiksteuerung) eingestellt haben, folgt die Slave-Einheit der Master-Einheit. An der Master-Einheit 

müssen keine speziellen Einstellungen vorgenommen werden, sowohl im Auto- als auch im Sound-Modus arbeitet das Gerät automatisch als Master.

AUTOMATISCHE STEUERUNG

Drücken Sie die MODE-Taste so oft, bis das LED-Display leuchtet und im Display „AUTO“ angezeigt wird. Um die Geschwindigkeit des automatischen 

Moduses zu verändern drücken Sie die ENTER-Taste.  

Summary of Contents for CLFLOWERHP

Page 1: ...1 USER S MANUAL BEDIENUNGSANLEITUNG MANUEL D UTILISATION MANUAL DE USUARIO INSTRUKCJA OBSŁUGI MANUALE D USO 4 IN 1 32W MOONFLOWER CLFLOWERHP ...

Page 2: ... in the intended manner and for the intended purpose 6 Use only sufficiently stable and compatible stands and or mounts for fixed installations Make certain that wall mounts are properly installed and secured Make certain that the equipment is installed securely and cannot fall down 7 During installation observ e the applicable safety regulations for your country 8 Never install and operate the eq...

Page 3: ...notify you formally about the existence of potential health risks Hea ring damage due to high volume and prolonged exposure When in use this product is capable of producing high sound pressure levels SPL that can lead to irreversible hearing damage in performers employees and audience members For this reason avoid prolonged exposure to volumes in excess of 90 dB CAUTION IMPORTANT INFORMATION ABOUT...

Page 4: ...auch dass das Gerät durch ein Ziehen am Netzkabel verrutschen und herunterfallen kann wodurch Personen verletzt werden und oder andere Schäden auftreten können Verlegen Sie Ihre Kabel daher immer sorgfältig 31 Entfernen Sie Netzkabel und Netzadapter aus der Steckdose bei Gefahr eines Blitzschlags oder wenn Sie das Gerät länger nicht verwenden 32 Das Gerät darf nur im spannungsfreien Zustand Trennu...

Page 5: ...rrespondent bien à la valeur et à la fréquence de la tension secteur locale Si l appareil possède un sélecteur de tension ne le branchez sur la prise murale qu après avoir vérifié que la valeur réglée correspond à la valeur effective de la tension secteur Si la fiche du cordon secteur ou du bloc adaptateur livré avec votre appareil ne correspond pas au format de votre prise murale veuillez consult...

Page 6: ...uipo ni intente modificarlo 16 Una vez conectado el equipo compruebe que en toda la longitud del cableado no hay peligro de que provoque una caída por ejemplo 17 Durante el transporte asegúrese de que el equipo no se caiga y pueda causar daños personales o materiales 18 Si el equipo no funciona correctamente o si se ha vertido líquido sobre él o si un objeto ha caído en su interior o si ha sufrido...

Page 7: ...ącznie w sposób zgodny z jego przeznaczeniem 6 Stosować wyłącznie stabilne i pasujące statywy ew elementy mocujące w przypadku instalacji stałych Należy zadbać o prawidłową instalację uchwytów ściennych i ich odpowiednie zabezpieczenie Zapewnić bezpieczną instalację urządzenia i upewnić się że urządzenie nie spadnie 7 Podczas instalacji przestrzegać obowiązujących w danym kraju przepisów bezpiecze...

Page 8: ...nacza ważne wskazówki dotyczące obsługi i konserwacji UWAGA WYSOKI POZIOM GŁOŚNOŚCI PRODUKTÓW AUDIO To urządzenie przewidziane jest do zastosowań profesjonalnych Komercyjne stosowanie tego urządzenia podlega obowiązującym w danym kraju przepisom i wytycznym dotyczącym zapobiegania wypadkom Firma Adam Hall jest jako producent zobowiązana do wyraźnego informowania o potencjalnym zagrożeniu dla zdrow...

Page 9: ...trica rimuovere il cavo di rete o l adattatore di rete dalla presa 30 Per staccare un dispositivo provvisto di presa Volex è prima necessario sbloccare la relativa spina Volex del dispositivo stesso Tirando il cavo di rete però il dispositivo potrebbe spostarsi e cadere provocando danni alle persone o di altro genere Prestare quindi la più scrupolosa attenzione durante la posa dei cavi 31 In caso ...

Page 10: ... de entrada y salida así como tomas eléctricas IEC de entrada y salida El práctico soporte ajustable y la argolla permiten un montaje seguro del foco PL Wprowadzenie Urządzenie CLFLOWERHP marki Cameo Light to reflektor LED z efektem derby wyposażony w diodę LED 32 W RGBW Sterowanie odbywa się przez 5 lub 2 kanały DMX w trybie automatycznym lub poprzez sterowanie muzyką Możliwe jest także zastosowa...

Page 11: ...a 240 VAC Consumo de 40 W Modo autónomo Control por sonido mediante micrófono interno Soporte de montaje ajustable incluido EFECTO DERBY 1 LED RGBW 4 en 1 de 32 W Espejos reflectantes giratorios Provisto de 6 lentes Ángulo de dispersión de 65 USO El CLFLOWER HP de Cameo es un foco de efectos controlable por DMX512 El foco de efectos de Cameo funciona en modo autónomo maestro esclavo activado por s...

Page 12: ...andalone Controllo tramite musica con microfono integrato Staffa di montaggio regolabile in dotazione EFFETTO DERBY Un LED RGBW 4 in 1 da 32 W Specchi riflettenti rotanti Sistema a 6 lenti Angolo di dispersione 65 UTILIZZO Il Cameo CLFLOWER HP è un faro a effetti con controllo tramite DMX512 Il faro a effetti Cameo può essere impiegato come dispositivo standalone in modalità master slave con contr...

Page 13: ... XLR socket for looping through the DMX control signal DE 3 polige weibliche XLR Buchse zum Weiterleiten des DMX Steuersignals FR Connecteur XLR 3 points pour renvoi du signal de pilotage DMX ES XLR hembra de 3 pines para reenviar la señal de control DMX PL 3 stykowe żeńskie gniazdo XLR do przesyłania sygnału sterowania DMX IT Presa XLR femmina a 3 poli per inoltrare il segnale di controllo DMX 5 ...

Page 14: ...trol or music control the slave unit follows the master unit There is no need for selecting a special setting on the master unit since the device operates automatically as the Master for both Auto and Music Control modes AUTOMATIC CONTROL Press the MODE button repeatedly until the LED indicator lights up and displays AUTO on the display To change the speed of the automatic mode press the ENTER but...

Page 15: ...s l afficheur LED Pour modifier la rapidité des modes automatiques appuyez sur la touche ENTER PILOTAGE PAR LA MUSIQUE Appuyez sur la touche MODE jusqu à ce que la mention SUxx apparaisse dans l afficheur Vous pouvez alors régler la sensibilité avec les touches UP et DOWN SU00 SU99 ES CONTROL DMX Y CONFIGURACIÓN DE LA DIRECCIÓN INICIAL DMX Pulse el botón MODE hasta que se ilumine la pantalla LED y...

Page 16: ...omocą przycisków UP i DOWN można ustawić czułość SU00 SU99 IT COMANDO DMX E IMPOSTAZIONE DELL INDIRIZZO DI AVVIO DMX Premere il tasto MODE più volte fino a quando il display LED si accende e viene visualizzato l indirizzo di avvio DMX A001 A512 L indirizzo di avvio DMX può essere impostato a piacimento con i tasti UP e DOWN Il comando sincrono di più fari dello stesso modello effettuato con un dis...

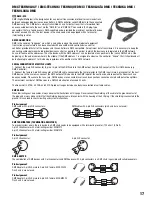
Page 17: ... the first DMX device e g DMX Controller 2 Connect the female 3 pin XLR connector of the DMX cable connected to the first projector to the DMX input male 3 pin socket of the next DMX device In the same way connect the DMX output of this device to the DMX input of the next device and repeat until all devices have been connected Please note that as a rule DMX devices are connected in series and conn...

Page 18: ...ts z B DMX Controller 2 Verbinden Sie den weibliche XLR Stecker des an den ersten Scheinwerfer angeschlossenen DMX Kabels mit dem DMX Eingang männliche XLR Buchse des nächsten DMX Geräts Verbinden Sie den DMX Ausgang dieses Geräts in der gleichen Weise mit dem DMX Eingang des nächsten Geräts und so weiter Bitte beachten Sie dass DMX Geräte grundsätzlich seriell verschaltet werden und die Verbindun...

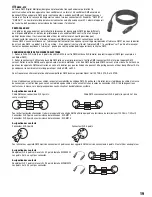
Page 19: ...eur XLR mâle de l appareil DMX suivant Reliez la sortie DMX de cet appareil selon le même méthode à l entrée DMX de l appareil DMX suivant et ainsi de suite Veillez à ce que tous les appareils DMX soient reliés en série et n oubliez pas que les liaisons ne peuvent être partagées sans utiliser de splitter actif Ne pas dépasser le nombre maximal d appareils par chaîne DMX soit 32 Vous trouverez un c...

Page 20: ...hembra del cable DMX del primer foco a la entrada DMX del equipo siguiente conector de chasis macho Conecte la salida DMX de este último equipo a la entrada DMX del equipo siguiente y así sucesivamente Tenga en cuenta que los dispositivos DMX están conectados en serie y que las conexiones no se pueden dividir sin un splitter activo El número máximo de equipos DMX conectados en cadena es de 32 Las ...

Page 21: ...ą wtyczkę XLR kabla DMX podłączonego do pierwszego reflektora podłączyć do wejścia DMX męskie gniazdo XLR następnego urządzenia DMX Wyjście DMX tego urządzenia podłączyć w taki sam sposób do wejścia DMX następnego urządzenia i tak dalej Należy pamiętać że urządzenia DMX podłącza się szeregowo a połączeń nie można rozdzielać bez aktywnego rozdzielacza Maksymalna liczba urządzeń DMX w łańcuchu DMX n...

Page 22: ...imo proiettore DMX con l ingresso DMX presa XLR maschio del successivo dispositivo DMX Analogamente collegare l uscita DMX di questo dispositivo con l ingresso DMX del dispositivo seguente e così via Tenere presente che in linea di principio i dispositivi DMX sono collegati in serie e i collegamenti non si possono condividere senza uno splitter attivo In una catena DMX i dispositivi DMX non posson...

Page 23: ... CHANNEL VALUE FUNCTION CH1 Mode Selection 000 127 Music Control 128 255 Auto Mode CH2 Mode Options 000 255 Sensitivity Speed 5 CHANNEL MODE CHANNEL VALUE FUNCTION CH1 Colour selection 000 015 Red 016 031 Green 032 047 Blue 048 063 White 064 079 Red Green 080 095 Red Blue 096 111 Red White 112 127 Green Blue 128 143 Green White 144 159 Blue White 160 175 Red Green Blue 176 191 Red Green White 192 ...

Page 24: ... T ohne Bügel 250mm x 240mm x 177mm Gewicht 3 kg Weitere Eigenschaften verstellbarer Metallbügel inklusive DE FR Référence Modèle CLFLOWERHP Type de Produit Effet Derby à LED Type Projecteur d effets Spectre de couleurs RGBW Nombre de LED 1 Type de LED LED 4 en 1 RGBW puissance 32 W Angle de départ 65 Entrée DMX XLR 3 points mâle Sortie DMX XLR 3 points femelle Modes DMX 5 canaux 2 canaux Fonction...

Page 25: ...sans support 250 mm x 240 mm x 177 mm Poids 3 kg Divers Livré avec support métallique réglable ES Nombre del modelo CLFLOWERHP Tipo de producto Foco LED de efecto derby Tipo Foco de efectos Colores RGBW N º de LEDs 1 Tipo de LED LED RGBW 4 en 1 de 32 W Ángulo de dispersión 65 Entrada DMX XLR de 3 pines macho Salida DMX XLR de 3 pines hembra Modos DMX 5 canales 2 canales Funciones DMX Automático ac...

Page 26: ...y Wymiary szer x wys x gł bez pałąka 250 mm x 240 mm x 177 mm Waga 3 kg Pozostałe cechy regulowany pałąk montażowy w zestawie MANUFACTURER S DECLARATIONS HERSTELLERERKLÄRUNGEN DECLARATIONS DECLARACIÓN DEL FABRICANTE DEKLARACJE PRODUCENTA DICHIARAZIONI DEL PRODUTTORE EN MANUFACTURER S WARRANTY LIMITATIONS OF LIABILITY You can find our current warranty conditions and limitations of liability at http...

Page 27: ... la documentación adjunta indica que al final de la vida útil del equipo no deberá desecharlo con los demás residuos domésticos con el fin de evitar posibles efectos negativos en el medio ambiente y en la salud humana debidos al vertido incontrolado de desechos La recogida selectiva ayuda a su posterior reciclaje y fomenta la reutilización sostenible de los componentes de este equipo Si es un part...

Page 28: ...28 WWW CAMEOLIGHT COM Adam Hall GmbH Daimlerstrasse 9 61267 Neu Anspach Germany Tel 49 0 6081 9419 0 Fax 49 0 6081 9419 1000 web www adamhall com e mail mail adamhall com REV 02 ...

Reviews: