background image

Pa

g

2

  - M

an

u

al c

od

e: 

11

9

G

3

13

6

11

9

G

3

13

6

 ve

r.


2

  0

3

/2

0

14  © C

A

M

E c

an

ce

lli auto

m

ati

ci s.p.a. - T

h

e d

ata a

n

d i

n

fo

rm

ati

on p

rovi

d

ed i

n th

is m

an

u

al a

re s

u

b

je

ct to c

h

an

g

e at a

ny ti

m

e w

ith

ou

t p

ri

or n

oti

ce by C

A

M

E C

an

ce

lli A

u

to

m

ati

ci S

.p.a.

ENGLISH

Foreword

• This product should only be used for the purpose for which it was explicitly

designed. Any other use is considered improper and therefore dangerous. CAME

Cancelli Automatici S.p.A. will not be held liable for damage caused by improper,

incorrect or unreasonable use. • The safety of the product, and therefore its pro-

per installation, depends on total compliance with the technical specifi cations and 

installation procedures, as well as with rules regarding safety and use, expressly

mentioned in the technical documentation for the products themselves. • Keep

these warnings together with the installation and operation manuals for the ope-

rator system components.

Before installing

(preliminary check: in case of a negative outcome, do not proceed until you have 

complied with the safety requirements)

• Installation and testing must only be performed by qualifi ed personnel • Cable

routing, installation, connection and testing must be carried out to the highest

levels of workmanship in accordance with applicable laws and regulations • Be-

fore starting any operation, read all the instructions carefully; incorrect installation 

can be dangerous and harm persons or property • Check that the operator is in

good mechanical condition, balanced and aligned, and that it opens and closes

properly. If needed, also install suitable guards or use appropriate additional safety 

sensors • If the operator will be installed at a height of less than 2.5 m from the

ground or other access level, check whether you will need any protections and/or

warnings • Ensure that opening the turnstile does not create a dangerous situation 

• Do not mount the operator upside down or onto any elements that may fold

under its weight. If needed, add suitable reinforcements at the points where it is

secured • Do not install on ground that is not level • Check that any lawn watering 

devices will not wet the operator from the bottom up.

Installation

• Carefully section off  the entire site to prevent unauthorised access, especially by 

minors and children • Be careful when handling operators that weigh more than

20 kg. In such cases, use proper weight handling safety equipment • CE safety

devices (photocells, platforms, sensitive edges, emergency button etc.) must be

installed in compliance with applicable legislation and according to the highest

standards of workmanship, bearing in mind the environment, the type of service

required and the operating forces applied to the moving turnstiles. Points where

there is a risk of crushing, shearing or dragging must be protected using suitable

sensors • End users must be informed of any residual risks by means of special

pictograms as envisaged by legislation • All opening commands (buttons, key

selectors, magnetic readers etc.) must be installed at least 1.85 m from the pe-

rimeter of the area of turnstile movement, or where they cannot be reached from

outside through the turnstile. Also, the direct commands (buttons, touch comman-

ds etc.) must be installed at a height of at least 1.5 m and must not be accessible 

to the public • The turnstile identifi cation data must be clearly visible • Before

connecting the turnstile to the power supply, make sure the identifi cation data

corresponds to the mains data • The turnstile must be connected to an eff ective,

compliant earthing system.

• The manufacturer disclaims any liability for the use of non-original products; this 

also results in the invalidation of the warranty • All ‘hold-to-run’ commands must

be placed where the moving turnstile, transit areas and driveways are completely

visible • Before delivery to the user, check that the system complies with the EN

12453  and EN 12445 standards (impact tests), check that the operator has been 

properly adjusted and that the safety and protective devices work correctly • As

appropriate and in a visible position, affi  x warning symbols.

Special instructions and advice for users

• Keep the turnstile’s area of operation clean and clear of any obstacles. Check

that the photocells' area of operation is free from obstacles • Children must be

supervised to make sure they do not play with the operator and the fi xed control

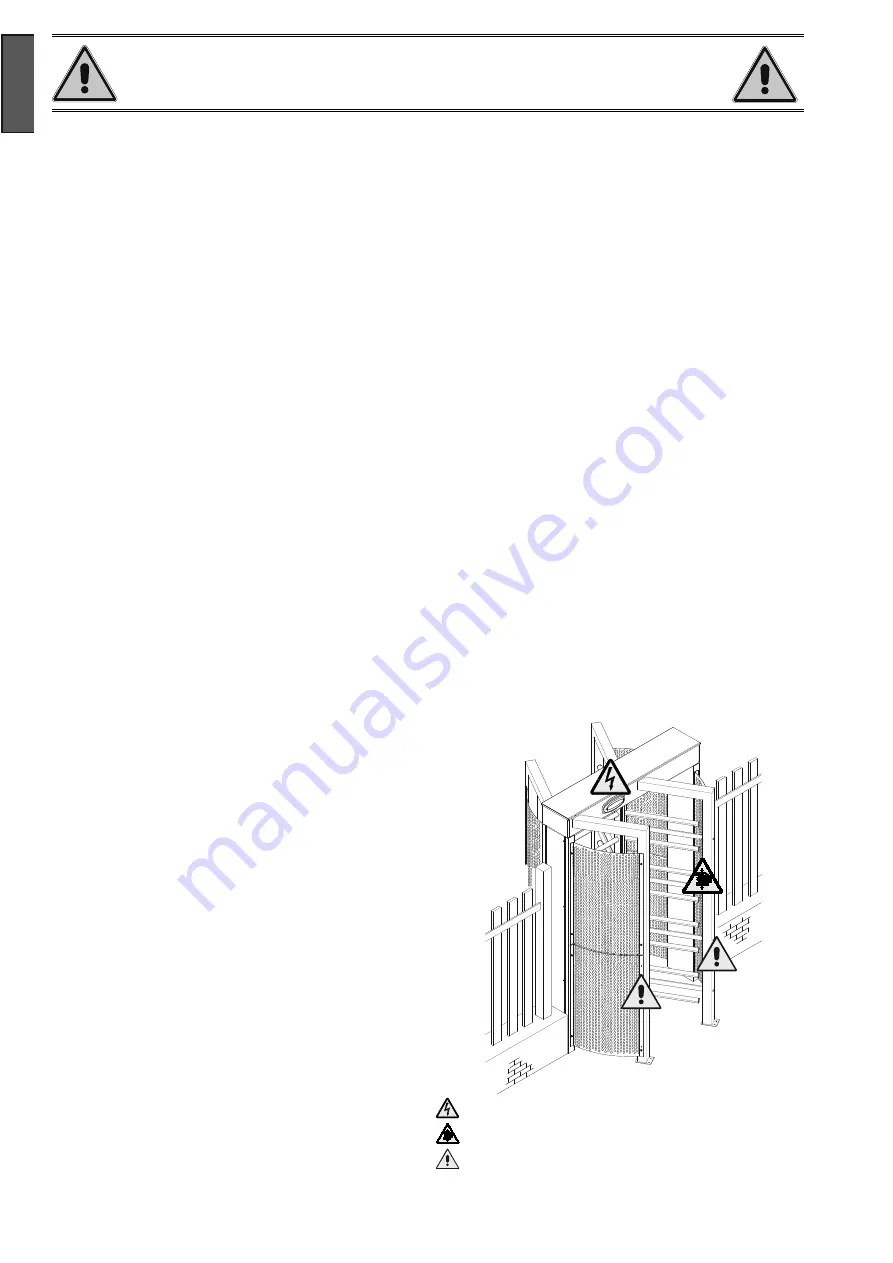
CAUTION!

important personal safety instructions:

READ CAREFULLY!

Danger of hand crushing 

Danger - live parts

Warning Impact Hazard 

devices or stand in the turnstile's area of operation. Keep any remote control devi-

ces (i.e. transmitters) or any control devices away from children as well, to prevent 

the operator from being activated accidentally • The operator is not designed 

to be used by persons (including children) whose physical, sensorial or mental 

capacities are limited, or who are lacking in experience or knowledge, unless said 

persons can be supervised or given instructions regarding using the operator by a 

person responsible for their safety • Frequently check the system, to see whether 

any anomalies or signs of wear and tear appear on the moving parts, on the com-

ponent parts, on the securing points, on the cables and any accessible connec-

tions. Keep any joints lubricated and clean, and do the same where friction may 

occur • Perform functional tests on photocells every six months. Ensure that the 

glass on the photocells is kept clean (use a cloth slightly moistened with water; do 

not use solvents or any other chemicals as these could damage the devices) • If 

the system requires repairs or modifi cations, disconnect the power to the operator 

and do not use it until safety conditions have been restored • Cut off  the electrical 

power supply for manual opening. Read the instructions • If the power cable is 

damaged, it must be replaced by the manufacturer or the technical assistance 

service or by a person with a similar qualifi cation so as to prevent any risks • It is 

STRICTLY FORBIDDEN for users to perform OPERATIONS THEY ARE NOT EXPLI-

CITLY REQUIRED AND ASKED to do. For repairs, adjustments and extraordinary 

maintenance, CONTACT THE SPECIALIST TECHNICAL SERVICE CENTRE. On the 

periodic maintenance log, note down the checks you have done.

Further special instructions and advice for all

• Avoid working near the turnstiles or moving mechanical parts • Stay clear of the 

turnstile's area of operation when in motion • Do not resist the direction of move-

ment of the operator; this may present a safety hazard • At all times be extremely 

careful about dangerous points that must be indicated by proper pictograms and/

or black and yellow stripes • When using a selector or command in ‘hold-to-run’

mode, keep checking that there are no people in the area of operation of the

moving parts. Do this until you release the command • The turnstile may move

at any time without warning • Always cut the power when cleaning or performing

maintenance.

Summary of Contents for 001PSGD3

Page 1: ...TORNELLO A TUTTA ALTEZZA MANUALE D INSTALLAZIONE PSGS3 PSGD3 Italiano IT 119G3136IT Italiano IT English EN Fran ais FR RU 119G3136...

Page 2: ...i di rete Il tornello deve essere collegato ad un efficace impianto di messa a terra realizzato a norma Il produttore declina ogni responsabilit per l impiego di prodotti non originali questo implica...

Page 3: ...e l alloggiamento di schede ed eventuali dispositivi elettronici aggiuntivi La colonna centrale rotante in acciaio AISI 304 ed completa di 3 set di bracci in acciaio lucidato 40 mm Le griglie di prote...

Page 4: ...zione delle parti 1 Colonna portante 2 Piastra inferiore con perno 3 traverso superiore 4 Colonna centrale rotante 5 Montante centrale con bracci fissi 6 Montante laterale 7 Carter apribile colonna 8...

Page 5: ...petto ad altre parti conduttrici interne verificare che la zona del varco sia in buono stato e senza avvallamenti Se necessario creare una base in calcestruzzo idonea al fissaggio del tornello Attrezz...

Page 6: ...usare adeguate attrezzature di sollevamento Rischio di ribaltamento Non appoggiarsi al tornello a tutta altezza fino al suo completo fissaggio Durante le fasi di fissaggio il tornello potrebbe essere...

Page 7: ...Il numero di tubi dipende dal tipo di impianto e dagli accessori previsti Assemblaggio struttura Fissare i montanti laterali al traverso usando la bulloneria fornita Inserire i tappi sui bracci Se ne...

Page 8: ...tto il traverso inserire l anello seeger fornito nella sede del perno e lasciare la colonna sospesa Inserire la piastra di fissaggio con perno sotto la colonna centrale rotante e fissarla al pavimento...

Page 9: ...senza obbligo di preavviso da parte di CAME cancelli automatici s p a ITALIANO Fissare i montanti laterali e centrali al traverso con la bulloneria fornita e poi al pavimento sui fori predisposti Si...

Page 10: ...no da ritenersi suscettibili di modifica in qualsiasi momento e senza obbligo di preavviso da parte di CAME cancelli automatici s p a ITALIANO Elettromagnete 2 Elettromagnete 2 Elettromagnete 1 Il mec...

Page 11: ...fusibile Scheda elettronica LINE 3 15 A F 120 V 1 6 A F 230 V Accessori ACCESSORIES 1 6 A F Percorso cavi Posizionare il quadro comando all interno del traverso Passare il cavo di alimentazione del q...

Page 12: ...omatici s p a ITALIANO Dal traverso collegare il quadro comando frecce di direzione e alla luce di cortesia con una piattina COLLEGAMENTI ELETTRICI 120 230 V AC 50 60 Hz Alimentazione Alimentazione tr...

Page 13: ...Rosso Bianco Nero 120 V AC Bianco Rosso 230 V AC Configurazione dispositivi Le frecce di direzione con display individuano automaticamente la direzione di transito I DIP 1 e 2 servono solo a visualiz...

Page 14: ...sso di 10 s Transponder per l azionamento anti orario contatto NO Sblocca il tornello in senso anti orario Il tornello si riblocca automaticamente dopo un tempo fisso di 10 s Transponder Dispositivi d...

Page 15: ...i effettuare qualsiasi manovra La programmazione delle funzioni viene effettuata con la pulsantiera del quadro Tutti i contatti NC se non utilizzati devono essere cortocircuitati Per poter utilizzare...

Page 16: ...ellazione di una tessera Selezionare il numero corrispondente alla tessera da cancellare o posizionarla sul sensore che lampeggia Quando compare sul display il numero della tessera premere per cancell...

Page 17: ...la Regolazione del deceleratore idraulico La corretta regolazione del deceleratore idraulico condizione necessaria per un corretto funzionamento del tornello e per ridurre lo stress meccanico del sist...

Page 18: ...tare i carter delle colonne laterali e del traverso superiore MANUTENZIONE Prima di qualsiasi operazione di manutenzione togliere la tensione per evitare possibili situazioni di pericolo causate da mo...

Page 19: ...o Controllo serraggio bulloni Verifica regolazione deceleratore idraulico Verifica efficienza blocco sblocco leve Pulizia lubrificazione guida lineare Controllo stato rullini Ogni 1 000 000 di cicli s...

Page 20: ...n sobre la empresa los productos y asistencia en su idioma NL Voor meer informatie over het bedrijf de producten en hulp in uw eigen taal PT Para toda e qualquer informa o acerca da empresa de produt...

Page 21: ...FULL HEIGHT TURNSTILE INSTALLATION MANUAL PSGS3 PSGD3 English EN 119G3136EN...

Page 22: ...ing the turnstile to the power supply make sure the identi cation data corresponds to the mains data The turnstile must be connected to an effective compliant earthing system The manufacturer disclaim...

Page 23: ...opened to route cables and fit add on control boards and electronic devices The middle rotating column is made of AISI 304 stainless steel and comes complete with 3 sets of polished steel arms 40 mm T...

Page 24: ...of the components 1 Load bearing column 2 Bottom plate with pin 3 Top crosspiece 4 Central rotating column 5 Central post with fixed arms 6 Side post 7 Removable column casing 8 Protective grid 9 Remo...

Page 25: ...arts check that the area around the opening is in good condition and free of dips Prepare a concrete anchoring base for the turnstile if necessary Tools and materials Make sure you have all the tools...

Page 26: ...people Transport and lift using appropriate lifting equipment Risk of tipping over Do not lean on the full height turnstile until it is fully secured While securing the turnstile it may be unstable a...

Page 27: ...he number of tubes depends on the type of system installed and any accessories Assembling the structure Secure the side posts to the crosspiece using the nuts and bolts provided Fit the caps onto the...

Page 28: ...sspiece fit the seeger ring supplied into the pin seat and leave the column suspended Fit the anchoring plate with pin under the central rotating column and fix it The use of AISI 304 stainless steel...

Page 29: ...tice by CAME Cancelli Automatici S p a ENGLISH Secure the side and central posts to the crosspiece using the nuts and bolts supplied and subsequently anchor to the floor atop the prepared holes The us...

Page 30: ...ormation provided in this manual are subject to change at any time without prior notice by CAME Cancelli Automatici S p a ENGLISH Electromagnet 2 Electromagnet 2 Electromagnet 1 The rotating mechanism...

Page 31: ...trol board LINE 3 15 A F 120 V 1 6 A F 230 V ACCESSORIES 1 6 A F Cable routes Place the control panel inside the crosspiece Route the power cord of the control panel and accessories along the entire l...

Page 32: ...i S p a ENGLISH From the crosspiece connect the direction arrows to the courtesy light using a metal strip ELECTRICAL CONNECTIONS 120 230 V AC 50 60 Hz Power supply 230 V AC power supply for transform...

Page 33: ...Black 120 V AC White Red 230 V AC Device configuration The direction arrows with display automatically detect the direction of the transit DIP 1 and 2 only serve to display ON or not OFF the two arro...

Page 34: ...0 s Anti clockwise operation transponder N O contact Releases the turnstile in an anti clockwise direction The turnstile will lock automatically after a fixed time of 10 s Transponder Control devices...

Page 35: ...ring before attempting any operation Functions can be programmed using the push button panel All unused N C contacts must be shorted In order to use the programming the traffic light with display must...

Page 36: ...e number of the card to be deleted or place it on the flashing sensor When the display shows the number of the card press to delete it To delete the Master card all other cards stored must first be de...

Page 37: ...istered users and data settings from Adjusting the hydraulic damper Proper adjustment of the hydraulic damper is a necessary condition for the correct turnstile operation with reduction of mechanical...

Page 38: ...the casing for the side columns and the top crosspiece MAINTENANCE Before any maintenance disconnect line voltage to prevent any possible dangerous situations that can be caused by accidental movement...

Page 39: ...Check bolt tightness Check hydraulic damper adjustment Check the efficiency of lock release levers Linear rail cleaning lubrication Check roller condition Each 1 000 000 cycles replace Rollers and el...

Page 40: ...i ES Por cualquier informaci n sobre la empresa los productos y asistencia en su idioma NL Voor meer informatie over het bedrijf de producten en hulp in uw eigen taal PT Para toda e qualquer informa o...

Page 41: ...TOURNIQUET PLEINE HAUTEUR MANUEL D INSTALLATION PSGS3 PSGD3 Fran ais FR 119G3136FR...

Page 42: ...eau Le tourniquet doit tre connect une installation de mise la terre efficace et conforme aux normes en vigueur Le producteur d cline toute responsabilit en cas d utilisation de produits non originaux...

Page 43: ...ls dispositifs lectroniques suppl mentaires La colonne centrale tournante en acier inox AISI 304 est dot e de 3 s ries de bras en acier poli 40 mm Les grilles de protection sont en t le d acier AISI 3...

Page 44: ...ription des parties 1 Colonne porteuse 2 Plaque inf rieure avec axe 3 Traverse sup rieure 4 Colonne centrale tournante 5 Montant central avec bras fixes 6 Montant lat ral 7 Carter ouvrant colonne 8 Gr...

Page 45: ...ductrices internes s assurer que la zone de passage est en bon tat et qu elle ne pr sente aucun affaissement si n cessaire cr er une base en b ton appropri e la fixation du tourniquet Outils et mat ri...

Page 46: ...t l utilisation d quipements ad quats Risque de renversement Ne pas s appuyer contre le tourniquet pleine hauteur tant qu il n est pas compl tement fix Durant les phases de fixation le tourniquet pour...

Page 47: ...n Le nombre de tuyaux d pend du type d installation et des accessoires pr vus Assemblage de la structure Fixer les montants lat raux la traverse l aide des boulons fournis Appliquer les embouts sur le...

Page 48: ...trou sous la traverse introduire le circlip fourni dans le logement de l axe et laisser la colonne suspendue Appliquer la plaque de fixation avec axe sous la colonne centrale tournante et la fixer au...

Page 49: ...oment et sans aucun pr avis de la part de la soci t CAME cancelli automatici s p a FRAN AIS Fixer les montants lat raux et centraux la traverse l aide des boulons fournis puis au sol sur les trous pr...

Page 50: ...t susceptibles de subir des modifications tout moment et sans aucun pr avis de la part de la soci t CAME cancelli automatici s p a FRAN AIS lectroaimant 2 lectroaimant 2 lectroaimant 1 Positionner le...

Page 51: ...1 6 A F 230 V Accessoires ACCESSORIES 1 6 A F Parcours des c bles Positionner l armoire de commande dans la traverse Faire passer le c ble d alimentation de l armoire et des accessoires sur toute la h...

Page 52: ...i s p a FRAN AIS partir de la traverse connecter l armoire de commande aux fl ches directionnelles et la lampe d accueil l aide d un c ble plat BRANCHEMENTS LECTRIQUES 120 230 V AC 50 60 Hz Alimentati...

Page 53: ...on des dispositifs Les fl ches directionnelles avec afficheur signalent automatiquement le sens de passage Les commutateurs DIP 1 et 2 permettent uniquement de visualiser ON ou non OFF les deux fl che...

Page 54: ...r l actionnement anti horaire contact NO Permet le d blocage du tourniquet dans le sens contraire celui des aiguilles d une montre Le tourniquet se bloque nouveau en automatique au bout d un d lai fix...

Page 55: ...ise sous tension attendre 10 avant d effectuer toute man uvre La programmation des fonctions est effectu e depuis le clavier de l armoire Tous les contacts NF non utilis s doivent tre court circuit s...

Page 56: ...10 secondes la premi re des cartes ajouter sur le capteur qui clignote max 500 cartes F 3 limination d une carte S lectionner le num ro correspondant la carte liminer ou la positionner sur le capteur...

Page 57: ...donn es dans la F 17 Lecture des donn es depuis la Permet de t l charger les utilisateurs enregistr s et les configurations des donn es depuis la R glage du d c l rateur hydraulique Le r glage correc...

Page 58: ...les carters des colonnes lat rales et de la traverse sup rieure ENTRETIEN Avant toute op ration d entretien il est conseill de mettre hors tension pour viter d ventuelles situations de danger provoqu...

Page 59: ...boulons Contr le r glage du d c l rateur hydraulique Contr le du bon fonctionnement du dispositif de blocage d blocage des leviers Nettoyage lubrification du rail de guidage lin aire Contr le de l ta...

Page 60: ...n sobre la empresa los productos y asistencia en su idioma NL Voor meer informatie over het bedrijf de producten en hulp in uw eigen taal PT Para toda e qualquer informa o acerca da empresa de produt...

Page 61: ...PSGS3 PSGD3 RU 119G3136RU...

Page 62: ...2 119G3136 119G3136 2 03 2014 CAME cancelli automatici s p a CAME Cancelli Automatici S p A Came Cancelli Automatici S p 2 5 20 CE 1 8 1 5 EN 12453...

Page 63: ...2 03 2014 CAME cancelli automatici s p a CAME Cancelli Automatici S p A CAME CANCELLI AUTOMATICI S p A 001PSGS3 120 001PSGD3 120 AISI 304 3 40 AISI 304 60 PSGS3 PSGD3 IP 44 50 60 120 230 24 223 446 3...

Page 64: ...PSGS3 PSGD3 4 119G3136 119G3136 2 03 2014 CAME cancelli automatici s p a CAME Cancelli Automatici S p A 1 2 3 4 5 6 7 8 9 10 11 12 13 14 1 2 3 4 5...

Page 65: ...GD3 5 119G3136 119G3136 2 03 2014 CAME cancelli automatici s p a CAME Cancelli Automatici S p A 3 1 10 10 20 20 30 230 FROR CEI 20 22 CEI EN 50267 2 1 3G x 1 5 2 3G x 1 5 2 3G x 1 5 2 2 x 0 5 2 2 x 0...

Page 66: ...PSGS3 PSGD3 6 119G3136 119G3136 2 03 2014 CAME cancelli automatici s p a CAME Cancelli Automatici S p A A E F H...

Page 67: ...8x20 UNI5933 M8x20 PSGS3 PSGD3 PSGD3 UNI7473 M10 UNI 5588 M8 UNI 1751 8 UNI 659 2 8 UNI 5931 M12x40 UNI 6592 12 7 119G3136 119G3136 2 03 2014 CAME cancelli automatici s p a CAME Cancelli Automatici S...

Page 68: ...1 2 8 119G3136 119G3136 2 03 2014 CAME cancelli automatici s p a CAME Cancelli Automatici S p A AISI 304 10 5 AISI 304...

Page 69: ...UNI 5588 M8 UNI 1751 8 UNI 6592 8 UNI 5588 M8 UNI 1751 8 UNI 6592 8 9 119G3136 119G3136 2 03 2014 CAME cancelli automatici s p a CAME Cancelli Automatici S p A AISI 304...

Page 70: ...PSGS3 PSGD3 10 10 119G3136 119G3136 2 03 2014 CAME cancelli automatici s p a CAME Cancelli Automatici S p A 2 2 1 1 2 1...

Page 71: ...2 1 11 6 7 8 14 13 3 2 2 4 5 10 9 11 12 1 15 11 11 119G3136 119G3136 2 03 2014 CAME cancelli automatici s p a CAME Cancelli Automatici S p A 35 24 SELV LINE 3 15 A F 120 1 6 A F 230 ACCESSORIES 1 6 A...

Page 72: ...L N 12 12 119G3136 119G3136 2 03 2014 CAME cancelli automatici s p a CAME Cancelli Automatici S p A 120 230 50 60 230 120 L1T L2T L1T L2T 1 6 A 3 15 A...

Page 73: ...A EbI EbI S2 S1 2 EM 4 3 L1T L2T E L1T L2T 24V 0V EbA EbA EbI EbI 13 13 119G3136 119G3136 2 03 2014 CAME cancelli automatici s p a CAME Cancelli Automatici S p A 120 230 DIP 1 2 ON OFF DIP 1 2 ON OFF...

Page 74: ...CAME bI S2 S1 GND GND GND S1 S2 GND A B GND A B GND 10 11 1 2 3 4 EM 2 S1 S2 14 14 119G3136 119G3136 2 03 2014 CAME cancelli automatici s p a CAME Cancelli Automatici S p A R700 10 10 RBM84 10 10 24 2...

Page 75: ...54 4 54 4 CAME TSP00 LT001 Memory Roll 15 15 119G3136 119G3136 2 03 2014 CAME cancelli automatici s p a CAME Cancelli Automatici S p A R700 TSP00 LT001 AF R700 10...

Page 76: ...lli Automatici S p A F 1 F 4 F 14 F 17 TSP00 LT001 F 2 F 3 F 4 F 1 F 2 F 3 F 4 F 5 F 6 F 7 F 8 F 9 F 10 F 11 F 12 F 13 F 14 AntiPassBack F 15 F 16 F 17 F 1 F 1 S1 10 F 3 F 2 F 2 10 500 F 3 F 4 F 4 F 5...

Page 77: ...3 m m 17 17 119G3136 119G3136 2 03 2014 CAME cancelli automatici s p a CAME Cancelli Automatici S p A F 15 F 11 F 8 F 14 F 16 F 17 3...

Page 78: ...25 UNI 7380 M6x20 UNI 7380 M6x20 UNI 1751 6 UNI 6592 6 18 18 119G3136 119G3136 2 03 2014 CAME cancelli automatici s p a CAME Cancelli Automatici S p A AISI 304 119RW48 Guardian PSGS3 PSGD3 10 000 10 1...

Page 79: ...19G3136 2 03 2014 CAME cancelli automatici s p a CAME Cancelli Automatici S p A 2 3 2 4 400 000 6 1 000 00 3 000 00 CAME CANCELLI AUTOMATICI S p A UNI EN ISO 14001 Came Cancelli Automatici S p A 2006...

Page 80: ...e langue DE Weitere Infos ber Unternehmen Produkte und Kundendienst bei ES Por cualquier informaci n sobre la empresa los productos y asistencia en su idioma NL Voor meer informatie over het bedrijf d...

Reviews:

Related manuals for 001PSGD3