background image

Page 18 of 33

CV-550 SPK V3 REFERENCE MANUAL 

INSTALLATION INSTRUCTIONS

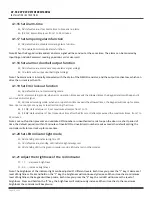
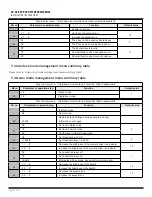
4.1.16 Set Alarm-time


40, 0#, default value, if set Alarm-time to 0 means no alarm. 


40, (0-99) #, Alarm-time is set from 1 to 99 minutes.

4.1.17 Set tampering alarm function


41, 0#, default value, disable tampering alarm function. 


41, 1#, enable Anti-dismantle alarm function.

Note: When the Keypad is dismantled, an alarm signal will be send out at the same time. The alarm can be canceled by 
inputting an Admin Password, reading an admin card or user card.

4.1.18 Set alarm or doorbell output function


42, 0#, default value, alarm wire output alarm signal voltage. 


42, 1#, alarm wire output doorbell signal voltage.

Note: The Alarm wire is internally connected with the drain of the NMOS transistor, and the output is active low, which can 
drive the current less than 1A.

4.1.19 Set Error lockout function


43, 0#, default value, normal working mode.


43,1#, alarm working mode, when error operation times exeeds the allowed times, the Keypad alarm will beep and it 

send out an alarm signal.
 

43, 2#, locked working mode, when error operation times exeeds the allowed times, the Keypad will lock up for some 

time. User cannot press any key or read card during that time.
 

44, (1-10)#, default value is 10, set maximum attempts from 1 to 10 .


45, (1-99)#, default value is 10,set locked out time after the PIN or card attempts exceed the maximum times, from 1 to    

99 minutes

Note: Lock out function prevents and unlimited PIN number or unauthorized cards to open the door in a short period of 
time, the default period is within 10 minutes of invalid PIN or invalid card number reads exceeds the default setting, the 
controller will alarm or lock up for some time.

4.1.20 Set LED indicator light mode


50, 0#, standby, LED indicator light is off.


50, 1#, default value, standby, LED indicator light always red.


50, 2#, standby, LED turns green in reader mode, LED turns red in other modes.

4.1.21 Adjust the brightness of the red indicator


51, 1, 1, ... ,decrease brightness


51, 2, 2, ..., increase brightness

Note: The brightness of the indicator light can be adjusted 21 different levels. Each time you press the “1” key, it decrease 1 
level of brightness. Press and hold on the “1” key, the brightness will continuously decrease. When it reaches to minimum 
level of brightness, the keypad will beep twice. Each time you press the “2” key, the red LED will increase the level of 
brightness. Press and hold on the “2” key, the brightness will continuously increase. When it reaches to the maximum 
brightness the controller will beep twice.

Summary of Contents for CV-550SPK V3

Page 1: ...Page 1 of 33 CV 550SPK v3 Reference Manual Door Activation Devices ...

Page 2: ...Add user PIN 13 3 7 Exit management menu operation mode 14 3 8 User open door 14 4 Basic Functions 14 4 1 Management menu operations 14 4 1 1 Change admin password 14 4 1 2 Set or delete super open password 14 4 1 3 Set admin card 14 4 1 4 Delete admin card 15 4 1 5 Set keypad mode 15 4 1 6 Limits types of reading card 15 4 1 7 Restore to default settings 15 4 1 8 Add user 16 4 1 9 Delete user 16 ...

Page 3: ...ation card operation 23 4 2 8 Normal open card operation 23 4 3 Users operation 23 4 3 1 Get user card or PIN 23 4 3 2 Change user PIN 23 4 3 3 User open door 23 4 4 Other operations 24 4 4 1 Cancel alarming 24 4 4 2 Admin password initialization 24 4 4 3 Restore factory settings 24 4 5 Operation characteristics in different Keypad modes 24 4 5 1 Operation characteristics in reader mode 24 4 5 2 O...

Page 4: ...installer Authentication by Card and PIN or Multi cards to open the door Administrator Super open card and Super open password to open door Convenient administrator Add card Delete card Anti duress card Authorization card and Normal open card operation Quick access to the management menu using admin password card feature User card capacity up to 20 000 the admin programming card capacity up to 21 ...

Page 5: ... temperature 40 F 140 F 40 to 60 C Working humidity 0 95 Lock signal relay contact current 1A Alarm or doorbell signal MOS output current 1A Distance of reading EM card 2 inches 5 cm Distance of reading HID card 2 inches 5 cm 1 5 Applicable models This user manual applies to the following items 1 CM 550SPK v3 Stand Alone Keypad Reader with 12 colored wire leads 2 Rain Privacy Shield for the keypad...

Page 6: ...e wall or into the backbox Connect the remaining keypad wires as shown on the wiring diagram Be careful not to connect the wrong wires or short circuit otherwise permanent damage to the keypad may occur After checking power on for a short time confirm the indicator light is normal and the buzzer beeps once Otherwise power off immediately and recheck the wiring properly If all is well secure the ke...

Page 7: ...ontrol input of red LED Access Controller ALARM 12V NC NO COM D0 D1 GND LED_G BEEP LED_R GREY RED ORANGE BLUE PURPLE Green White BLACK BROWN YELLOW PINK Wiring the CV 550SPKV3 to an ACCESS CONTROLLER Must be configured for reader mode 12V Normally Closed Normally Open Common Data 0 Data 1 Ground Green LED Beeper Red LED Blue Green Alarm Annunciator Connect positive wire to colored wire representin...

Page 8: ...l Wiegand Card Reader Normally Closed Door Strike 12 VDC Can be replaced with a MOV Camden Model CX ED1079 D1 Camden Model CV 7400 Stand Alone Keypad Must be configured for single door mode Power Supply 12 to 24 VDC 12V ALARM NC NO COM D0 D1 D_IN OPEN GND RED GREY ORANGE BLUE PURPLE Green White BROWN YELLOW BLACK Blue Green Alarm Annunciator Connect positive wire to colored wire representing the p...

Page 9: ...lly Open Camden Model CV 550SPK Wiring the CV 550SPKV3 to an external card reader and door strike Door Position Switch Normally Closed Door Strike Can be replaced with a MOV Camden Model CX ED1079 D1 Stand Alone Keypad Must be configured for INTERLOCK mode NO GND NO GND TRIG INPUT RESET FACP1 FACP2 AUX COM STRIKE LOCK XFMR BATT 115 vac Camden Model CX PS10UL Power Supply SW2 SW2 position must be O...

Page 10: ...FMR BATT 115 vac Camden Model CX PS10UL Power Supply SW2 SW2 position must be OFF NO GND NO GND TRIG INPUT RESET FACP1 FACP2 AUX COM STRIKE LOCK Normally Closed Can be replaced with a MOV D1 Maglock Camden Model CX 90 91 Door Strike Camden Model CX ED1079 Door Position Switch Push to Exit Switch Camden Model CM 30 Normally Open ...

Page 11: ...IN OPEN GND NO COM NC Light Green RED BROWN YELLOW BLACK BLUE PURPLE ORANGE Camden Model CV 550SPK V3 Power Supply DC 10 28V ve ve Not Used Relay contacts To trigger door strike or Maglock Power Supply AC 10 28V Not Used Relay contacts To trigger door strike or Maglock Camden Model CX TRP 612DC Camden Model CX TRP 4016 Wiring for DC Power AC1 g n i r i W D N G for AC Power AC1 AC2 Note Connect cor...

Page 12: ...meter when you type this key it means input is finished means cancel current operation or back to previous menu Management menu is fixed to 2 digits from 00 99 Don t press on the keypad afterwards After entering the 2 digits the LED will turn to orange or purple if the operation failed you will hear beep beep beep 3 short beeps Under the management menu operation mode if there is no activity detec...

Page 13: ...ntinuously Batch loading When you hear a long beep and the indicator light turns to green it means the new card was added successfully After finishing enrolling the last card press the key to exit the add user card status 3 6 Add User PIN 11 ID User PIN ID User PIN repeat the operation till the last user PIN Note The user ID range is from 1 to 20 000 and must not be added before User PIN is a 4 6 ...

Page 14: ... other operations If the Admin Password is correct the indicator light will turn to green once and then back to red flash status Other operations must be performed in this status If the user forgets the admin password or the user needs to use the management menu many times they can read the first zone Set card operation instead 4 1 1 Change Admin Password 00 New Admin Password Repeat Admin Passwor...

Page 15: ...menus for Reader mode are 00 04 09 40 42 50 57 60 64 among them menu 01 and 02 can only add and delete admin password cards The valid menus for Single door and interlock mode are 00 04 09 10 12 20 22 30 36 40 45 50 57 The valid menus for Demo mode are 03 09 32 34 51 53 55 4 1 6 Limits types of reading card 04 0 cannot read any card 04 1 can read EM card only 04 2 can read HID card only 04 4 can re...

Page 16: ... user 11 ID 8 8 digit format card number ID 8 8 digit format card number Specify ID number and input 10 digit format card number to add user 11 ID 10 10 digit format card number ID 10 10 digit format card number Specified ID number and input 4 6 digits PIN to add user 11 ID User PIN ID User PIN Note ID number are 1 5 digits between 1 20000 User PIN in zone 1 are any 4 6 digits except 1234 4 1 8 3 ...

Page 17: ...mal open mode Under this mode the lock will latch open not controlled by other unlocking action If the user doesn t want to use the Normal open mode the administrator will need to change the mode to the other two modes Note A better way to implement the Normal open mode is using a Normal open card in the first mode it can switch to Normal open mode and normal status quickly For the programming of ...

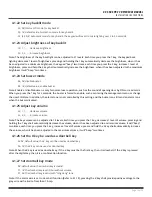
Page 18: ...ot press any key or read card during that time 44 1 10 default value is 10 set maximum attempts from 1 to 10 45 1 99 default value is 10 set locked out time after the PIN or card attempts exceed the maximum times from 1 to 99 minutes Note Lock out function prevents and unlimited PIN number or unauthorized cards to open the door in a short period of time the default period is within 10 minutes of i...

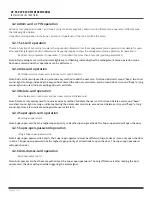
Page 19: ... as entering the management menu or change the user PIN state In addition the alarm tone is not controlled by this setting and the buzzer can still send an alarm tone when the buzzer disabled 4 1 25 Adjust key volume 55 1 1 decrease volume 55 2 2 increase volume Note The key volume can be adjusted to 15 levels Each time you press the 1 key decreases 1 level of volume pressing and holding the 1 key...

Page 20: ...X format refers to the standard RS232 communication protocol data output TTL level 0 5V the output data is output by the card byte HEX format The output RS232 TTL ASCII 8 format is the output data is ASCII character format card number data is 8 bit format and same as the ordinary EM card marked on the 8 bit card number but omit the 0 in front of it The output RS232 TTL ASCII 10 format is the outpu...

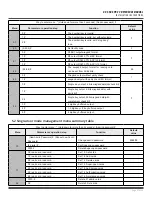
Page 21: ...data Corresponding relation is 1 0001 2 0010 3 0011 4 0100 5 0101 6 0110 7 0111 8 1000 9 1001 1010 0 0000 1011 Single key output 6 bits wiegand data with parity bit Every key output a 6 bit data Corresponding relation is 1 000010 2 000100 3 000111 4 101001 5 101010 6 101100 7 101111 8 110001 9 110010 110100 0 000001 110111 Single key output 8bits wiegand data with complement check bit Every key ou...

Page 22: ...ght is orange indicating the keypad has entered the add user card state second read Add card sound beep a long sound light turns red indicate exiting add user card state 4 2 3 Delete card operation Read Delete card read user card read user card read Delete card Note Delete card is mainly used for a quick and easy method to delete the user card first read Delete card sound beep two short sound ligh...

Page 23: ...ard Hold down for more than 2 seconds read card Old PIN New PIN Repeat new PIN Note Every card s default PIN is 1234 which can t be use to open door unless you change it Change user PIN by ID number Hold down for more than 2 seconds ID number Old PIN New PIN Repeat new PIN Note You need to know ID when you change PIN through this method ID number needs to be obtained from the administrator The old...

Page 24: ... specific default values shown in the schedule other cards and PIN information will not be deleted 4 5 Operation characteristics in different Keypad modes 4 5 1 Operation characteristics in reader mode In the reader mode you can only operate menus 00 04 09 40 42 50 57 60 64 Among them the 01 and 02 menus can only be adding and deleting Set card Reading Set card the Keypad does not output a Wiegand...

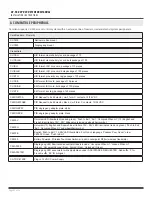
Page 25: ...e door mode 4 5 4 Operation characteristics in Demo mode Demo mode is a mode for Single door mode primarily for display purposes or without security as a tool to use any card to open the door In this mode any card or 6 digit PIN can open a door without authorization When entering management mode only menus 03 09 32 34 51 53 and 55 are valid 5 MANAGEMENT MENU SUMMARY TABLE 5 1 Reader mode managemen...

Page 26: ...mantle alarm 42 0 Alarm lead output alarm signal voltage 0 1 Alarm lead output doorbell signal voltage 50 0 Indicator light is always off 1 1 Red indicator light is always on 2 Green indicator light is always on reader mode 51 1 1 Decrease the brightness of the normally bright red indicator 18 2 2 Increase the brightness of the normally bright red indicator 52 0 Key backlit is always off 1 1 Key b...

Page 27: ...check bit 0 1 Single key output 6 bits wiegand data with parity bit 2 Single key output 8bits wiegand data with complement check bit 3 4 digit key buffered output 4 1 5 digit key key buffered output 5 6 digit key buffered output 5 2 Single door mode management menu summary table Way to enter menu Hold down for more than 2 seconds Admin password Menu Parameter or operation step Function Default val...

Page 28: ...10 digit format card number to addusers 11 ID read card ID read card Specify ID number and read card to add user ID 8 8 digit format card number ID 8 8 digit format card number Specify ID number and input 8 digit cardnumber to add user ID 10 10 digit format card number ID 10 10 digit format card number Specify ID number and input 10 digit for matcard number to add user ID user PIN ID user PIN Spec...

Page 29: ...to 0 means no alarm 0 1 99 Set the alarm time to 1 99 minutes 41 0 Disable anti dismantle alarm function 0 1 Enable anti dismantle alarm function 42 0 Alarm lead output alarm signal voltage 0 1 Alarm lead output doorbell signal voltage 43 0 Normal operate mode 0 1 Enable lock out alarm function 2 Enable lock out locked function 44 1 10 Set lock out wrong attempts 1 10 10 45 1 99 Set lock out locke...

Page 30: ...rd Menu Parameter or operation step Function Default value 03 0 Reader mode 1 1 Single door mode Way to enter menu Hold down for more than 2 seconds Admin password Menu Parameter or operation step Function Default value 3 Interlock mode 9 Demo mode 09 0000 Restore default settings admin password and user information unchanged 32 0 Set lock to Delay mode 0 1 Set lock to Switch mode 2 Set the lock t...

Page 31: ...working properly 1 The gauge of power wires are too thin resulting in the voltage being too low Replace wires with higher gauge wires AWG 18 2 Wiring connection is incorrect or power wires are not powered Wiring in the correct way 3 Set the indicator light normal off Set to normal mode Fail to enter management mode 1 Hold the key in front of the password longer than 2 seconds Operate in the right ...

Page 32: ...PIR Request to Exit detector black c w 2 form C contacts 12 24 VDC CM RQEPW PIR single gang adaptor plate white CM RQEPK PIR single gang adaptor plate black CM 30C Universal LED illuminated red and green Push to Exit Exit Occupied When Lit 13 English and French insert labels 12V 28V bilingual versions and wheelchair symbol CM 30U Universal 13 English and Spanish insert labels 12V 28V LED Illuminat...

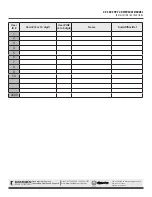
Page 33: ...ew Doors to Innovation Quality and Support CV 550 SPK V3 REFERENCE MANUAL INSTALLATION INSTRUCTIONS File CV 550SPK V3 Reference_Manual indd Rev June 21st 2022 Part No 40 82B306 User ID Card 8 or 10 digit User PIN 4 to 6 digit Name Suite Office Ref 1 2 3 4 5 6 7 8 9 10 2000 ...

Reviews: