background image


Instruction Manual CS-Zodiac


6


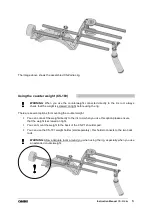
The image above shows the assembled CS-Zodiac rig. 


Using the counter weight (CS-180)


!!!! 

WARNING:  When  you  use  the  counterweight  connected  directly  to  the  iris  rod,  always 
check that the weight is screwed on tight before using the rig. 

 
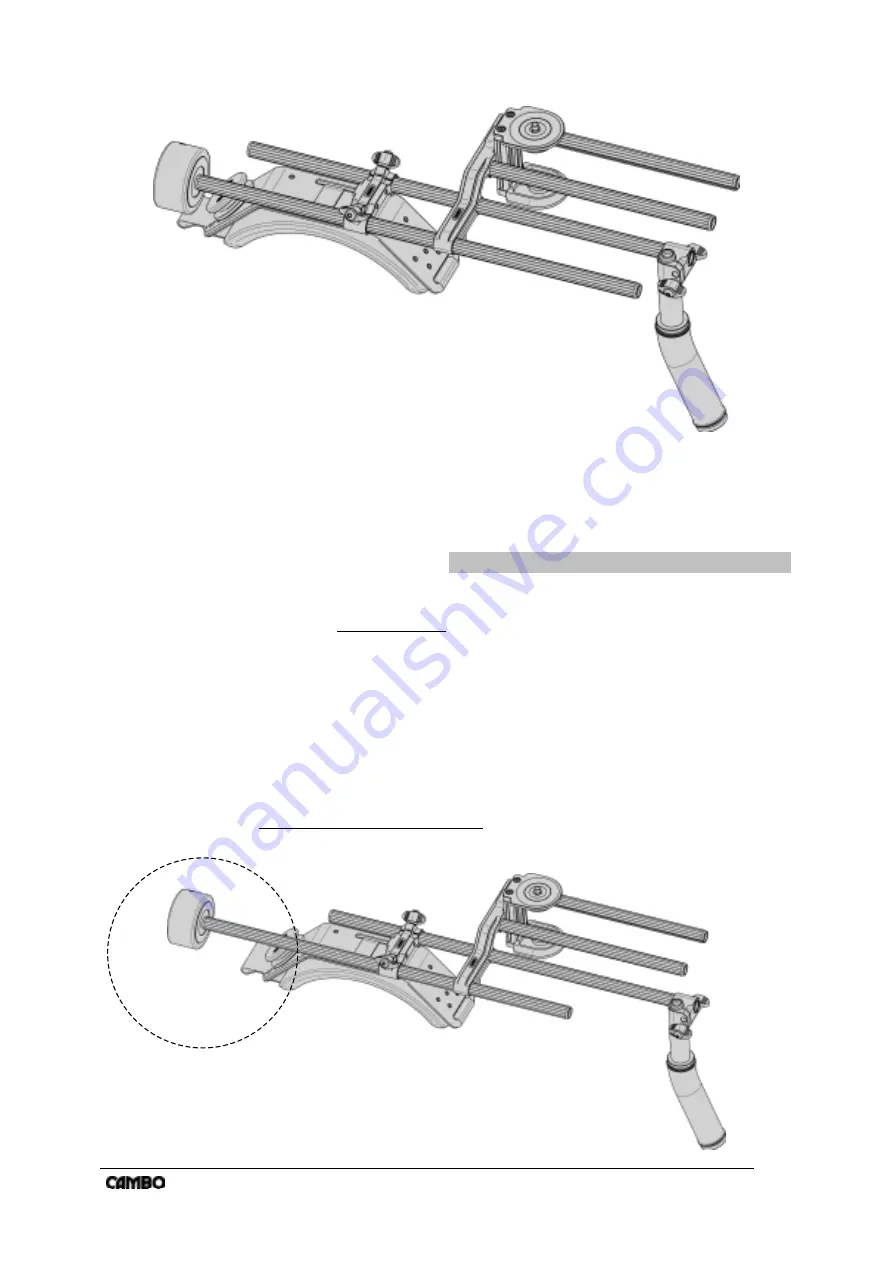
There are several options for mounting the counter weight.  


You can connect the weight directly to the iris rod, when you use this option please ensure 
that the weight is screwed on tight.  


You can mount the weight to the back of the CS-P1 shoulder pad.  


You can use the CS-181 weight holder (sold separately), this holder connects to the two back 
rods. 


!!!! 

WARNING: Allow adequate room around you when using the rig, especially when you use 
an extended counterweight. 


!!!!


Summary of Contents for CS-ZODIAC

Page 1: ...CS ZODIAC HDSLR DV SUPPORT SYSTEMS INSTRUCTION MANUAL EN Please read this manual carefully before using the Cambo CS rig CAMBO WHERE TRADITION MEETS VISION MADE IN THE NETHERLANDS ...

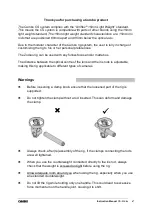
Page 2: ... The distance between the optical centre of the lens and the iris rods is adjustable making this rig applicable to different types of cameras Warnings Before loosening a clamp knob ensure that the loosened part of the rig is supported Do not tighten the clamp without a rod inserted This can deform and damage the clamp Always check after re assembly of the rig if the clamps connecting the rods are ...

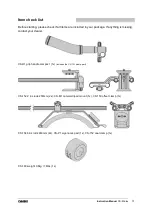
Page 3: ...ed in your package If anything is missing contact your dealer CS H1 grip handle compact 1x includes the CS 151 clamp part CS 1522 iris rods 250mm 2x CS M1 camera tripod mount 1x CS 150 offset clamp 1x CS 1546 iris rods 460mm 2x CS P1 ergonomic pad 1x CS 152 dual clamp 1x CS 180 weight 0 8kg 1 8lbs 1x ...

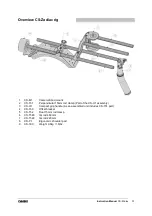
Page 4: ...1 Perpendicular 15mm rod clamp Part of the CS H1 assembly 3 CS H1 Compact grip handle As an assembled unit includes CS 151 part 4 CS 150 Offset bracket 5 CS 152 Dual 15mm rod clamp 6 CS 1546 Iris rod 460mm 7 CS 1522 Iris rod 220mm 8 CS P1 Ergonomic shoulder pad 9 CS 180 Weight 0 8kg 1 8lbs ...

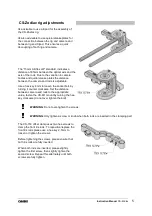
Page 5: ...osen the socket bolt by turning it counter clockwise Set the distance between camera and rods to the appropriate value fasten the CS M1 mount by turning the hex key clockwise do not over tighten the bolt WARNING Do not over tighten the screws WARNING Only tighten a screw or knob when both rods are inserted in the clamping part The CS 150 offset clamp uses two hex screws to clamp the front iris rod...

Page 6: ...rig There are several options for mounting the counter weight You can connect the weight directly to the iris rod when you use this option please ensure that the weight is screwed on tight You can mount the weight to the back of the CS P1 shoulder pad You can use the CS 181 weight holder sold separately this holder connects to the two back rods WARNING Allow adequate room around you when using the...

Page 7: ...15XX iris rods feature 3 8 sockets which can be used for mounting attachments Name Function CS 155 iris rod connector CS 156 3 8 adapter CS 156 1 4 adapter To couple two CS 15XX iris rods To attach a 3 8 accessory To attach a 1 4 accessory monitor microphone light etc ...

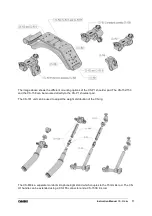
Page 8: ...152 153 and the CS 158 can be mounted directly to the CS P1 shoulder pad The CS 181 unit can be used to adjust the weight distribution of the CS rig The CS M8 is a separate monitor microphone light stand which couples to the 15mm iris rod The CS H1 handle can be extended using a CS 155 connector and a CS 15XX iris rod ...

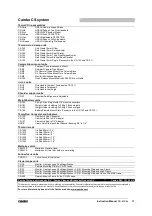
Page 9: ...s weights CS 189 Battery Camera Mount Plate Connects to the CS 152 and CS 153 15mm Rod Connector and Adapters CS 155 Cambo Iris Rod Connector CS 156 Cambo Iris Rod to 3 8 Adapter CS 157 Cambo Iris Rod to 1 4 Adapter HDRB Heavy Duty Stainless Steel Reducer Bushing 3 8 to 1 4 15mm iris rods CS 1509 Iris Rod 90mm 3 5 CS 1512 Iris Rod 120mm 5 CS 1522 Iris Rod 250mm 9 CS 1530 Iris Rod 300mm 12 CS 1536 ...

Reviews: