Configuring cnRanger 800 BBU and 2 GHz/3 GHz cnRanger RRH
45
Configuring cnRanger 800 BBU and 2 GHz/3
GHz cnRanger RRH
Cambium recommends that units are pre-configured ‘on the bench’ before being deployed.
Powering the cnRanger 800 BBU unit
1. Power the cnRanger 800 BBU unit, instructions of how to power cnRanger 800 BBU unit are
described earlier in section
powering up the cnRanger 800 BBU
.
2. Check that the power LED on the Sierra illuminates.
3. Connect an Ethernet cable from the PC to the ETH2 port on cnRanger 800 BBU and confirm the
Ethernet activity LED blinks.
Configure PC Ethernet interface
1. On the PC, configure the Ethernet port for a static IP address using the 168.254.1.X range, avoiding
169.254.0.0 and 169.254.1.1. For example 169.254.1.3.
2. Enter a subnet mask of 255.255.255.0.
3. Leave the default gateway blank.
4. Using a web browser, navigate to factory default web address 169.254.1.1 and login.
5. Enter Username (factory default username is admin) and Password (factory default password is
admin) and click Login.
6. The cnRanger 800 BBU interface menu and System Summary page are displayed.
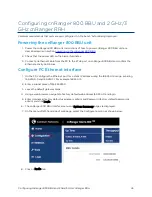
7. On the menu of left-hand side of web page, select the Configuration icon as shown below:
8. Click on Radio tab.


