ErgoVate Desk User Manual
ERGOVATE proudly brought to you by
11
●
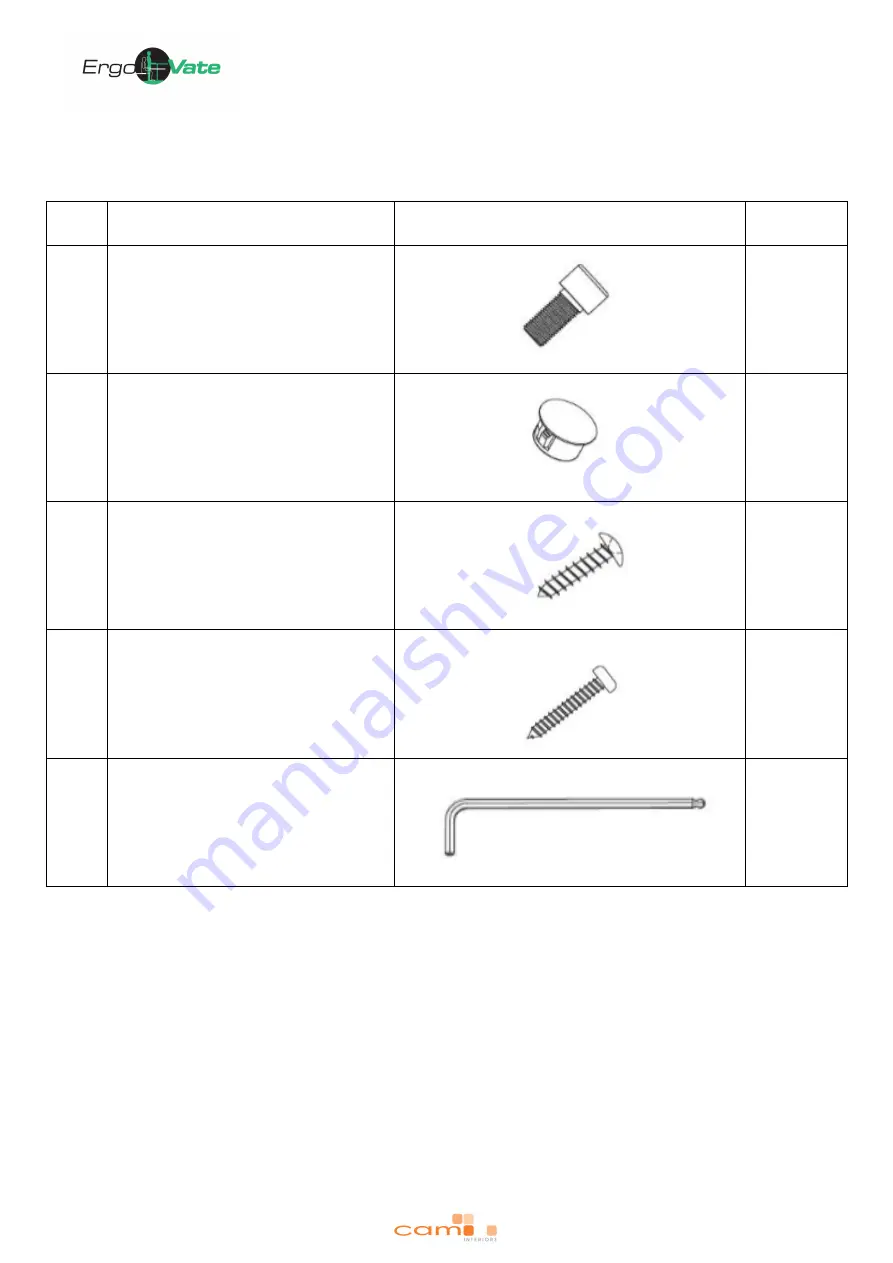
Chart B: Hardware kit
No.
Description
Drawing
Qty (pcs)
A
Foot bolt
8
B
Cap
4
C
Tabletop screw
14
D
Control screw
2
E
Allen key
1
Page 1: ...ErgoVate Straight Desk 2017 User Manual ...
Page 2: ...fore Installation Reinstallation 5 2 2 During Operation 6 2 3 Connection 7 3 Technical Specifications 8 4 ErgoVate Introduction 9 4 1 ErgoVate Kit Contents 9 4 2 Installation Instructions 12 4 3 Getting Started 17 4 3 1 Resetting 17 4 3 2 Operation 17 4 4 Anti Collision 18 4 5 Energy Preserving Feature 18 5 Disposal Guidance 19 6 Troubleshooting 20 ...
Page 3: ...ctronic control boxes hand controls and power suppliers ErgoVate is constantly improving its range to meet and exceed customer expectations This user guide will tell you how to install use and maintain you ErgoVate product We are sure this product will provide you with many years of reliable operation All ErgoVate products undergo rigorous functionality and quality testing prior to shipping You ar...
Page 4: ...aintain an adequate locking force up to 120kg load including the tabletop However when the cable is damaged or is disconnected from the control box it will cause the desk to gradually slide to the bottom if the load on either column is greater than 60kg 5 Make sure that no persons or items will collide with the ErgoVate desk when adjusting upwards and downwards 6 Damaged cords must be replaced bef...
Page 5: ...ied person in order to avoid hazard 3 Not to be opened by unauthorized personnel control box motor housing hand control 4 RISK OF ELECTRIC SHOCK Insert the plug only into proper socket only If it does not fit contact a qualified electrician to install the proper outlet Do not change the plug in any way 5 The control box is only used for the specified linear actuators do not use appliances not reco...
Page 6: ...here aerosol spray products are being used or where oxygen is being administered 8 To properly disconnect the system lower table to minimum height then remove plug from outlet 9 If table is heavily loaded keep the load away from edges to prevent the possibility of the table tipping over 10 Any servicing is to be performed by an authorized service representative 11 Make sure that no persons or item...
Page 7: ...ep 2 Hand control must be connected with control box Step 3 Control box must be connected to power supply Make sure to place the table on an equal levelled floor or use adjusting screws to level the frame Make sure that all cords are long enough when the frame is in both highest and lowest positions Control box is normally pre assembled between the outer pipes underneath the tabletop The hand cont...
Page 8: ...ght Leg 2 Frame orientation Rectangular Max lifting capacity Including tabletop 120kg equally divided Height adjustable range Min to max excluding tabletop 630 1280mm Speed Depending on the load 30 40mm s Desk width 1165 2100mm Noise level 39dB Duty cycle 10 max 2 min run 18 min stop Ambient temperature 0 45 C ...
Page 9: ...ErgoVate Desk User Manual ERGOVATE proudly brought to you by 9 4 ErgoVate Introduction 4 1 ErgoVate Kit Contents Top View Side View Assembled View ...
Page 10: ... Chart A List of package contents No Description Drawing Qty 1 Pre assembled desk frame including 2 lifting columns and 1 control box 1 set 2 End pipe 2 pcs 3 Foot 2 pcs 4 Control Handset 1 pc 5 Power cord 1 pc 6 Hardware kit Refer to Chart B for more details 1 set ...
Page 11: ...ErgoVate Desk User Manual ERGOVATE proudly brought to you by 11 Chart B Hardware kit No Description Drawing Qty pcs A Foot bolt 8 B Cap 4 C Tabletop screw 14 D Control screw 2 E Allen key 1 ...
Page 12: ...o you by 12 4 2 Installation Instructions Step 1 Before assembling open the carton on a flat floor or work area Place desk frame on the flat carton Step 2 Insert end pipes into ends of the desk frame Step 2 1 Align legs into a vertically upright position ...
Page 13: ... ERGOVATE proudly brought to you by 13 Step 3 Fasten the end pipe brackets and lifting columns into place using bolts 8pcs that were previously embedded into the desk frame Step 4 Attach feet to the lifting columns using bolts ...
Page 14: ...learly marked on the frame as shown in circled part of diagram Note Recommended frame span is 50mm less than the width of tabletop with exception of 2100mm wide top this will be greater Step 5 1 Once the desired frame width has been set use the supplied Allen key to tighten the set screws 8pcs total Note Set screws are preinstalled into the frame instead of being included within the provided hardw...
Page 15: ...VATE proudly brought to you by 15 Step 5 2 Put caps into the holes Step 6 Plug the power cord and hand control to the control box Run the wire through the cable management clips Then run the hand control wire through the inlet hole ...
Page 16: ...n the control and assembled desk frame to the tabletop with screws Then tighten the control screws as shown in circle Step 8 Flip over the desk and reset control box before adjusting Simultaneously press and hold the and buttons together for 3 to 5 seconds until you hear a beep ...
Page 17: ...for 3 seconds 2 Continue holding the buttons until both legs reach the lowest position 3 When finished resetting the hand control will beep once and the buttons can be released 4 3 2 Operation 1 Press and hold the button to raise the desk 2 Press and hold the button to lower the desk Note For controls with memory functionality please refer to the Hand Control User Guide ...
Page 18: ...rol The sensitivity of this anti collision is different during upward or downward motion The anti collision activates with a force of approximately 25kg upwards and downwards the anti collision activates with a force of approximately 35kg plus weight of the desktop and what is placed on the desktop Situations where the anti collision is not activated If the collision occurs during the reset operat...
Page 19: ...and aluminum or plastic can be divided into ABS and PP All plastic parts 50g are provided with an internal code for plastic types The example below shows the recycling groups in which the different components of the ErgoVate system should be placed into Products Components Recycling group Columns Spindle and motor Plastic housing Cable PCB boards Scrap Plastic recycling or combustion Cable scrap o...
Page 20: ... operates irregularly or is tilted Visual observation Perform reset The frame stops and can only move downwards Is the frame in the highest position The frame could be overloaded When the frame has reached the maximum height it will only move downwards Remove some of the load and perform again The frame will only move downwards even though frame is not overloaded Visual observation Perform reset T...