Audio Production System with Optional Networking
GLOBAL USER BUTTONS
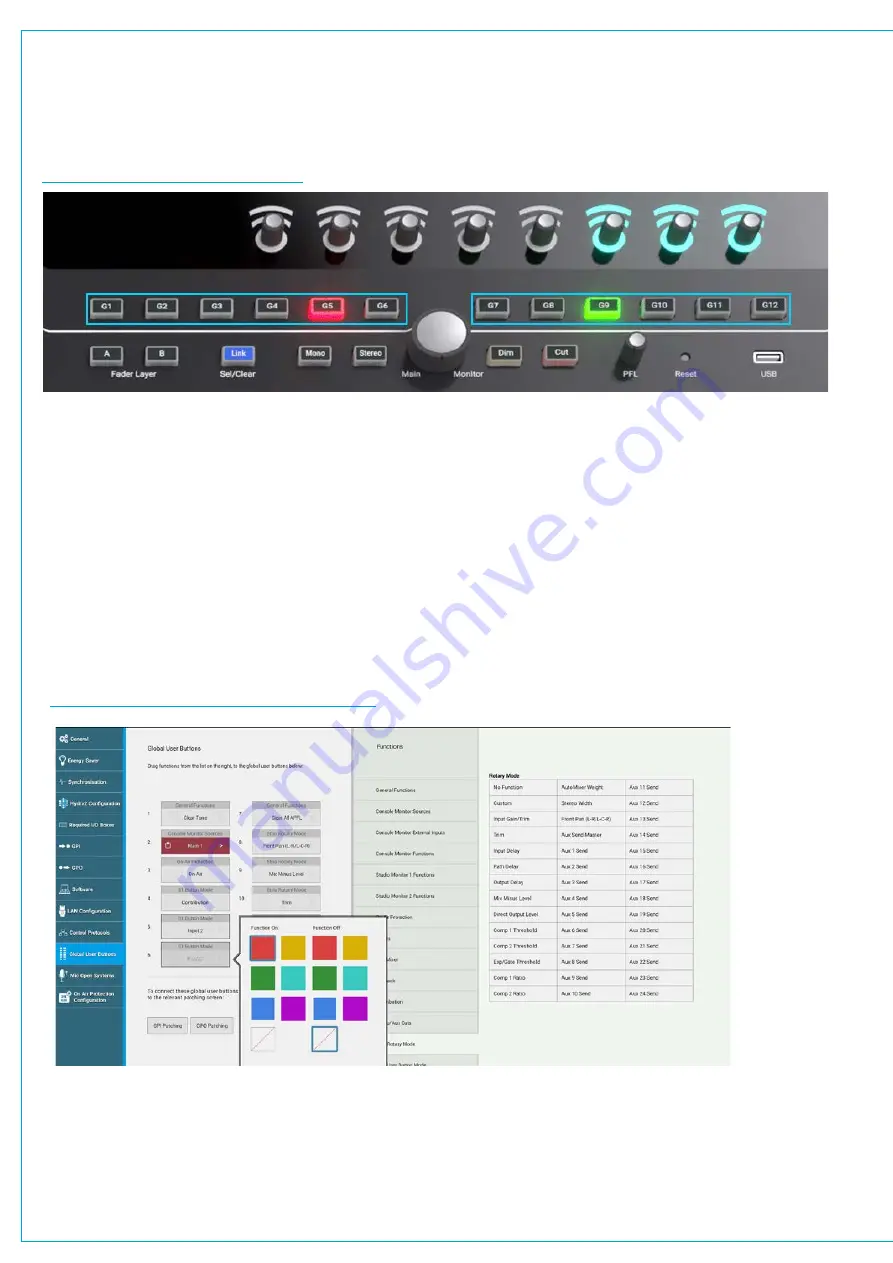
The 12 Global User Buttons in Brio 36’s touchscreen section each have RGB LED indicators in them.
They can be assigned to directly control a range of functions through the touchscreen UI.
FIGURE 1 - GLOBAL
USER BUTTONS
These buttons can be set up to change General Functions such as clearing Tone or Talkback or APFL, change monitor
source sources including External Inputs, change Console and Studio Monitor functions, select Talkback destinations,
Control Group and Aux Cuts that are not on the surface, start and stop loudness meters, bypass AutoMixers, select
contribution buses and interact with the On-Air protection system. If switching a console function, that function’s state
lights the button. If no console function being controlled, the buttons can be lit by GPI tally as described below.
Global User buttons controlling any of these functions can also be connected to GPOs to simultaneously trigger external
equipment. For example a Global User button that is set up to switch a monitor source, could also connect to a GPO to
trigger a vision switcher to switch to an appropriate video feed. The indicators within the Global User buttons can be used
as Tallies to indicate that a corresponding GPI has been activated.
This can also be used as a method for checking the correct operation of a GPIO circuit. In addition they can be used to
change the functions of the Strip Rotary Mode and the S1 and S2 Strip User Button Modes.
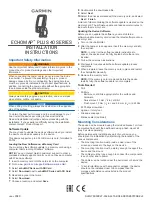
FIGURE 2 - GLOBAL USER BUTTONS SET UP
Global User Buttons are setup by dragging and dropping the function onto the required button.
Note: at the bottom of the page there are links to GPI and GPO patching, GPIs can be connected to the Global User But-
ton indicators to show that a particular GPI has been activated and GPOs can be triggered from the Global User Button
switches to control external or internal functions. Buttons default to lighting red for the on state, regardless of function.
The colour can be changed, and a colour for the off-state selected by tapping the button in the touch UI .
Summary of Contents for BRIO 36
Page 1: ...calrec com Audio Production System with Optional Networking BRIO 36 USER MANUAL V1 1...
Page 12: ...12 BRIO 36 Audio Production System with Optional Networking...
Page 13: ...calrec com BRIO 36 PRODUCT INFORMATION...
Page 20: ...20 BRIO 36 Audio Production System with Optional Networking...
Page 21: ...calrec com BRIO 36 SYSTEM OVERVIEW...
Page 29: ...29 FIGURE 1 BRIO 36 USER INTERFACE DISPLAY...
Page 43: ...calrec com BRIO 36 SETTING UP...
Page 47: ...47 FIGURE 1 SYNCHRONISATION OPTIONS...
Page 67: ...calrec com BRIO 36 GETTING SIGNALS IN AND OUT...
Page 93: ...93 FIGURE 1 THE DIRECT OUTPUT SCREEN...
Page 100: ...100 BRIO 36 Audio Production System with Optional Networking...
Page 101: ...calrec com BRIO 36 PROCESSING...
Page 146: ...146 BRIO 36 Audio Production System with Optional Networking...
Page 147: ...calrec com BRIO 36 MONITORING...
Page 149: ...149 FIGURE 3 EXAMPLE LOUDSPEAKERS SETUP...
Page 155: ...calrec com BRIO 36 METERING...
Page 163: ...calrec com BRIO 36 COMMUNICATIONS...
Page 172: ...172 BRIO 36 Audio Production System with Optional Networking...
Page 173: ...calrec com BRIO 36 ROUTING...
Page 175: ...175 FIGURE 1 CONFIGURING BUSES AND OUTPUTS...
Page 182: ...182 BRIO 36 Audio Production System with Optional Networking...
Page 183: ...calrec com BRIO 36 EXTERNAL INTERFACING...
Page 193: ...calrec com BRIO 36 CONSOLE FACILITIES...
Page 198: ...198 BRIO 36 Audio Production System with Optional Networking...
Page 199: ...calrec com BRIO 36 TERMINOLOGY...
Page 207: ...calrec com BRIO 36 FEATURES BY SOFTWARE VERSION...


