


California Trimmer Mower
Maintenance Manual
37
Heavy Duty & Commercial
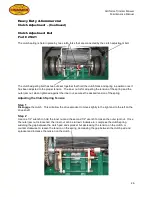
Drive Shaft Assembly – (Continued)
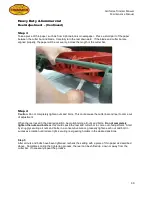
To compress, slide the spring compression tool, in it’s contracted length, onto the drive shaft and tighten
its two (2) set screws. Turn the bottom part of the spring compression tool until the desired measurement
of the spring is achieved. Tighten the two (2) set screws on the set collar.
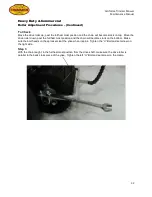
Be sure to use a liquid
thread lock on the set screws
. Slowly loosen the tension on the spring compression tool by turning the
bottom, making sure the collar is holding securely in place. Loosen the set screws on the spring
compression tool and remove from drive shaft. Lightly file the two (2) indentations on the drive shaft, left
by the set screws, if needed. Check the length of the spring to make sure the collar stayed in place.
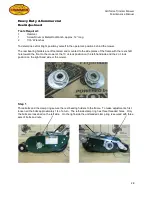
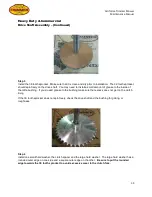
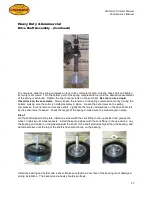
Step 7
On the shaft closest to the plate, install one wheel with the zerk fitting in the up position and grease the
wheel. Install two (2) wheel spacers. Install the second wheel with the zerk fitting in the up position. Lay
the bearing and holder on the wheel against the shaft. If the shaft protrudes higher than the bearing, add
additional shims until the top of the shaft is flush with the top on the bearing.
Install the bearing and holder with a driver. Make sure that the inner face of the bearing is not damaged
during installation. The bearing and wheels should spin freely.


