10
V i s i t u s o n l i n e a t
c a l i f o n e. c o m
Getting Started
continued
Getting Started
continued
NOTE: THE INTERNAL SPEAKERS ARE DISABLED WHEN EXTENSION SPEAKERS ARE PLUGGED IN
Microphone Jack
To record using a dynamic microphone, plug into the 3.5 mm jack (29) on the rear of the cabinet. A 2.5 mm jack is also provided
for use with Califone model 4805AV microphone with remote Start/Stop.
Remote Sensor
A sensor is built into the 2455AV-02 for use with the RC-2400 remote control.
RC-2400 Remote Control
• The RC 2400 operates most functions available on the boombox controls. It does not, however, function with some
of the tape operations.
INTRO
One feature added to the remote is the Intro function. This feature will give a preview of each track for 10 seconds.
Press the ‘PLAY’ button while in the CD mode, then press the ‘INTRO’ button. Press the ‘INTRO’ button again to resume normal
play. If the ‘INTRO’ button is not pushed a second time, the preview will continue through the last track. Pushing ‘PLAY’, ‘PAUSE’
or ‘STOP’ will not disengage the Intro function.
MUTE
Mute is another feature added to the remote. It works with tape, AM/FM and CD functions.
10+
This button allows you to jump forward a number of tracks rather than use the scan forward feature. From stop, pause or
play, pushing the 10+ button once will show a 1 and a flashing –(dash) see 1-. To jump to track 15 enter 5. To go to track 23 from
track 6 press 10+ twice and see 2-. Enter 3 and jump to track 23.
Other Notes
- The ‘SCAN/SKIP’ buttons are the same as the ‘Tuner
p
’, ‘Skip forward
uu
|
’ and ‘Tuner
q
’, ‘Skip back
|
tt
’ buttons on the boombox.
- The ‘REPEAT’ button is the same as the ‘PRESET/REPEAT’ button on the boombox.
- The ‘TIME’ button is the same as the ‘PLAY TIME’ button on the boombox.
Continuous Play (Deck 1 to Deck 2)
1. Set the ‘FUNCTION’ selector to ‘TAPE’.
2. Load prerecorded cassettes into Deck 1 and Deck 2.
3. Press the ‘PLAY’ button on Deck 2.
4. Press the ‘PAUSE’ and ‘PLAY’ buttons on Deck 1.
5. Adjust the ‘VOLUME’ and ‘TONE’ controls.
6. When the tape in Deck 2 reaches its end, it will automatically stop and the tape in Deck 1 will begin playing automatically.
To Record from Microphone, Tape, Radio or CD
This unit has an ALC (Automatic Level Control) circuit and no further adjustment of the Volume control is necessary while
recording. Set the ‘FUNCTION’ Selector to: ‘TAPE’ to record from microphone. Plug mic into AM/FM jack to record from radio
or into CD jack to record from CD.
1. Insert a blank tape into cassette Deck 1.
2. Press the ‘PAUSE’ button then the ‘RECORD’ button on Deck 1 to prepare for recording. As the ‘RECORD’ button is pressed
the ‘PLAY’ button will follow.
3. Press ‘PAUSE’ again to start recording.
Dubbing (Recording from Tape 2 to Tape 1)
1. Insert a blank tape into cassette Deck 1, and the source or prerecorded tape into Deck 2.
2. Press the ‘PAUSE’ button then the ‘RECORD’ button on Deck 1 to prepare for recording. As the
‘RECORD’ key is pressed the ‘PLAY’ button will follow.
3. Press the ‘PLAY’ button on Deck 2, the ‘PAUSE’ button on Deck 1
will release automatically and recording will begin.
Note:
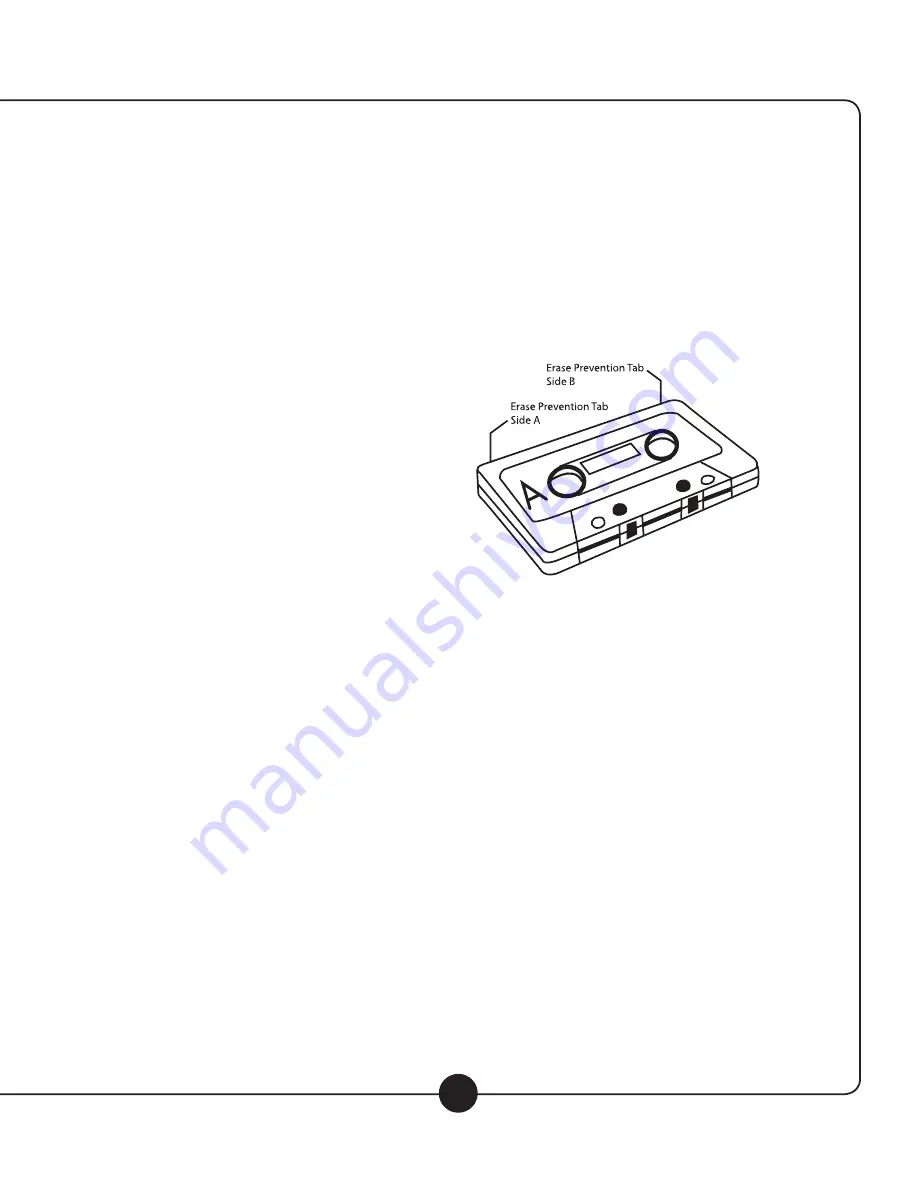
Every new cassette tape has erase prevention tabs.
Commercially prerecorded tapes have the tabs removed to
prevent recording over the original material or accidental
erasure. Cover the openings with adhesive tape if you wish
to record over such cassette tape.
To Stop Recording
Press the ‘STOP/EJECT’ button on Deck 2 or press the ‘PAUSE’ key on Deck 1 to momentarily stop recording.
Cueing with the Tape 1 Counter
Rewind the tape to the beginning. Press the ‘RESET’ button to reset the counter to (000). Use the Tape 1 Counter Display to note
precise points on an audio tape during playback and to cue the tape to those precise points using the ‘FAST FORWARD’, ‘CUE’,
or ‘REWIND/REVIEW’ buttons.
Compact Disc Player Operation
The 2455AV-02 Programmable Compact Disc Player plays both 12cm and 8cm CDs, CD-R, CD-RW without
requiring an adapter. Up to 20 tracks can be programmed for play.
Loading a Compact Disc
1. Lift to open the CD door and see “OPEN” on
the LCD display.
2. Place a CD in compartment with label side up.
3. Press the CD door down to close.
To pause a playing CD
Press the ‘PLAY/PAUSE’ button again. The pause indicator “II”
will appear on the display. Press ‘PLAY/PAUSE’ again to resume play.
Compact Disc Play
To play a loaded CD:
1. Turn power ON.
2. Set the ‘FUNCTION’ Selector to CD.
3. The LCD will show the number of tracks and playing time.
4. Press the ‘PLAY/PAUSE’ button.
The CD Display will show the current track and playing
time.


