califone.com
8
califone.com
9
5. BASIC OPERATION
5.1 RADIO OPERATION
1. Slide the FUNCTION SELECTOR SWITCH to the RADIO
position.
2. Slide the BAND switch to the desired waveband. Turn the
TUNING KNOB to your desired radio station.
3. Adjust the sound level by rotating the VOLUME CONTROL
KNOB.
4. To turn off the radio, slide the FUNCTION SELECTOR SWITCH
to OFF position.
5. For Stereo FM reception, slide the BAND Switch to the FM
position. The FM STEREO indicator will light when listening to a
strong station that is broadcasting in stereo.
NOTES:
• For FM, pull out the telescopic antenna. To improve FM reception
extend and reposition the antenna, reduce its length if the FM-signal
is too strong (very close to a transmitter).
• For AM, SW1 & SW2, the set is provided with a built-in aerial, so
there is no need to use the telescopic aerial, the aerial can be
directed by turning the whole set.
5.2 CASSETTE OPERATION
1. Press the STOP/EJECT button to open the cassette door.
2. Insert a cassette tape into the CASSETTE COMPARTMENT and
push the cassette door to close.
3. Slide the FUNCTION SELECTOR SWITCH to TAPE position.
4. Press the PLAY button. Adjust the VOLUME CONTROL KNOB
to your desired listening level.
5. To stop the tape, press the STOP/EJECT button.
FAST FORWARD AND REWIND
• The tape can be fast FORWARDED or REWOUND by pressing the
FAST FORWARD button or REWIND button respectively.
PAUSE FUNCTION
• During playback or recording, the tape can be stopped temporarily
by pressing the PAUSE button. To continue playback or recording,
press the PAUSE button once again.
AUTO STOP SYSTEM
• When the tape runs to its end during playback or recording, the
cassette operation will be stopped automatically.
CAUTION: To avoid damage to the cassette mechanism or to the
cassette tapes, always press the STOP/EJECT button between each
operation.
HANDLING CASSETTE TAPES
• If the tape is loose in its cassette, take up the slack by inserting a
pencil in one of the reels and rotating if the tape is loose it may get
stretched, cut, or caught in the cassette.
• Do not touch the tape surface.
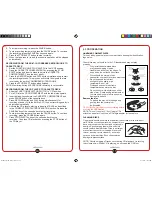
• To prevent recording from being erased accidentally, remove the
tab(s) A and B.
• To record after the tabs have been broken off reseal the slots A and
B with a piece of adhesive tape.
CASSETTE DECK MAINTENANCE
The heads, capstan and pinch roller should be cleaned from time to time
to prevent buildup of tape oxide, which degrades performance. We
recommend cleaning after every 20-30 hours of operation.
1. Press the Stop/Eject key to open the deck door.
2. Remove cassette tape before cleaning.
3. Clean the head of all visible, reddish-brown oxide with a cotton-
tipped swab moistened with a methyl alcohol or any solution specifi-
cally manufactured for this purpose.
CAUTION: DO NOT scrape the head surface with hard, sharp or abra-
sive objects. This will permanently damage the heads.
4. Clean the pinch roller by scrubbing the surface of the roller with the
moistened swab. Rotate the roller by hand until the entire surface is
clean.
5. Clean external case surfaces with a moist, soft cloth. Use only a mild
detergent water solution.
HEAD DEMAGNETIZATION
It is recommended that the tape heads be demagnetized from time to
time. This eliminates residual magnetism which degrades sound
reproduction and the recording function.
1. After cleaning the heads and capstan, place the demagnetizer sev-
eral feet away from the cassette unit and plug it into an AC outlet.
2. Follow the manufacturer’s operating instructions supplied with the
demagnetizer.
RECORDING FROM THE RADIO TO CASSETTE DECK
1. Tune to a desired radio program as described in the "RADIO
OPERATION" section.
2. Insert a blank cassette tape into the CASSETTE COMPARTMENT.
3. Press the PAUSE button.
4. Press the RECORD button. The PLAY button is engaged
simultaneously to start recording. With the built-in Automatic Level
Control (ALC), the best recording quality is automatically adjusted.
Changing the volume level will not affect the recording.
1886 Manual - JH 2009.11.09.indd 8-9
11/11/2009 1:20:06 PM


