


8
Setting the Home Location
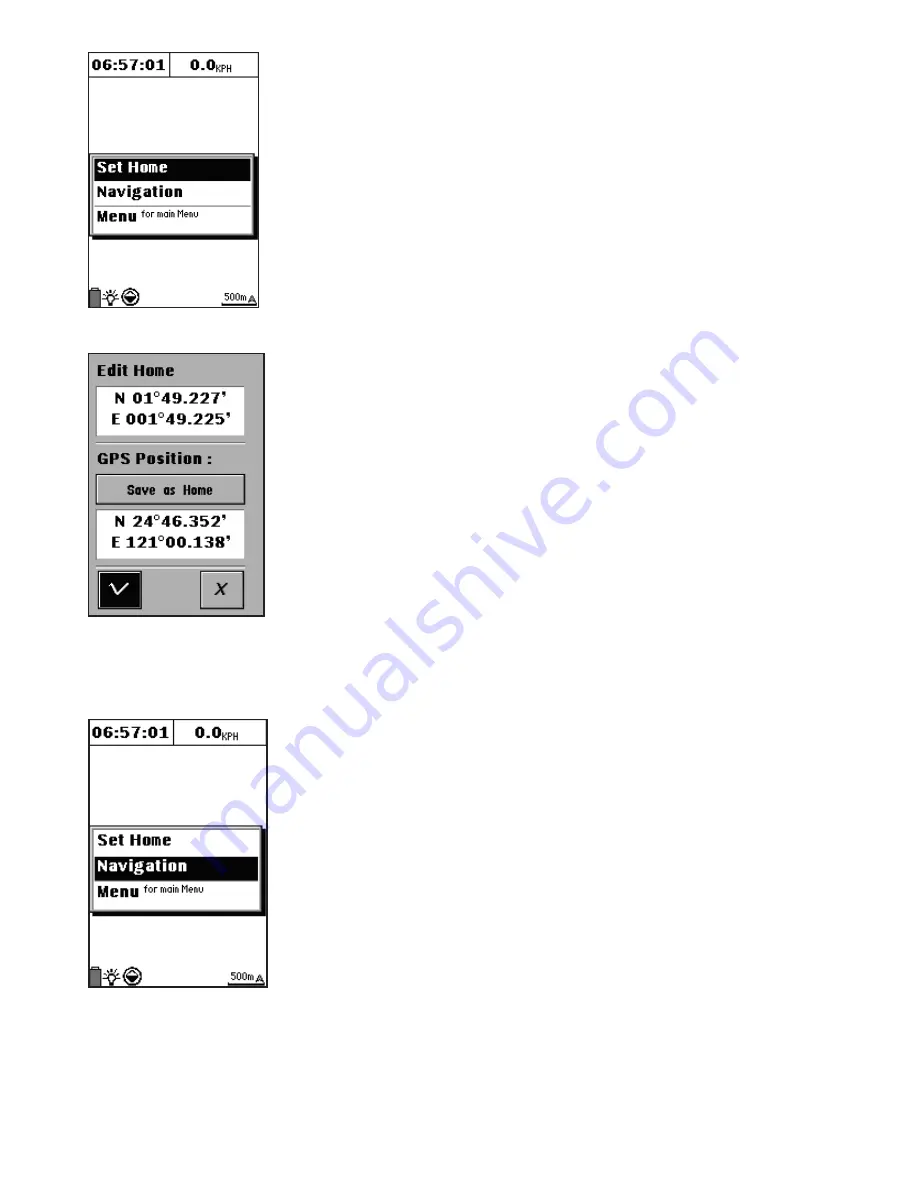
To set your Home Location:
1. In Simple mode, press the
Menu
button to display the
menu options.
2. Use the navigation keys to select
Set Home
and press
OK
(
Fig. 5
).
3. You can set your home location in one of the following
ways (
Fig. 6
):
• Press the navigation keys to highlight
Edit Home
and
press
OK
. Use the navigation keys to set the home
position manually.
• Select
Save as Home
by pressing the navigation keys.
Your home location is automatically set to the location
acquired from the GPS.
4. Use the navigation keys to highlight √ to save your
settings. When a new home location is set, any previously
saved “Home” will be deleted. A warning message
prompts you to confirm the new setting.
Using the Navigation Feature
After setting your home location, you can start navigation
and begin recording trail logs. Press OK to clear the log
history and start recording a new log. The navigation log
recording is automatically updated every 50 meters.
To turn on the Navigation function:
1. In Simple mode, press the
Menu
button to display the
OSD menu.
2. Use the navigation keys to select
Navigation
. (
Fig. 7
)
The device will stop recording the log and a tracking line
will be displayed on the screen.
3. The arrow points in the direction to your home location,
and displays the time and distance before you reach it.
4. Press the
Page
button to go to the Navigation page.
A route between the home location and your current
location is displayed. Refer to this route to return to your
home position.
Using Advanced Mode
In Advanced mode, you can search for objects step by step or
search for a “nearest” object. And you can set waypoints and
create routes for important locations and store them in the
ONIX 110 for future reference.
Fig. 7
Fig. 5
Fig. 6


