background image

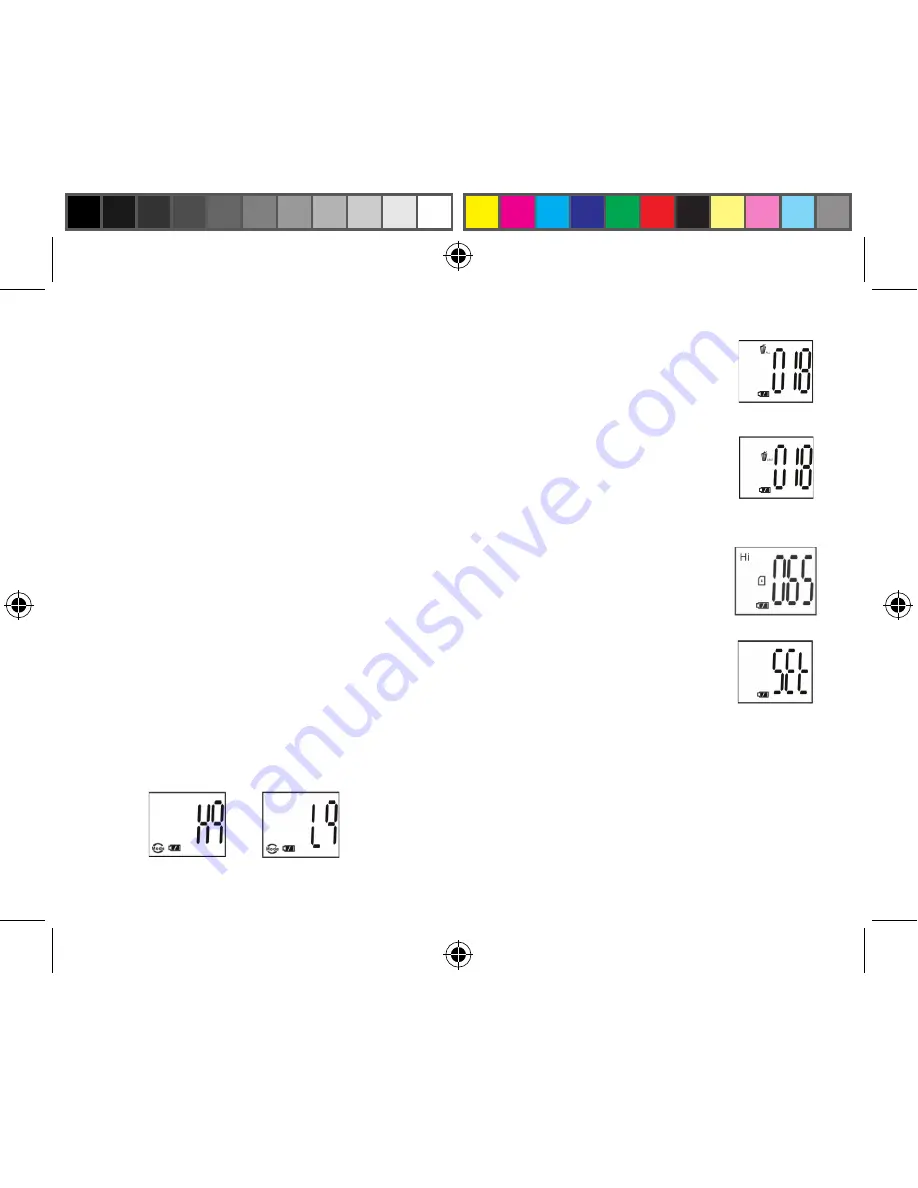
12. To  delete  all  pictures  in  the  camera’s  memory,  select  the  “Delete”  mode.  Press  the 

SNAP button to confirm. The picture number will then blink. You will hear a tone 

that becomes higher as the pictures are deleted. Once complete, the picture number 

will reset to possible captured numbers. 

13. If “Delete Last” icon appears, the display will show the following: Press SNAP to delete 

only the last picture in the camera’s memory. The "total pictures taken" number will 

be automatically decreased after deletion is done. 

14. When an SD card is inserted into the card slot, the SD mark appears on the LCD. 

The captured pictures will be stored in the SD card once the card is inserted. The total 

picture capacity now depends on the memory capacity of the SD card.

15. Press the MODE button until SET mode appears on the LCD. Press SNAP to enter 

Setting mode. To change the setting of image quality (default setting is High), Storage/

PC Cam (default setting is Storage), 50 Hz/60 Hz frequency (default setting is 60 Hz), 

follow the steps below:

   a.   Select the image quality at HQ (High quality) or LQ (Low quality) by pressing the SNAP button. 

Then press the MODE button to confirm and enter the next setting.

118213 QVC Imageview-1LIM.indd   8

8/17/06   10:19:05 PM

Summary of Contents for ImageView 118213

Page 1: ...Model 118213 Lit 98 0795 07 06 1 3 Megapixel 118213 QVC Imageview 1LIM indd 1 8 17 06 10 19 03 PM ...

Page 2: ...118213 QVC Imageview 1LIM indd 2 8 17 06 10 19 03 PM ...

Page 3: ...ly use a binocular for and then save the image in a built in attached digital camera You can then download these images to your computer and e mail them to your friends and family print off the picture using the included software or save them in a photo album for future use Before using the product please read the instructions contained in this manual and take time to familiarize yourself with the...

Page 4: ... has not been used or if a button has not been pressed for over 2 minutes the camera will automatically power off to save battery life If the camera is connected via USB it will not power off except when the PC power is off 3 Mode change press the button rapidly to change modes B The SNAP button has two functions 1 Take a picture press this button to take a picture when the camera is on But not in...

Page 5: ...ber of pictures in the memory b SET select HQ high quality LQ low quality mode STO Mass Storage PCC PC Cam mode 50Hz 60Hz frequency c FUL When the memory is full the display will show FUL OPERATION GUIDE 1 The camera is powered by two AAA alkaline included lithium or NiMh batteries 2 Insert the batteries into the battery compartment Insert an SD card upside down with metal contacts facing up in th...

Page 6: ...t that mode by pressing the SNAP button 7 When in Normal mode press SNAP to take a picture Press SNAP 8 Pressing the MODE button will cause the camera to enter Mode Change 9 To select Self Timer mode press MODE and the self timer mark appears Press SNAP and the capture will be done after 10 seconds The camera exits self timer mode automatically after the capture is done and the self timer mark dis...

Page 7: ... memory May vary due to subject and lighting Pixels resolution Image quality Maximum Picture Capacity 1280x1024 Hi High quality HQ Up to 42 pictures Low quality LQ Up to152 pictures 640x480 Lo High quality HQ Up to 74 pictures Low quality LQ Up to 285 pictures 11 When in Normal mode press the MODE button 3 times to enter the AVI mode The icon will appear Press the SNAP button to start AVI capturin...

Page 8: ...hen an SD card is inserted into the card slot the SD mark appears on the LCD The captured pictures will be stored in the SD card once the card is inserted The total picture capacity now depends on the memory capacity of the SD card 15 Press the MODE button until SET mode appears on the LCD Press SNAP to enter Setting mode To change the setting of image quality default setting is High Storage PC Ca...

Page 9: ...de press the SNAP button until the 60 changes to 50 Confirm the selection by pressing the SNAP button To avoid any flickering on the picture the correct power frequency either 50 or 60 for your country must be selected d Escape the Setting mode by pressing the SNAP button 16 The battery mark keeps track of the battery life If the Battery indicator is blinking it is necessary to replace the batteri...

Page 10: ... new disc device appear on their desktop Clicking on the new disc icon will show the contents a folder named DCIM The image folder inside this contains your photos stored as JPEGs jpg file format They may then be opened edited renamed and saved using any photo or graphics software that accepts jpg files If you do not have software that will open jpg files you should install MGI Photosuite Windows ...

Page 11: ...tallation restart your computer Windows 2000 ME and XP do not require drivers as the camera uses the USB mass storage standard allowing the photo files to be accessed as if they were stored on an external hard drive For any Windows OS if you are not already using photo editing software you prefer you may install Roxio PhotoSuite from the CD ROM Be sure to read the Release Notes completely noting a...

Page 12: ...isplay when you review photos Single clicking any file should show a small preview image 5 Click Edit Select All or click on one photo contol click to select multiple photos then Edit Copy to Folder in Windows menus Select an existing folder on your hard drive such as My Pictures or create a new folder Hawaii Vacation etc then click OK to transfer copies of the photo files you want 6 After the pho...

Page 13: ...diting to your hard drive and not the camera s memory or card To do this in PhotoSuite after clicking Done answer Save Changes with Yes but then answer Replace Existing File with No and use the Save As dialog box to save the edited photo in a folder on your hard drive Save In Local Disk not the Removable Disk camera 8 If you are new to photo editing on a computer consult your software s Help menu ...

Page 14: ...varies from person to person To achieve perfect alignment of lens to eye follow these simple steps 1 Hold your binocular in the normal viewing position 2 Grasp each barrel firmly Move the barrels closer together or further apart until you see a single circular field Always re set your binocular to this position before using How to Adjust For Individual Eye Strength As individual eyesight varies fr...

Page 15: ...he diopter setting adjustment ring focus the same object being viewed Caution should be used as over turning or forcing the diopter eyepiece can cause damage or cause the eyepiece to break away from the chassis 8 Your binocular should be adjusted for your eyes Focus at any far or near distances can now be attained simply by turning the center focus wheel Make a note of the diopter setting for your...

Page 16: ...not water fogproof 6 Take the batteries out of your ImageView if you are not going to use for a long period of time Make sure you download any pictures from your camera before you remove the batteries out of the camera CLEANING 1 Blow away any dust or debris on the lens or use a soft lens brush 2 To remove dirt or finger prints clean with a soft cotton cloth rubbing in a circular motion Use of a c...

Page 17: ... Tél 49 0 221 709 939 3 Fax 49 0 221 709 939 8 This warranty gives you specific legal rights You may have other rights which vary from country to country 2006 Bushnell Outdoor Products FCC Note This equipment has been tested and found to comply with the limits for a Class B digital device pursuant to Part 15 of the FCC Rules These limits are designed to provide reasonable protection against harmfu...

Page 18: ... you remove the batteries from the camera unless you have been using an SD card rather than the internal memory for photo storage WARNING Do NOT look directly at the sun through your binoculars Doing so may cause permanent eye damage Customer Service 800 423 3537 118213 QVC Imageview 1LIM indd 18 8 17 06 10 19 08 PM ...

Reviews: