Page 6
User instructions
Program function (cont)
3:
Press either
/
buttons to select the track
number you wish to play in position one .
4:
Press the
PROG.
button to store the track .
5:
Repeat steps
3
-
4
until you have programmed all the
tracks you wish to play .
6:
Press the
PLAY/PAUSE
button to begin playback of
your programmed sequence .
7:
To delete the program press the
STOP
button twice .
You will notice the
‘PROG’
icon disapears from the
display .
Radio function
Before tuning the radio extend the antenna (16) fully.
1:
Press the
SOURCE
button
(4
,
33)
repeatedly until you
see a radio frequency appear on the display
EG:
-
89
:
60
.
2:
To manually scan for radio stations press and hold
either of the
/
buttons
(12
,
13
,
22)
for two
seconds to scan down or up the frequency band .
When a station is found the scan will stop and the
station will begin to play .
3:
To fine tune the frequency press either of the
/
buttons
(do not press & hold)
, to jump
0.05 MHz
.
4:
There is an autoscan function that will scan the entire
frequency range and store all located stations in the
preset memory slots . To use this function press and
hold the
AUTOSCAN
button on the remote
(21)
. The
unit will scan the frequency band and stop when
finished . See
‘Radio station presets’
below for details
on how to recall located stations .
NOTE: Placement of the aerial is important to
get a good FM signal. If you are having problems
tuning a station, moving the aerial may improve
the reception. If not try moving the unit to another
location.
5:
If you are experiencing poor stereo
FM
reception, you
can press the
FM ST.
button
(7
,
28)
to revert to
MONO
mode which can clean up the reception .
Stereo mode is indicated by this icon
‘
’
.
NOTE: Not all stations will allow this function.
Radio station presets
It is possible to store up to 20 preset stations. The
below steps will explain how to store & recall them.
1:
With a radio station tuned, press and hold the
PRESET
button
(8
,
24)
. You will see a
P01
flash on the
display to indicate preset
01
.
2:
If you wish to store the current station in slot
01
press
the
PRESET
button again to store . Should you wish to
use another slot use the
NAVIGATION
/ buttons
(29)
to cycle through slots
1
-
20
until you reach the
slot you wish to use .
3:
Press the
PRESET
button to store the station in the
selected slot .
4:
To recall stations stored in preset slots use the
NAVIGATION
/ buttons
(29)
to cycle through slots
1
-
20
. Each press will play the stored station on that
slot . If no station is stored then static will be heard .
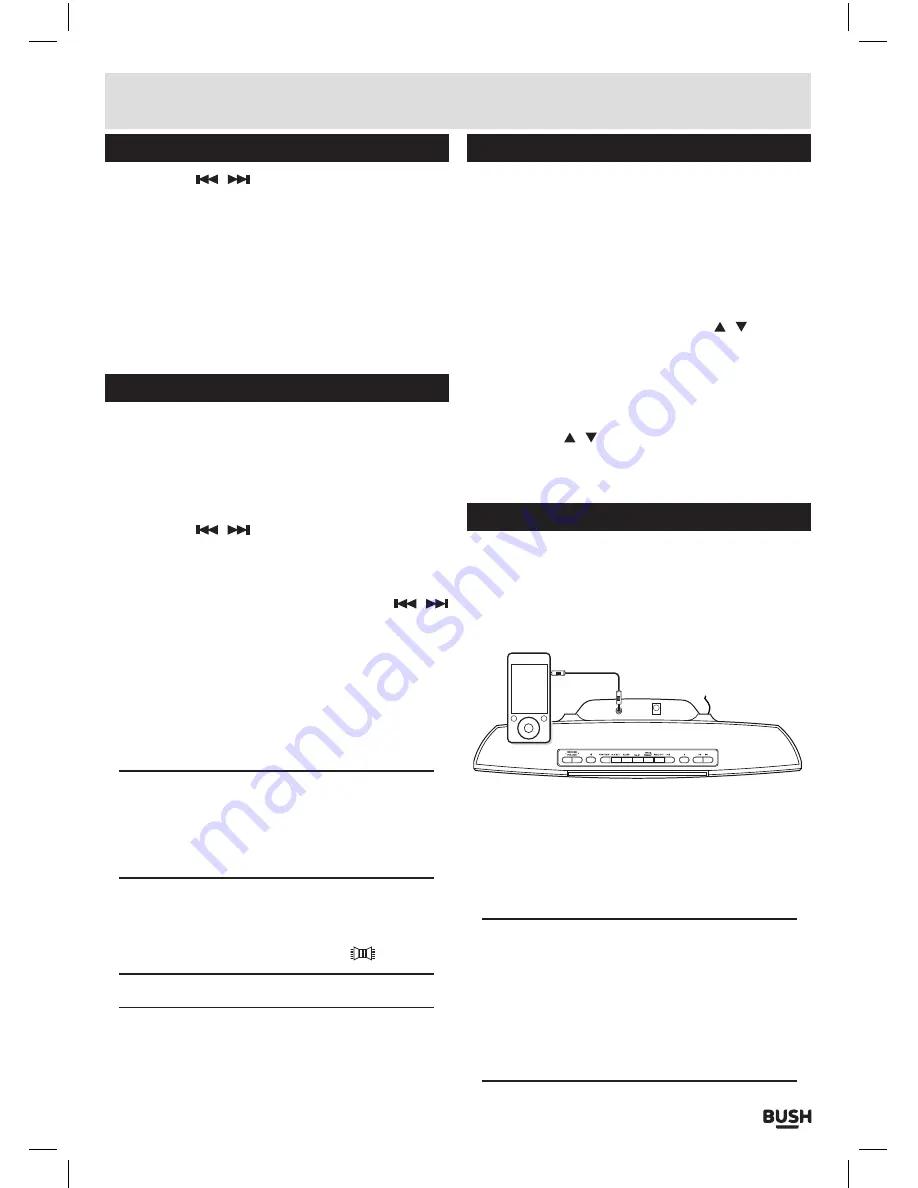
Aux input mode
You can connect an audio devices to the unit using a
3.5mm audio cable (not supplied).
1:
Connect the
3
.
5
mm plug
(not supplied)
into the
AUX
socket on the rear of the unit
(14)
.
PLAY MODE
AUX INPUT SOCKET
MP3 PLAYER
2:
Connect the other end to your audio device .
3:
Press the
SOURCE
button
(4
,
33)
repeatedly until you
see
‘AU’
appear on the display .
4:
Power on the external audio device and begin
playback .
5:
Adjust the volume on the
CMC1112BT
unit .
NOTE: it is recommended to try various volume
levels on the external audio device until you reach
an acceptable balance.
Too much volume and the audio will be distorted,
too little and the audio will be too weak.
The actual volume level is controlled on the
CMC1112BT unit, using the
VOL + / - buttons.


