Installing the Equipment, cont.
Dress input wires
1
Connect input wires from
RM4014
to output terminals of your device.
2
Dress input wires inside enclosure, making sure wires do not slip through opening of faceplate.
3
Tighten fitting on bottom of enclosure.
4
Turn
ON
your device. Wait at least 2 minutes.
4
The following procedure provides general steps for configuring the
RM4014
for service using Bullhorn Tools. Before
beginning the configuration steps, ensure that
Bullhorn Tools is installed on your laptop. The software can
be downloaded
from the
Downloads
page on the Bullhorn RMU Support site (
www.support.aiworldwide.com/products/bh2
).
Configuring the RM4014 for Service
For additional information or questions, please contact Technical Support at 1-800-229-3404 or [email protected]
Bullhorn RM4014 Installation & Configuration Quick Reference Guide
©
2016-2020 American Innovations, Ltd.
Part No. 122215-000 Rev. 3
1
Ensure that the configuration cable is connected to the
RM4014
and your laptop and the unit is powered on.
2
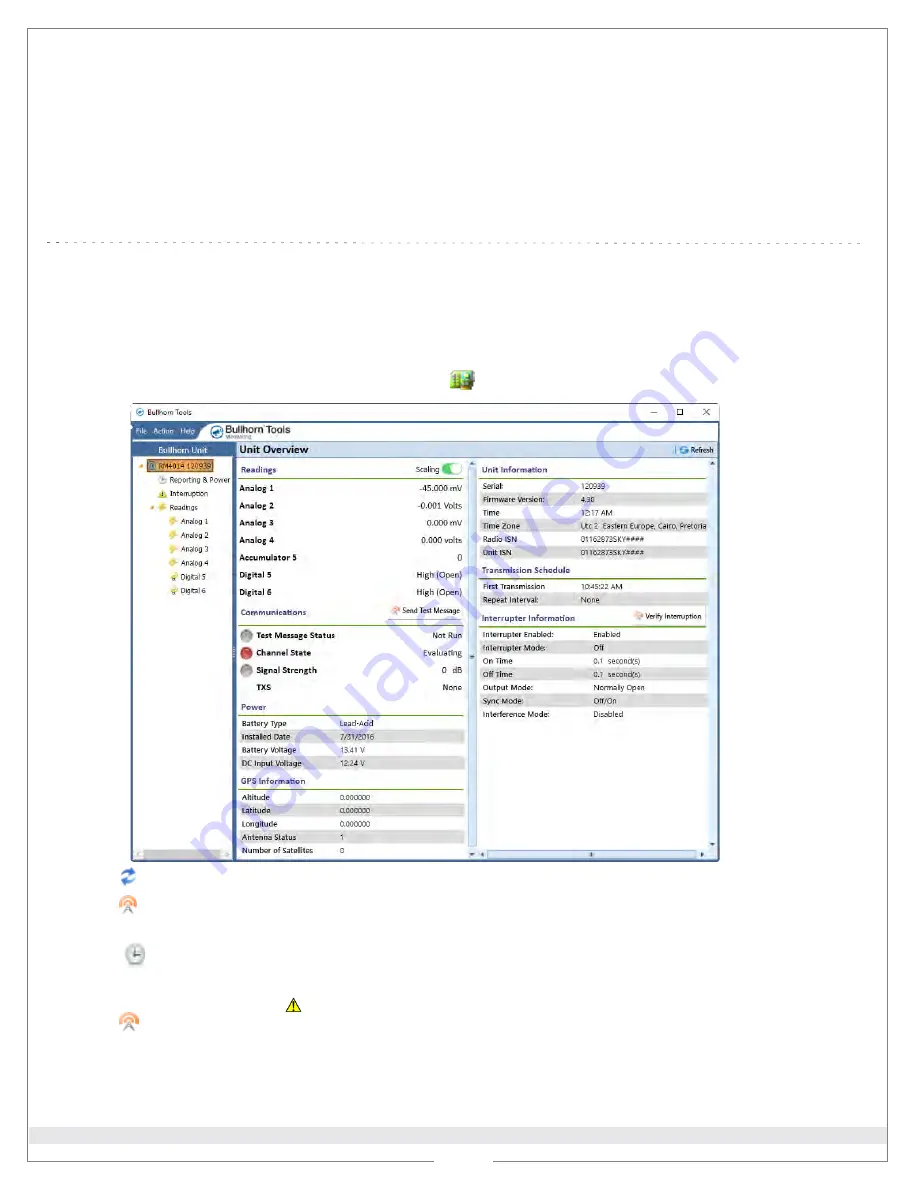
Open Bullhorn Tools. After the scan has completed, click
Connect
to open the
Unit Overview
window.
2 of 2
3
Click
Refresh
to update unit settings.
4
Click
Send Test Message
to verify communications.
5
Load or import a saved template, if available (
File > Load Template
).
6
Click
Reporting & Power
to adjust unit clock, create a transmission schedule, check battery information,
and set AC outage delay alarm times.
7
For interruption only
- click
Interruption
and configure interruption and (optional) interference settings.
Click
Verify Interruption
button (on
Unit Overview
window) to verify process is working correctly
.
8
Configure
Readings
, including Analog and Digital.
Digital 5
can be configured as an accumulator.
9
Exit Bullhorn Tools and disconnect configuration cable.
10
Close and secure enclosure door
.


