


ROTISSERIE COOKING
(CONT.)
LIGHTING & OPERATING INSTRUCTIONS
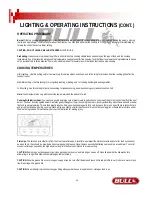
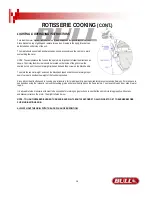
To install the motor bracket, remove the two (2) end screws on the grill closest to the front.
Place bracket on top of grill lip and replace screws (see drawing to the right). Bracket can
be installed on either side of the unit.
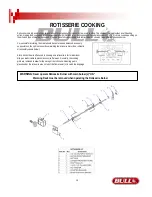
The meat should be centered and balanced as evenly as possible on the spit rod to avoid
overworking the motor.
NOTE: To evenly balance the food on the spit rod, it is important to follow the directions as
shown. The trolley thumb screw should be located on the inside of the grill, screw the
knurled nut on next, the counter weight is then added and then screw on the black handle.
To adjust the counter-weight, unloosen the black handle and slide the counter-weight up or
down to properly position the weight of the food being cooked.
Since indirect heat is often used in cooking on a rotisserie, a foil or aluminum drip pan is advisable to prevent excessive flare-ups. If more space is
needed when using the rotisserie, remove the cooking grates and place the drip pan on the flame tamers. You may wish to add beer, wine or water
to pan.
It is advisable to load rotisserie with meat to be cooked before turning on gas to check to see that the spit rod is turning properly without any
unnecessary strain on the motor. Then light infrared burner.
NOTE: TO LIGHT INFRARED BURNER, TURN KNOB AND WAIT ABOUT 10 SECONDS TO ALLOW GAS TO GET TO BURNER BEFORE
CLICKING IGNITION KNOB.
ALWAYS LIGHT THE GRILL WITH THE HOOD IN AN OPEN POSITION!
16
Summary of Contents for 47628
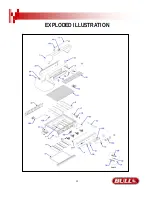
Page 24: ...EXPLODED ILLUSTRATION 23 ...


