


10
Click the
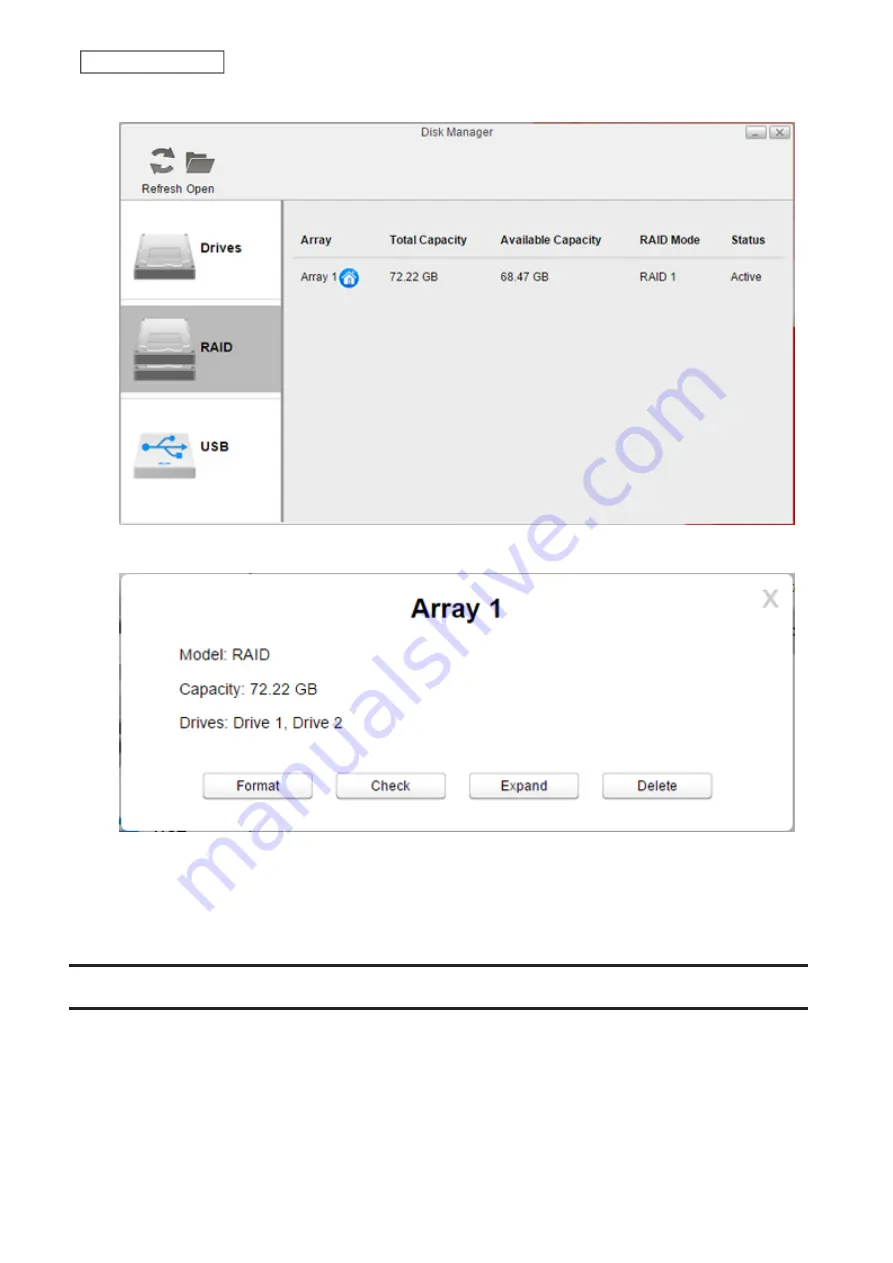
RAID
tab and the RAID array to make the capacity larger.
11
Click
Expand
.
12
Read the warning message carefully and click
Yes
.
13
The RAID array will be rebuilt and its capacity will expand. The power LED will blink amber and the
I18
and
I46
messages will appear. Wait until those messages disappear and the power LED returns to a steady white.
Adding an External Drive
Your LinkStation features a USB port, and you can connect an external drive to this port. For external drives, Buffalo
USB drives are recommended. The following file systems for external drives are supported: ext2, ext3, ext4, FAT32,
exFAT, NTFS, HFS Plus
Make sure only one device is connected to a USB port on the LinkStation. Some external drives with automatic
power-on won’t turn on automatically when connected to the LinkStation. Use their manual power switch to turn
them on. Be sure to connect only one bus-powered drive at a time. If there is insufficient bus power for your USB
drive, connect its AC adapter.
41
Chapter 5 Disk Manager
Summary of Contents for LinkStation 500
Page 38: ...2 Click the RAID tab 3 Click the array to delete 37 Chapter 5 Disk Manager ...
Page 40: ...2 Click the RAID tab 3 Click Create RAID Array 39 Chapter 5 Disk Manager ...
Page 57: ...3 The system log window will open 56 Chapter 6 System Information ...
Page 66: ...2 Click Folder Setup 3 Select a shared folder for the DLNA server 65 Chapter 7 Services ...
Page 77: ...76 Chapter 7 Services ...
Page 97: ...2 From Settings click System Settings 3 Click Firmware 4 Click Browse 96 Chapter 8 System ...
Page 100: ...2 Click Folder Setup 3 Choose the folder to set as a backup destination 99 Chapter 8 System ...


