Step 2: Configure Your Router
Next, you need to configure your router. This is done from a web browser on a computer
connected to the router. Using a computer that is connected directly to the AirStation with a cat5
Ethernet cable is recommended.
A
.
Launch the web browser on the computer that you’re going to use to configure the AirStation.
NOTE:
The computer used to configure the AirStation should be set to
obtain an IP address
automatically
from a DHCP server. This is Windows’ default setting.
B
. Your web browser should automatically attempt to load a web page. If the default web page
loads then the AirStation has automatically configured your Internet connection settings. You
are connected to the internet! Turn to
page 5
.
C
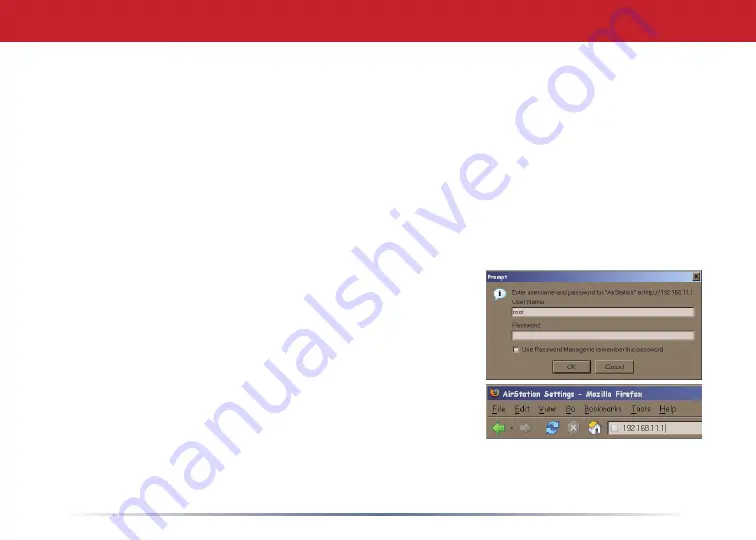
. If the AirStation cannot automatically configure itself for
your Internet Connection, then a window will open, prompting
you to enter a User ID and Password.
NOTE:
If your web browser doesn’t automatically connect you
to the AirStation Configuration Utility, then
type
192.168.11.1
in its address field and press
Enter
on your keyboard.
Enter
root
as the User name and leave the password field
blank.
D
.
The AirStation will provide different configuration options
depending on what it has auto-detected. Please enter specific connection information as
necessary. Contact your Internet Service Provider for any unknown account information.


