
Thank you for purchasing Dual Shades.
All of the required installation components are wrapped in your package along with these instructions.
With
proper installation, operation, and care, your new shades will provide years of beauty and performance. Please thoroughly review this instruction booklet before
beginning the installation.
If the installation brackets are mounted correctly, the rest of the installation process will follow easily. To prepare for this important first step, review the
mounting types and basic window terminology illustrated below.
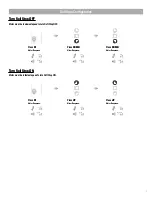
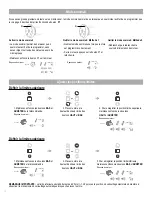
The installation brackets may be for
INSIDE
or
OUTSIDE
mounts.
Mounting the brackets level is essential for proper operation of the shade.
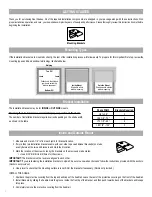
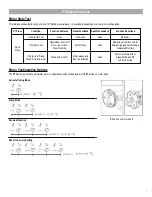
The number of installation brackets required varies depending on the shade width,
as shown in the table.
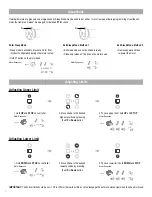
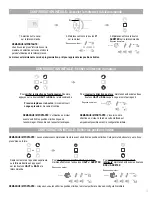
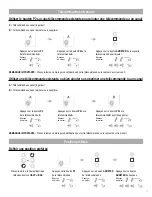
1. Measure and mark 2-1/2” in from each jamb for bracket location.
2. If more than two installation brackets came with your order, space additional bracket(s) on studs,
evenly between the two end brackets and mark their location.
3. Mark the location of the screw holes by the brackets on the previously made marks.
• Use a 3/32” drill bit to drill holes for the screws.
IMPORTANT:
The brackets must be level and aligned to each other.
IMPORTANT:
If you are fastening the installation brackets to drywall, be sure to use wall anchors and follow the instructions provided with the anchors.
(Anchors not provided.)
4. Use a level to check that the mounting surface is level. Shim the brackets if necessary. (Shims not provided.)
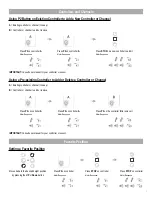
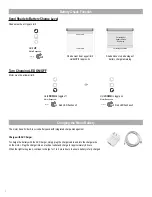
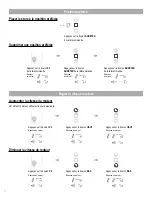
INSTALL THE SHADE
1. Peel back the protective covering from the top and endcaps of the headrail. Leave the rest of the protective covering on the front of the headrail.
2. Install brackets by sliding the headrail into the groove inside the front lip of the bracket and then push towards back of the brackets until snaps
into place.
3. Completely remove the protective covering from the headrail.
2
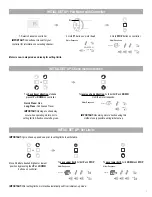
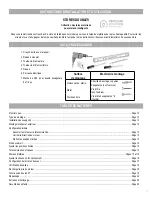
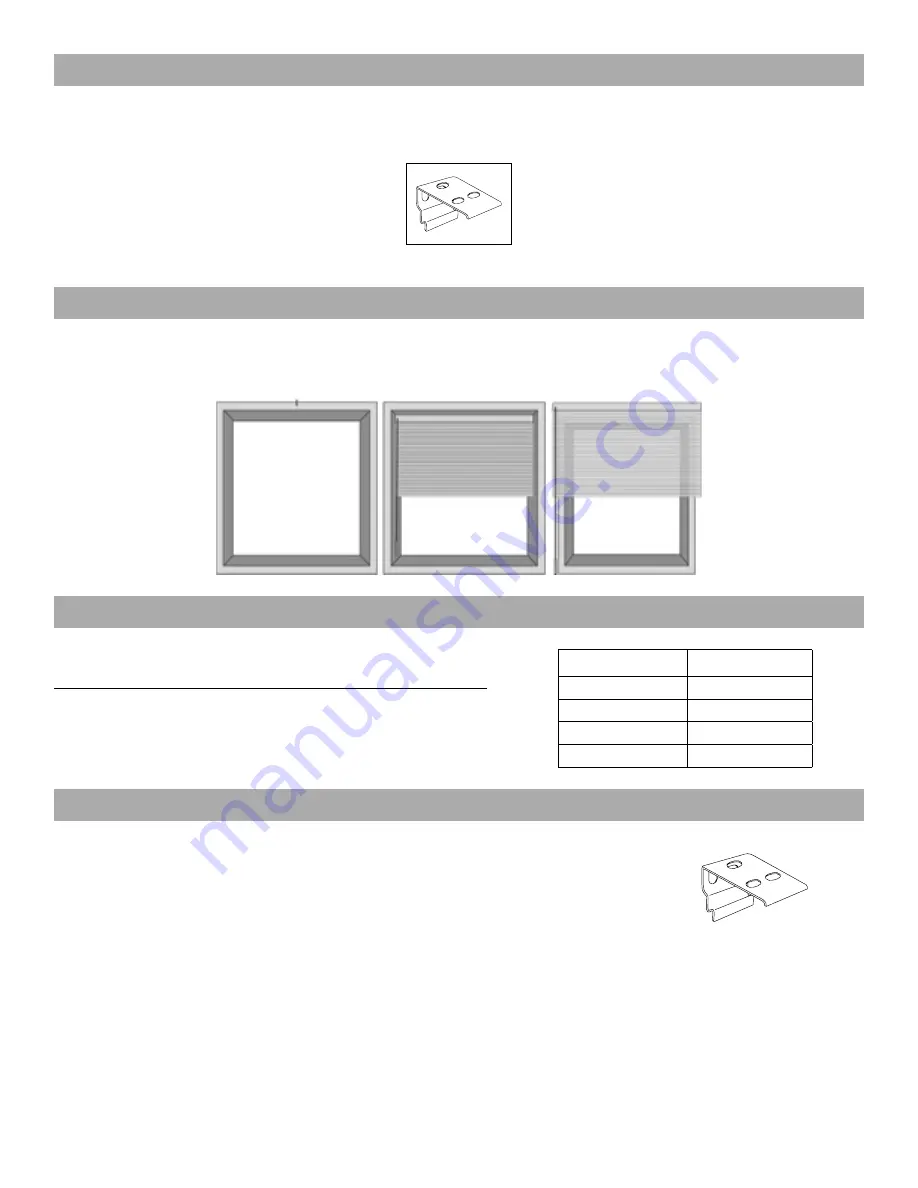
Mounting Brackets
Bottom Sill
Top Sill
Jamb
Jamb
Collectively, the sills and
jambs are called the
“window casement”.
Molding
Inside Mount
Shade fits within
window opening.
Outside Mount
Shade mounts outside
window opening.
Shade Width
Brackets Required
Up to 36”
2
>36 1/8” - 72”
3
>72 1/8” - 90”
4
>90 1/8” - 120”
5
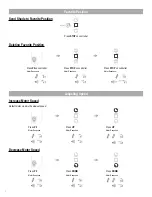
GETTING STARTED
Mounting Types
Bracket Installation
Inside and Outside Mount


