background image

Read carefully before carrying out installation and maintenance.

Installation and Service Instructions

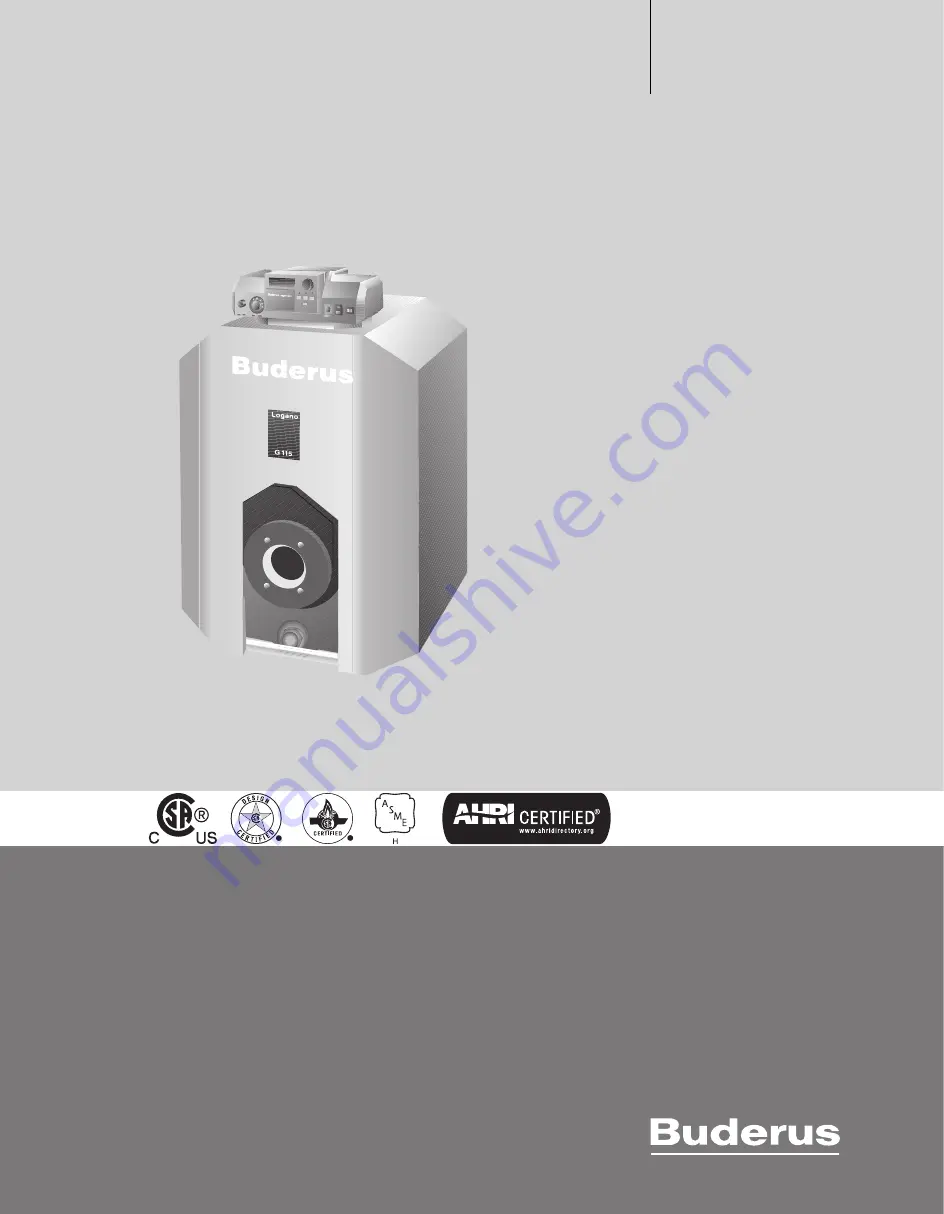
Low-temperature oil boiler

Logano

Caution!
Observe the safety instructions of this 
installation and maintenance manual before 
placing the boiler in operation.

Danger!
If installation, adjustment, modification, 
operation or maintenance of the heating 
system is carried out by an unqualified person, 
this may result in danger to life and limb or 
property damage. 
The directions of this installation and 
maintenance manual must be followed 
precisely. 
Contact a qualified service company or service 
provider if support or additional information is 
required.

Caution!
The operating manual is a component of the 
technical documentation and must be handed 
over to the operator of the heating system. 
Discuss the content of this manual with the 
owner or operator of the heating system to 
ensure that they are familiar with all 
information required for operation of the 
heating system.

6 720 804 872-00.2T

G115 WS US/CA

6 720 813 418 (2019/09)US/CA

Summary of Contents for Logano G115 WS US/CA

Page 1: ...danger to life and limb or property damage The directions of this installation and maintenance manual must be followed precisely Contactaqualifiedservicecompanyorservice providerifsupportoradditional...

Page 2: ...the heating system and checking for leaks 21 5 4 Mounting the burner 23 5 5 Connecting the fuel supply 23 5 6 Installation 24 5 6 1 Aquasmart installation 24 5 6 2 HydroStat installation 24 5 7 Block...

Page 3: ...mation Notes do not contain any warnings or information about hazards or risks 1 3 Observe the following Symbols All applicable local state and national codes and regulations must be observed for the...

Page 4: ...y As electronic equipment may contain hazardous substances it needs to be recycled responsibly in order to minimize any potential harm to the environment and human health Furthermore recycling of your...

Page 5: ...rcial applications 2 2 Certification and testing mark This appliance has been tested and certified to meet rules and regulations in place for the US and Canadian markets 2 3 Notes on installation and...

Page 6: ...s The boiler can alternatively be fitted with a simple aquastat control The boiler jacket prevents heat loss and acts as a noise insulator The boiler heat exchanger transfers the heat generated by the...

Page 7: ...at exchanger Burnerdoorandburnerdoorpanel factory fitted to boiler heat exchanger B kit components 1 Supply manifold G115 US elbow 90 1 1 4 elbow 90 3 4 double nipple R1 1 4 1 1 4 NPT x 75 boiler drai...

Page 8: ...back pressure W C 0 04 0 06 Permissible flow temperatureSafety1 1 Limit safety temperature limiter STB Maximum permitted flow temperature Safety limit STB 32 F Example Safety limit STB 212 F maximum p...

Page 9: ...ls not required but recommended with low temperature heating system design 130 113 F Required with Underfloor heating systems Systems with high water content 115 gal MBH 1 MBH 100 000 Btu hr In conjun...

Page 10: ...ay be operated that could extract combustion air from the boiler room e g Exhaust hood Tumble dryer Ventilation equipment Small animals Prevent small animals from entering the boiler room particularly...

Page 11: ...ntry of foreign objects 0 04 inches 1 mm no water proofing Table 8 Power supply Operating conditions Notes Requirement in greater detail Operating pressure above atmospheric 15 58 psi Maximum 30 psi w...

Page 12: ...to remove Fig 3 Removing burner door panel Unscrew two hex head bolts at the sides Open burner door Lift the burner door off its hinges Fig 4 Removing the burner door CAUTION Risk of system damage fro...

Page 13: ...Secure boiler to hand truck using strapping Move the boiler to the installation location Fig 6 Moving the boiler with a boiler hand truck The boiler is secured to the pallet by 2 screws for transport...

Page 14: ...of system damage from freezing Install the heating system in a frost free room Dimension Wall clearance A Recommended 51 1 8 minimum 39 3 8 B Recommended 27 minimum 15 C Recommended 15 minimum 3 7 8 L...

Page 15: ...ts 2 Hinges Firstremovethehingelobeboltsandthenthehingelobes Mountthe hingebarrelsontheleft handsideoftheboilerusingthehinge barrel bolts Hook the burner door with the hinge lobes onto the hinges Chec...

Page 16: ...ace a wooden batten underneath it Screw in adjustable feet 3 8 Gently set the boiler down Fig 10 Fitting adjustable feet 1 Angle bracket 2 Adjustable feet 4 4 Positioning and leveling the boiler Posit...

Page 17: ...ot existent refer the the following regulations NFPA 31 Installation of Oil Burning Equipment NFPA 211 Standard for Chimneys Fire Places and Solid Fuel Burning Appliances In Canada refer to CSA B139 I...

Page 18: ...2 inches WC using a draft gauge The overfire pressure can be positive If necessary install a barometric damper in the flue system to maintaintheunderpressureinthesystemortomeetcoderequirements Always...

Page 19: ...o 90 elbow The manifold can face in different directions Fig 14 Seal pressure temperature gauge to supply manifold Fig 13 Checking thread length on double nipple Fig 14 Installing B Kit 1 90 1 NPT str...

Page 20: ...m components For more installation examples refer to Chapter 10 page 42 Fig 16 Installation diagram 1 Pressure relief valve 2 Pressure temperature gauge 3 Ball or stop valve 4 Air eliminator in main s...

Page 21: ...auge CAUTION Riskofsystemdamagefromexcesspressure when testing for leaks Pressure control and safety equipment may be damaged by excessive pressure When you carry out a leakage test make sure that no...

Page 22: ...ions and pipework for leaks Bleed the system via the radiator bleed valves if applicable Top with water if the pressure drops as a result of bleeding the system Installing pressure relief valve Fig 14...

Page 23: ...er door mounting holes 5 5 Connecting the fuel supply Make the fuel connection in accordance with all applicable local and national codes and regulations We recommend fitting a fuel filter and de aera...

Page 24: ...ge 50 For operating the boiler with control Chapter 6 page 28 5 7 Blocked vent switch required in Canada For Canadian installations fit a blocked vent switch per the vent switch manufacturer s instruc...

Page 25: ...Let the flexible hooks of the control panel click into the openings by pushing the control panel down Fig 20 Fitting the controls 1 Flexible catches 2 Locating tabs 3 Slots 4 Locating holes Remove the...

Page 26: ...bly and balancing spring in the immersion well and insert completely The plastic spiral is then pushed back automatically Push the sensor retaining clip supplied with the controls onto the top of the...

Page 27: ...sertthecabletiestogetherwiththecablefromthetopintotheslots in the frame step 1 Slide the cable ties downward step 2 Push against the ties step 3 Flip the toggle up step 4 Fig 24 Securing cables with c...

Page 28: ...ng the safety valve Make sure that no persons are in the discharge area of the pressure relief valve Raise the lever on the pressure relief valve Thepressurereliefvalvemustopenandreleasepressure Ifthe...

Page 29: ...enter 3 Flue baffle plates 3rd pass 6 4 Preparing the heating system for operation Open the fuel supply at the main shut off valve Switch on the heating system emergency shut off switch and or the app...

Page 30: ...by one or several of the following measures Adjusting the position of heat exchanger baffles or Removing heat exchanger baffles or Removing the heat exchanger barrier plate 6 7 1 Adjusting the positi...

Page 31: ...door bolts ca 90 Lbs inch Tighten bolts evenly Install burner cable back to burner disconnect Recheck tightness of burner door after operation the burner for 10 minutes Check stack temperature again F...

Page 32: ...ner door panel on the hooks on the boiler casing Secure the burner door panel with the two screws at the sides The Logano G115 WS must be fitted with a burner that has an operating range that matches...

Page 33: ...28 ____________ psi 3 Checking combustion air supply and flue system 4 Checking position of heat exchanger baffles 29 5 Switching on the controls and burner controls documentation 29 6 Checking flue...

Page 34: ...down the heating system in an emergency 7 2 1 What to do in an emergency Explain to the customer what to do in an emergency e g a fire Never put yourself at risk of fatal injury Your own safety must a...

Page 35: ...If parts are replaced only Buderus approved components may be used A service must be carried out once a year The results of the services must be recorded in the servicing and maintenance log 8 2 Prepa...

Page 36: ...damaged or hardened gasket cord Close burner door with the two hexagon bolts approx 90 inch lbs Tighten the hexagon bolts evenly Fig 39 Brushing out the combustion chamber 8 3 2 Wet cleaning chemical...

Page 37: ...o persons are in the discharge area of the pressure relief valve Raise the lever on the pressure relief valve Thepressurereliefvalvemustopenandreleasepressure Ifthepressure relief valve does not disch...

Page 38: ...sible signs of corrosion signs of ageing 4 Check the combustion chamber and the heating surface for contamination shut down the system for this step 34 5 Checking the burner burner documentation 6 Che...

Page 39: ..._____ 1 2 3 4 5 6 7 8 9 10 Company stamp signature Company stamp signature Company stamp signature Company stamp signature Company stamp signature Company stamp signature Company stamp signature Ifany...

Page 40: ...4 Checking seals cord gaskets on burner door and burner and replacing as necessary 36 5 Commissioning the heating system 29 6 Final check of the servicing work 7 Checking safe and proper operation Co...

Page 41: ...burner Fig 41 Resetting the burner 1 Burner CAUTION Risk of system damage due to too many resets Too many resets can damage the burner s ignition transformer Do not press the reset button more than th...

Page 42: ...d Fig 43 Multiple circuits with circuit valves 1 Baseboard KR Check valve SH Heating circuit adjuster MAG Expansion tank SV Pressure relief valve PH System pump THV Thermostatic radiator valve PW Hot...

Page 43: ...systems with a high water volume 1 Radiator 2 Boiler bypass Fig 45 Multiple circuits with pumps and motor actuated 3 way mixing valve 1 Baseboard 7 747 019 141 42 1RS SV PH THV MAG WH G125 WS NA 3 4 1...

Page 44: ...x65 5 6 as per drawing 05555070 20 Spacer sleeve R3 8 x39 x 54 Hexagon nut ISO4032 M10 8 A3K x 55 Washer DIN115 A10 5 A3K x 57 Reducer nipple G1 xG3 4 63027607 60 Sensor sleeve PMW 3 SEE 4 1 2 US 7747...

Page 45: ...3mm 05447620 320 Inspection window cover x 330 Hexagon bolt ISO4017 M6x12 8 8 A3K x 340 Pressure testing nozzle M6 SW10 V2 x 350 Heat insulation for burner door BE non Buderus burner size 21 334 5 630...

Page 46: ...4 1 elbow 90DEG 3 4 I A 1 double nipple R11 4 11 4NPTx75 1 boiler drain 3 4 1 relief valve 3 4Mx3 4F 30PSI 1 temperature pressure gauge 1 4 NPT 1 Bolt set B Kit G115 US 1 adjustable boiler foot M10x51...

Page 47: ...6 Boiler block and burner door 21 23 24 133 133 180 180 52 53 22 21 370 380 390 280 270 260 250 350 300 290 310 330 340 320 350 400 360 22 52 55 54 80 142 141 140 130 131 132 120 70 70 91 90 10 81 51...

Page 48: ...7 85 Sheet metal screw C ST3 9x13 A3T x 90 Flathead bolt 3 9x9 5 A3T x 95 Plug in fuse x 100 Boiler block insulation G115 7747014842 100 Boiler block insulation G115 7747014843 100 Boiler block insula...

Page 49: ...S CA 6 720 813 418 2019 09 49 Fig 47 boiler jacket 7747102154 00 Verkleidung G125 WS NA 85 80 40 70 40 70 40 70 80 60 50 85 20 100 10 18 90 130 120 90 90 125 90 140 145 150 170 160 170 160 90 95 110 7...

Page 50: ...erminal on the Riello burner terminal block 5 Connect white wire in wire harness to terminal B2 of the L7248C the N Terminal on the Riello burner terminal block 6 Connect green wire to ground screw on...

Page 51: ...red wire from wire harness to L1 on the L7248C the red white wire on the Carlin 70200 Control 5 Connect black wire from wire harness to B1 on the L7248C the black wire on the Carlin 70200 Control 6 C...

Page 52: ...rness to B2 of the L7248C the white wire on the R7184B or 7505B Primary Control 6 Connect the green wire in the wire harness to ground screw on the L7248C the ground connection on the R7184B or 7505B...

Page 53: ...12 Circuit diagrams Logano G115 WS US CA 6 720 813 418 2019 09 53 Fig 51 Circuit diagram 4...

Page 54: ...CA 6 720 813 418 2019 09 54 Fig 52 Circuit diagram 5 Carlin 70200 Series Primary Control Field installed jumper T F F CAD Cell Eye Ground T BV BV A A L2 L1 IN L1 OUT LIMIT MOTOR VALVE IGNITION 70200...

Page 55: ...12 Circuit diagrams Logano G115 WS US CA 6 720 813 418 2019 09 55 Fig 53 Circuit diagram 6...

Page 56: ...l L1 and Neutral to terminal L2 4 Connect the black wire from the Honeywell or Genisys to terminal B1 on control 5 Connect the white wire from the Honeywell or Genisys to terminal B2 on control 6 Conn...

Page 57: ...the black wire from the Carlin 70200 to terminal B1 on control 5 Connect the white wire from the Carlin 70200 to terminal B2 on control 6 Connect the green wire from Carlin 70200 to ground screw on co...

Page 58: ...n control 2 Connect incoming 120VAC power source to the control 3 Connect Line Voltage to terminal L1 and Neutral to terminal L2 4 Connect the black wire from the Riello to terminal B1 on control 5 Co...

Page 59: ...iagram 20 Installation examples 42 Installation of boiler drain 20 L Log commissioning 33 Logs servicing and maintenance 38 M Main isolating cock 29 Main isolating valve 29 Maintenance regular 35 Mast...

Page 60: ......

Reviews: