


Birdhouse / birdfeeder with built-in IP camera Instructions for installation and operation
Operation
Access to camera in LAN
Note:
Before placing the birdhouse to the field, configure the IP camera and verify your LAN
functionality first (see in the manual bellow)!
Connect the built-in camera to your router / switch using the Ethernet cable. Ensure the camera
power supply (see the instructions above).
The camera is configured as DHCP client by default. It means the camera IP address is set by your
router which is enabled as DHCP server by default.
Note:
If DHCP client is not enabled in the camera the IP address of the camera is set to 192. 168.1.168 by
factory default.
You can enable the DHCP for camera wired LAN port in „IP Searcher“ utility (see below).
Searching the camera in the network
Download to your PC the „IP Searcher“ utility either from enclosed CD or from
www.budcam.cz
.
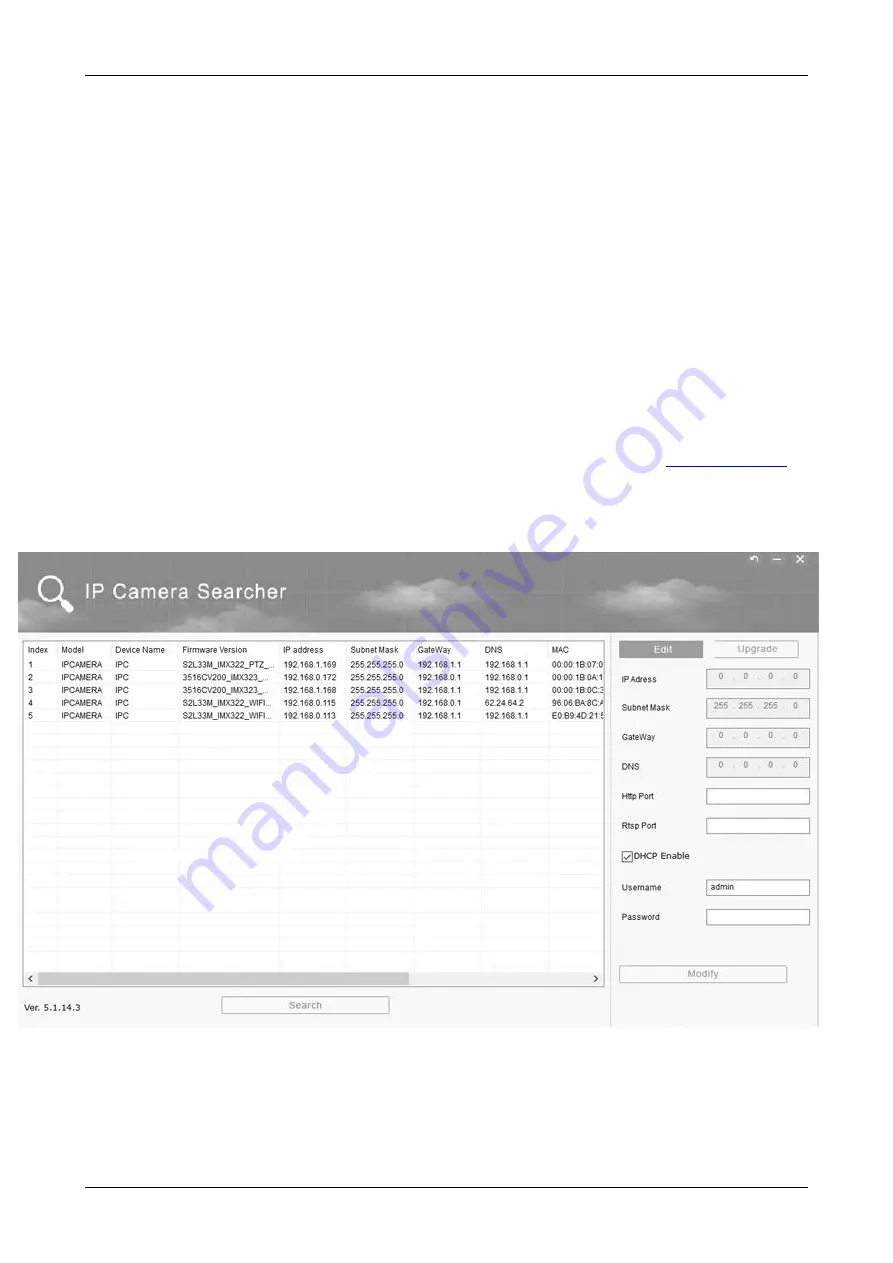
Run the „IP Searcher“ utility. Click on "Search" at the bottom. "IP Searcher" searches for
compatible IP cameras connected to your LAN and their network parameters are displayed. Select
the camera from your birdhouse / feeder and remember or note somewhere its IP address. Close "IP
Searcher".
Note:
·
For DHCP to be enabled the box "DHCP Enable” in „IP Searcher“ must be checked. If it is not
so, check the "DHCP Enable", enter the Username ("admin" by default) and the Password
("admin" by default). Then click "Modify". Wait a while and then click on "Search". "IP
Searcher" searches for your camera with a new IP address assigned to it by the DHCP server
(router) in your network. Note the IP address of the camera.
- 10 -