


U
ser
M
an
ua
l
4
Channel 1 TB HR DVR
8 Channel 2 TB HR DVR
16 Channel 4 TB HR DVR
4 Channel 1 TB HR DVR
71
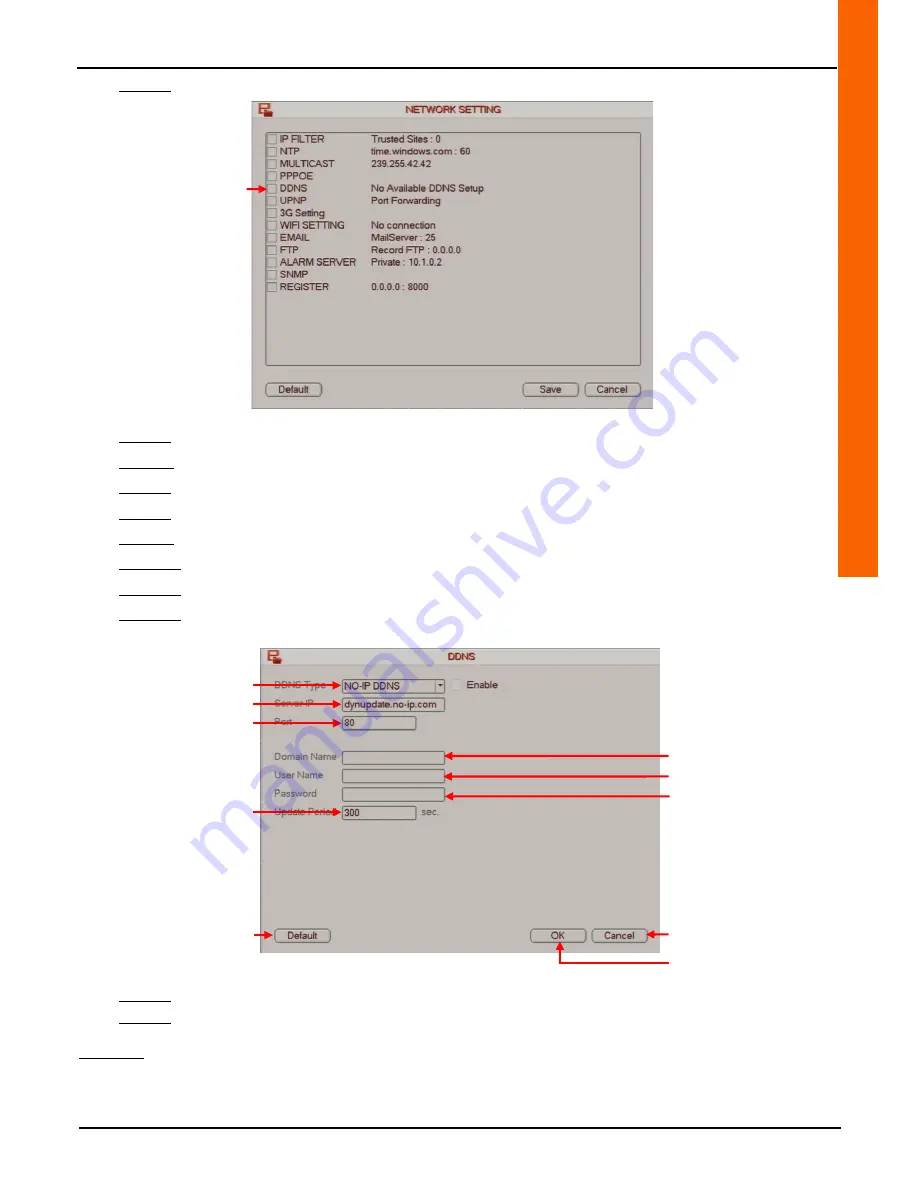
Step 2-4:Double-click on the "DDNS" line to access the "DDNS" menu.
Step 2-5: Select the DNS server type from the "DDNS Type" drop-down menu.
Step 2-6: Check the "Enable" box on the "DDNS Type" line to enable DNS function.
Step 2-7: Enter the DNS server address in the "Server IP" line field.
Step 2-8: Enter the web port in the "Port" line field.
Step 2-9: Enter the host name followed by its extension in the "Domain Name" line field.
Step 2-10: Enter the DNS account user name in the "User Name" line field.
Step 2-11: Enter the DNS account password in the "Password" line field.
Step 2-12: Enter the time period during which the connection between the computer and the recorder will no not be
interrupted while the IP address is edited in the "Update Period" line field.
Step 5-7: Click on the "OK" button to confirm the operation, or click on the "Cancel" button to cancel the operation.
Step 5-8: Right-click to return to the previous menu. Then right-click again to return to the direct tiles.
Comment:
•
Click on the "Default" button to reset default settings.
Cancel the operation
Save the operation
Reset
default settings
Access the DDNS menu
Select the DNS server
Enter the DNS server address
Enter the web port
Enter the host name
followed by its extension
Enter the DNS account user
name
Enter the DNS account
password
Enter length of connection time
Summary of Contents for 391519
Page 82: ......


