8190URF QG
英
3100505630 v1.1
USB Wireless Keyboard & Mouse Kit Quick Installation Guide
Hardware Installation
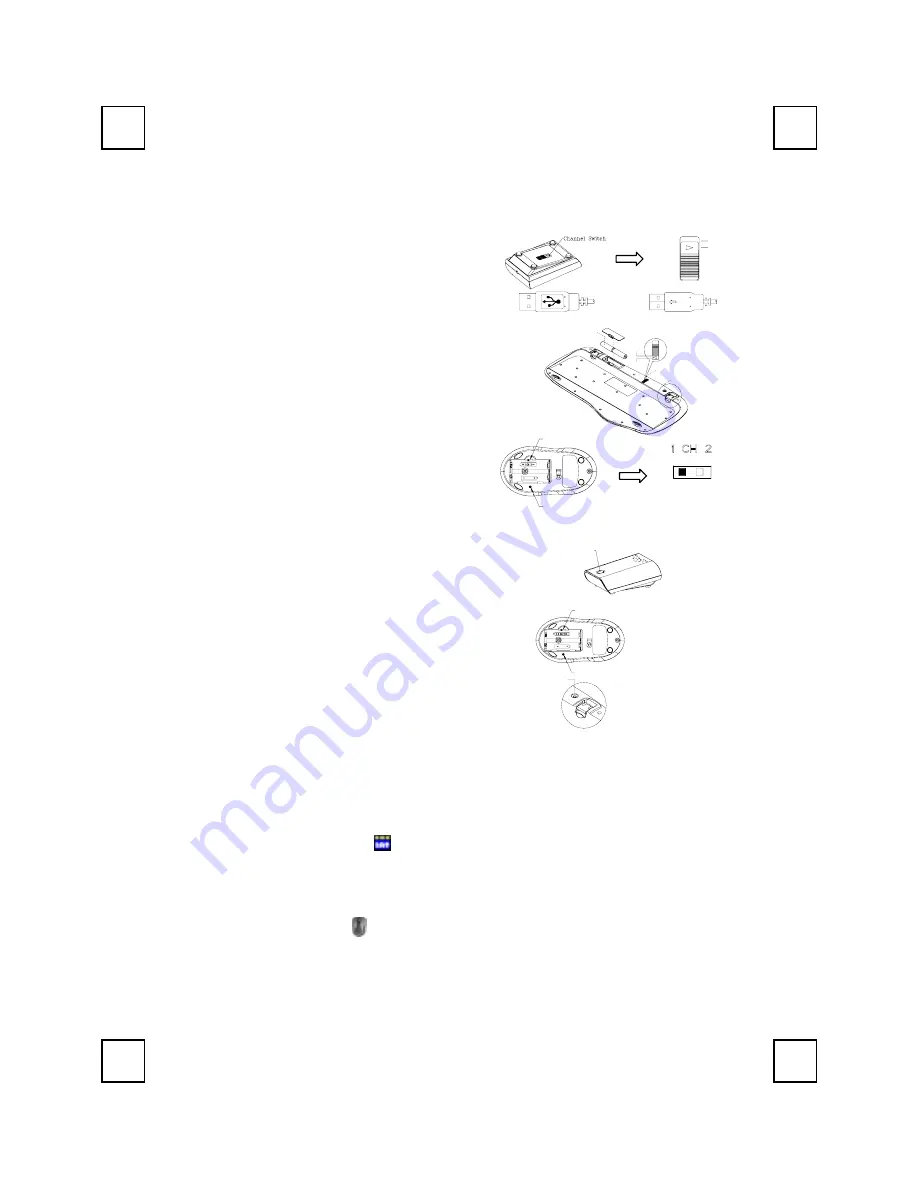
Slide Switch Setting
CH1
CH2
Battery 1.5V* 2pcs
Slide Switch
(-)
(+)
CH1
CH2
ID Button
1.
Connect the receiver to your computer by
plugging in the receiver connector into your PC.
2.
Take the receiver and select channel CH1 or
CH2 by using the slide switch on the underside
of the receiver. (Remember your selection.)
3.
Take the keyboard and make sure the batteries
on the back are installed correctly. (Follow the
polarity signs in the battery compartment.)
4.
Use the slide switch on the back of the keyboard
to select the same channel as the one selected
in step 3 on the receiver.
5.
Take the mouse and make sure the batteries on
the back are installed correctly. (Follow the
polarity signs in the battery compartment.)
6.
Use the slide switch on the back of the mouse to
select the same channel as the one selected in
step 3 and 5.
ID BUTTON
CHANNEL SWITCH
ID Button Setting
ID Button(LED)
ID BUTTON
CHANNEL SWITCH
This ID-recognition function helps to protect against
interference from other RF keyboards in the same
environment. Remember to set the ID when you replace
the batteries or your keyboard kits do not work properly.
The word CONNECT labels the ID button on each unit.
The LED under ID button of receiver shows connecting
condition.
1. Your PC must be on to change the ID setting.
2. Press ID button on the side of the receiver once.
3. Press ID button on the bottom of the mouse once
4. Press ID button on the bottom of the keyboard once.
ID Button
Important:
1. Use the mouse only on a clean, flat, non-slippery surface in order to ensure smooth and accurate
cursor action. If you use a mouse-pad, choose a light-colored one, not a dark one, to use less
battery power.
Software Installation
Keyboard Driver Installation
1. Insert the driver CD in your computer drive.
2. Run the "
SetupKey.exe
" in the
\keyboard softwar
e directory of the driver CD.
3. Follow the on screen instructions to finish the installation procedure.
Mouse Driver Installation
1. Insert the driver CD into your computer drive
2. Run the "
Setup.exe
" in the
\mouse software
directory of the driver CD.
3. Follow the on screen instructions to finish the installation procedure.
Bottom View of Mouse
Slide Switch Setting
of Mouse
Back View of Receiver Plug
Front View of Receiver Plug
ID Button of Keyboard
ID Button of
Receiver
ID Button of Mouse


