Bryant ZONE PERFECT PLUS A96447 User'S Information Manual Download Page 21


—21—

Using Your Smart Sensors

If you purchased optional smart or interactive sensors with your Zone Perfect Plus system, you have the ability to control the tem-
perature of a zone at that zone’s location. Suppose you have a guest bedroom, and it’s used infrequently. With a smart sensor in the
zone, a guest can adjust the temperature as needed for their comfort without changing the program at the user interface.

A97187

A97188

A97190

A97242

A97192

A97647

OUT

COOL

DESIRED TEMP

OUT

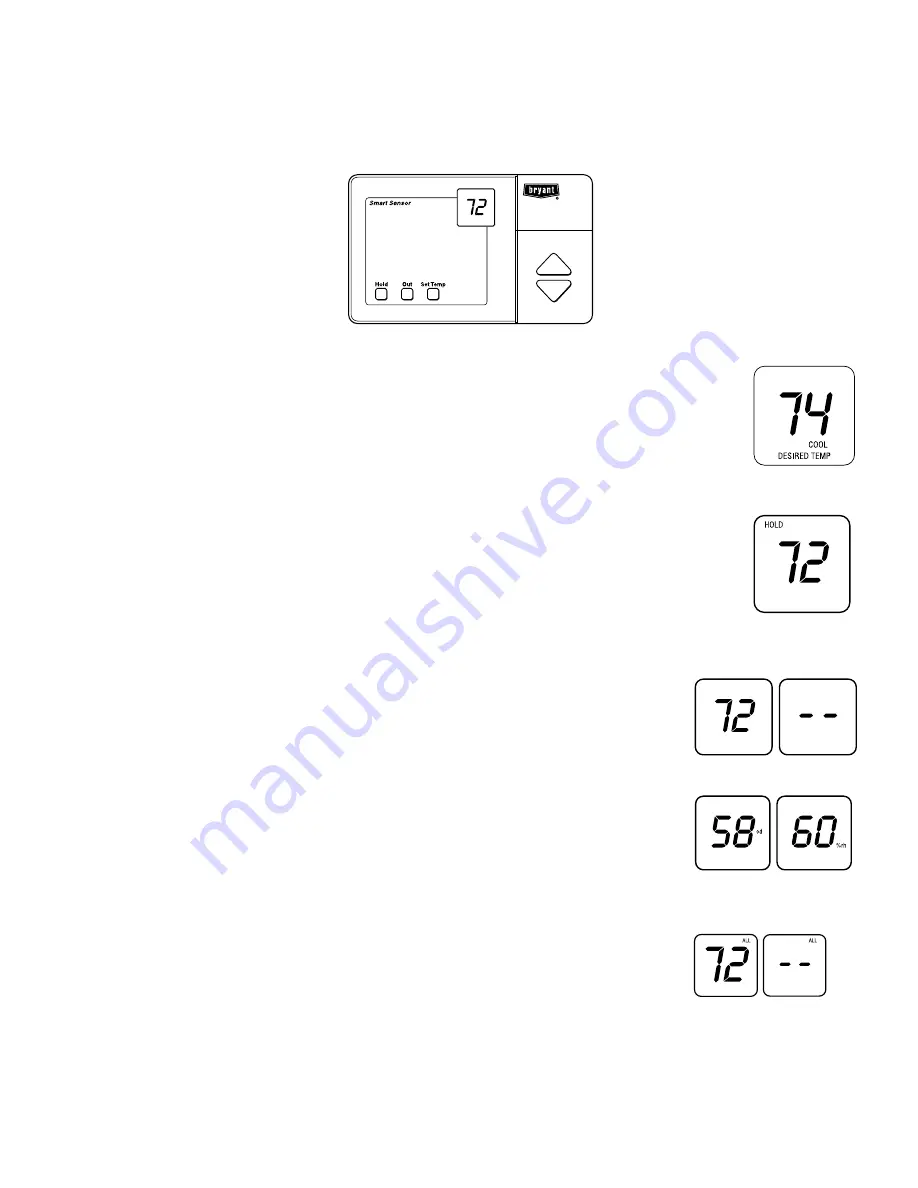
Smart Sensor display

with ALL ZONE enabled

Changing the desired temperature:

1. The current temperature in that zone will be displayed in the LCD.

2. Press the UP or DOWN button to display the desired temperature for that zone. The LCD will 

display the current mode of operation, either heat or cool.

3. Press the UP or DOWN button again as needed until the new desired temperature is shown.
4. Press SET TEMP button to change temperature between COOL desired temperature and HEAT

desired temperature.

6. Pressing OUT button will program the zone as being unoccupied. Pressing OUT button

again changes the zone to occupied. When a zone is set to OUT, desired temperature will be
displayed as dashes when the UP and DOWN buttons are pressed.

Viewing the outdoor temperature and indoor humidity:

1. Pressing both UP and DOWN buttons simultaneously will display the outdoor temperature,

if this feature is included, and the indoor humidity. Outdoor temperature will be displayed
first for 5 sec, followed by humidity for 5 sec. Smart Sensor will then return to normal. The
humidity value will be the humidity level as measured at the user interface.

Note: If the All Zone feature has been enabled from the user interface, you will not be able to

override the settings at the smart sensor location. The desired temperature will be dis-
played as dashes when the UP and DOWN buttons are pressed. You must first remove
the All Zone function by pressing the ALL ZONE button on the user interface. 

A Smart Sensor does not remove or transfer features from User Interface. It only provides
a location within zone where access is provided to some of User Interface features. Any
input that can be provided at Smart Sensor can also be provided at User Interface.

5. Pressing HOLD button will hold the desired temperature setting indefinitely. Pressing HOLD

button again removes the hold function.

Summary of Contents for ZONE PERFECT PLUS A96447

Page 1: ...Zone Perfect Plus Zoning Systems USER S INFORMATION MANUAL NOTE TO INSTALLER This manual must be left with the equipment user A96447...

Page 2: ...ifficult to heat or cool Here s how it works Your Bryant dealer has divided your home or business into zones which are controlled separately Instead of setting one temperature for the entire house or...

Page 3: ...stem to match your schedule and your comfort requirements To begin enjoying the benefits of your Zone PerfectPlus zoning system locate the user interface and follow the steps outlined below Set the cu...

Page 4: ...cupied and coded as OUT and will not be conditioned unless the temperature drops below 60 or rises above 85 in that zone during that time A96438 For Zone 2 the sleeping areas are unoccupied during the...

Page 5: ...l Time Heat Cool Day Evening Sleep Wake Monday ZONE Tuesday Wednesday Thursday Friday Saturday Sunday Time Heat Cool Time Heat Cool Time Heat Cool Time Heat Cool Day Evening Sleep Wake Monday ZONE Tue...

Page 6: ...l Time Heat Cool Day Evening Sleep Wake Monday ZONE Tuesday Wednesday Thursday Friday Saturday Sunday Time Heat Cool Time Heat Cool Time Heat Cool Time Heat Cool Day Evening Sleep Wake Monday ZONE Tue...

Page 7: ...ng with the corresponding section of the display that will be affected are highlighted in each picture This will quickly show you when you have performed the step correctly If you followed our quick s...

Page 8: ...ss the Next Day button until Monday Mo is displayed A98157 Step 4 Press the Next Period button until the WAKE period is displayed A98158 Step 5 Press the Set Time Temp button until the TIME icon is fl...

Page 9: ...iod Press the up or down button until the desired starting time for that period is displayed making sure that the AM or PM is correct A96451 Step 7 Press the Set Time Temp button until the HEAT icon i...

Page 10: ...Step 10 Press the Set Time Temp button until the COOL icon is flashing Press the up or down button until the desired cooling temperature for that period is displayed A98162 You have now programmed the...

Page 11: ...he Next Zone button and repeat the same process for the remaining zone or zones A98165 When you have finished entering your comfort chart schedule review the program by repeating periods days and zone...

Page 12: ...ce will be in the normal operating mode Setting the current day If it is not already correct press the Next Day button until the current day of the week is shown A98166 Setting the current time 1 Pres...

Page 13: ...T COOL AUTO or EHEAT A98168 OFF no mode is selected and the system is off HEAT heating only COOL cooling only AUTO the system will heat or cool as needed EHEAT emergency heat for heat pump application...

Page 14: ...e Perfect Plus system reminds you when to change or clean your filter It tracks how many hours your equipment has been operating and displays a CLEAN FILTER icon when it is time to change it Once you...

Page 15: ...ture If you purchased this option with your Zone Perfect Plus system press the up and down buttons at the same time to view the temperature outside your home or business If 2 dashes appear your system...

Page 16: ...sired temperature or 3 If necessary press the Out button to change the zone to occupied or unoccupied minimal heating or cooling Overriding the program settings in a particular zone for an indefinite...

Page 17: ...and limitations Depending upon where you live or work and the season of the year you may need to humidify or dehumidify the air in your home or business With your new zoning system you can control ind...

Page 18: ...ld Selection b saves water and will provide adequate humidification under normal circumstances The figure shows Selection a FAN will not be displayed with Selection b A98174 5 If your system includes...

Page 19: ...xcess mois ture from the air The Cool to Dehumidity feature allows the system to turn on the air conditioning as needed to try to reach the dehumidification setpoint while only lowering your indoor te...

Page 20: ...on is displayed Press the End key to exit the humidity program ing function From the normal operation mode press the Hold Out and All Zone buttons in that order to program all zones to an unoccupied s...

Page 21: ...es the zone to occupied When a zone is set to OUT desired temperature will be displayed as dashes when the UP and DOWN buttons are pressed Viewing the outdoor temperature and indoor humidity 1 Pressin...

Page 22: ...the desired zone is displayed Press the Out button to change that period to unoccupied Press the Hold button if you need to maintain the OUT feature for more than 1 period Press the Hold button again...

Page 23: ...ol Time Heat Cool Day Evening Sleep Wake Monday ZONE Tuesday Wednesday Thursday Friday Saturday Sunday Time Heat Cool Time Heat Cool Time Heat Cool Time Heat Cool Day Evening Sleep Wake Monday ZONE Tu...

Page 24: ...24 Cancels OM17 15 OM17 20 1998 Bryant Heating Cooling Systems 7310 W Morris St Indpls IN 46231 Printed in U S A Catalog No 809 601 2 98...

Reviews: