8
Window or Wall Installation
Tools Needed: Drill with 1/8” bit, metal cutting shears, screwdriver, silicone caulking.
ALL parts for installation are provided except the exhaust stack and rain cap. Additional
sheet metal work for nonstandard installations can be done at any sheet metal shop.
1. After uncrating, remove all of the parts from inside the furnace, being careful not to
bend or damage the sheet metal.
2. Mount the furnace door with the attached pins.
3. If the face plate is to be painted, it is best to do this before installation. With the grill
off, mask the cord, wipe the metal with vinegar or other weak acid, and spray paint when
dry.
Use a high temperature resistant paint to avoid a fire hazard.
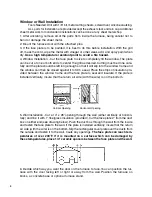
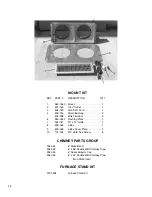
4. Window Installation - Cut the face plate to size to completely fill the window. The plate
can be cut at one or both ends to center the grill as desired. Cutting must be done care-
fully and the plate should be left long enough so that it will slip into the window frame and
the window can then be closed against it to form a seal. Place the strips of insulation pro-
vided between the window frame and the face plate to seal and insulate. If the plate is
installed vertically, insure that the return air side (with the wire) is on the bottom.
Vertical Opening
Horizontal Opening
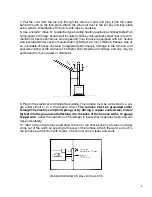
5. Wall Installation - Cut a 14” x 28” opening through the wall (either vertically or horizon-
tally) and line it with 1” fiberglass insulation (provided). Cut the face plate 2” from the duct
box on either end (see drawing below). Push the duct box through the wall from the inside
and fasten the face plate to the wall. If the plate is installed vertically, insure that the return
air side (with the wire) is on the bottom. Slip the rectangular cover plate over the ducts from
the outside and fasten it to the wall. Caulk any openings.
The face plate can reach tem-
peratures of over 200°F. If it is mounted on a surface which can be damaged by
these temperatures, place 1/4” ceramic spacers between the face plate and the wall.
6. Decide which way you want the door on the furnace to face. You can position the fur-
nace with the door facing left or right or away from the wall. Position the furnace on
bricks, a concrete base or optional furnace stand.
Summary of Contents for 300
Page 8: ...6 ...
Page 14: ...12 ...
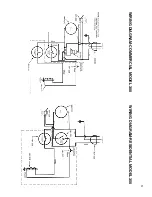
Page 23: ...21 WIRING DIAGRAM COMMERCIAL MODEL 300 WIRING DIAGRAM RESIDENTIAL MODEL 350 ...


