


24
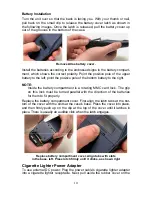
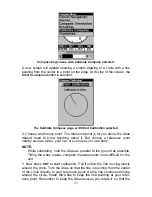
back of the unit is parallel to the ground.
4. The line will travel all the way around the circle at least once, and may
go twice around the circle. Continue rotating your Atlas in time with the
movement of the line until the words "Calibration is Done" appear at the
top of the screen. When you see this, you're finished! Your Atlas should
now report accurate compass headings.
Compass Menu
The Compass Menu allows you to set the compass orientation, as well as
calibrating the compass (described in Sec. 3).
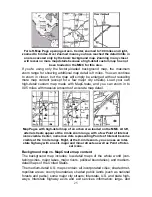
Map Page
The map screens show your course and track from a "bird's-eye" view. By
default, this unit shows the map with north always at the top of the screen.
(This can be changed using options in Advanced Mode. See the topic
Map
Orientation
, in Sec. 5.) If you're navigating to a waypoint, the map also shows
your starting location, present position, course line and destination.
NOTE:
When our text says, "navigating to a waypoint," we really mean naviga-
tion to
any
selected item, whether it is a waypoint you made, a map
feature or an item (like a restaurant) from the POI database.
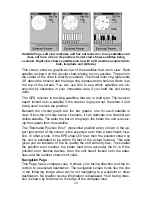
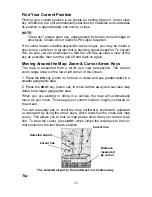
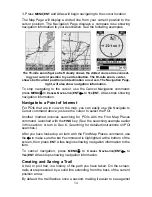
Using the map is as simple as pressing the
PAGES
key. A screen similar to
those in following images appears. The arrow flashing in the center of the
screen is your present position. It points in the direction you're traveling. The
solid line extending from the arrow is your plot trail, or path you've taken. (Re-
member, a flashing question mark on the arrow symbol or flashing text dis-
plays means Atlas has not yet calculated a position.)
The map zoom range is the distance across the screen. This number
shows in the lower left corner of the screen. In the first example below left,
the range is 4,000 miles from the left edge of the map to the right edge of
the map.
The Zoom In and Zoom Out keys zoom the map to enlarge or reduce its
coverage area and the amount of mapping detail shown. There are 39
available map zoom ranges, from 0.02 miles to 4,000 miles.