


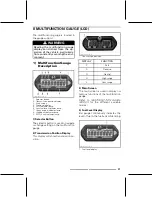
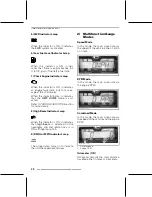


II MULTIFUNCTION GAUGE (LCD)
– Engine
revolutions
per
minute
(RPM)
– Both parameters simultaneously
(combined mode).
To change from one display to the
other, proceed as follows.
1. Turn ignition key to ON to power-up
the system.
2. Wait until the “greeting message”
has been displayed.
3. Press and release selector button
once to display OD (odometer).
4. Press and HOLD selector button for
2 seconds.
This will change the Mode to either
Speed, RPM or Combined.
vdd2008-001-083
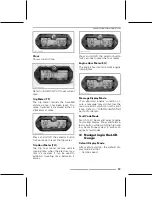
5. To select another mode, repeat
steps 3 and 4 until the desired mode
is displayed.
Temporary Display Mode
In the temporary display mode, the fol-
lowing functions are available:
– Odometer
– Clock
– Trip meter (resettable)
– Trip Hour meter (resettable)
– Engine hour meter.
Press and release selector button to
change the default display mode to the
temporary mode.
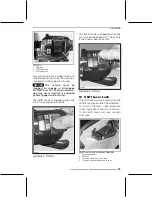
vmr2007-050-002_c
1. Selector button
The gauge will display the selected
mode for 10 seconds then will return
to the normal display mode.
While in a resettable mode, push and
HOLD selector button for 2 seconds to
reset it.
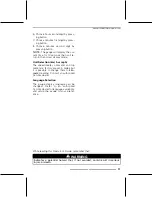
4) Gauge Setup
Clock Setting Using Gauge Selector
Button
To set current time, proceed as fol-
lows:
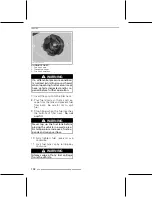
1. Select the clock display.
vmo2011-008-001_a
1. Selector button
2. Time
2. Press and HOLD selector button.
NOTE:
The display will flash.
3. Choose
the
12-hour
(12H)
or
24-hour (24H) format by pressing
button.
4. If the 12-hour format was selected,
choose Am (A) or Pm (P) by pressing
button.
5. Choose hour first digit by pressing
button.
90
______________
Summary of Contents for Can-Am 450 Series
Page 4: ...I VEHICLE IDENTIFICATION 2 _______________ ...
Page 13: ...A SAFETY INFORMATION ________A SAFETY INFORMATION _______ 11 ...
Page 79: ...B VEHICLE INFORMATION _______________ 77 ...
Page 112: ...IX VEHICLE TRANSPORTATION This page is intentionally blank 110 ______________ ...
Page 113: ...C MAINTENANCE ______________ 111 ...
Page 144: ...IV STORAGE AND PRESEASON PREPARATION This page is intentionally blank 142 ______________ ...
Page 145: ...D TECHNICAL INFORMATION ______________ 143 ...
Page 162: ...I SPECIFICATIONS This page is intentionally blank 160 ______________ ...
Page 163: ...E TROUBLESHOOTING ______________ 161 ...
Page 169: ...F SPARE PARTS ______________ 167 ...
Page 171: ...G WARRANTY ______________ 169 ...
Page 181: ...H CUSTOMER INFORMATION ______________ 179 ...
Page 185: ...III CHANGE OF ADDRESS OWNERSHIP ______________ 183 ...
Page 186: ...III CHANGE OF ADDRESS OWNERSHIP This page is intentionally blank 184 ______________ ...
Page 187: ...III CHANGE OF ADDRESS OWNERSHIP ______________ 185 ...
Page 188: ...III CHANGE OF ADDRESS OWNERSHIP This page is intentionally blank 186 ______________ ...
Page 189: ...III CHANGE OF ADDRESS OWNERSHIP NOTES ______________ 187 ...
Page 190: ...III CHANGE OF ADDRESS OWNERSHIP NOTES 188 ______________ ...


