Browning 07-137 Owner'S Manual Download Page 12

20

21

C a r P e t

The key to removing stains from your carpeted interior is to clean 
them as soon as they occur. Do not soak the carpeting with water to 
remove stains. Small amounts of water can permanently damage the 
fire-resistant materials within your safe if the water is allowed to soak 
into the carpeted areas. Use any household carpet spot remover to 
clean up stains. Follow the directions on the product itself.

d P X   a n d   d P h   s y s t e m   i n t e r i o r   m at e r i a l s

Several other materials are used in the construction of the patented 
DPX Storage System and the DPH Storage System. No specific 
maintenance is required for these systems, and they can be spot 
cleaned using mild detergent and water on a clean cloth. Care should 
be taken to avoid excessive pulling on sewn seams as items are added 
to or removed from the pockets, pouches and loops of the DPX and 
DPH systems.

The safe interior should always be loaded before storing any firearms 
on the DPX door rack to prevent tipping or weight imbalance.

h a n d l e

Some chemicals or abrasive cleaners can damage gold, brass or 
chrome handle finishes. The spokes, handle and hub on your safe 
should be cleaned only with a soft, damp cloth. No abrasives or 
chemicals of any kind should be used. 

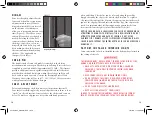
l o C k i n g   B o lt s

The tolerances between your locking bolts and the safe body and door 
are very tight. Because they fit so tightly, it may be necessary from 
time to time to place a small amount of Teflon

®

 lubricant on the 

bottom of each bolt with the bolts in the extended position.

m i r r o r   i n t e r i o r

If your safe is equipped with an interior mirror on the back panel,  
use only rubbing alcohol or distilled water and a soft cloth to clean  
the mirror. 

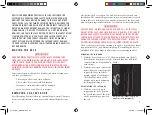
B u l B   r e P l a C e m e n t

1  Prior to replacing a bulb, turn the light switch off and  

unplug the light. Allow the bulb to cool before replacing. 

2  Twist lens cover counterclockwise.

3  Use only Type JCDGY8 20 watt 120 volt halogen bi-pin 

replacement light bulbs.

Notice! 

do noT Touch The bulb aT any Time. use a dry sofT clean 

cloTh To Touch bulb while replacing.

4  Make sure the replacement bulb is installed correctly. (If you have 

questions contact customer service.)

6  Remove soft cloth from new replacement bulb before putting lens 

cover back on.

7  Replace lens cover with a clockwise motion.

C a r e

s a f e   B o d y

All Browning ProSteel safe paint finishes are designed for indoor  
use only. Use a damp rag to wipe down the surface of the safe. If 
something other than water is needed, a very mild soap solution may 
be used. However, only water should be used around the detailing 
areas. Care should be taken around the art scene, pinstripe, corners or 
logo to avoid catching and peeling any edges with the cleaning cloth.

a rt   s C e n e

If your safe was manufactured with our exclusive art scene transfer 
process you must take particular care not to clean your safe with any 
ammonia-based cleaners. Glass cleaners like Windex

®

 can permanently 

damage the art scene and other portions of the safe detailing package. 
Do not attach anything to the body or detailing materials with tape. 
Tape may remove the art scene, paint and other portions of the 
detailing package.

07-137-BSF_Safe OM.indd   20-21

7/21/08   11:13:09 AM

Summary of Contents for 07-137

Page 1: ...P R O S T E E L S A F E S owner s manual Safe 07 137 BSF_Safe OM indd 1 7 21 08 11 13 07 AM ...

Page 2: ...ry Installed Interior Lights 19 Care 20 Warranty Service 22 Limited Materials and Workmanship Warranty 22 ProSteel Fire and Break in Limited Warranty 24 Important Operating Instructions for B r o w n i n g p r o s t e e l s a f e s If you have any questions about your new safe this owner s manual or other Browning products contact Browning Consumer Information One Browning Place Morgan UT 84050 93...

Page 3: ...ng ProSteel safe is the finest home security safe available With proper care and installation it will provide you many years of peace of mind security and fire protection fire resistant models only Your Browning ProSteel safe is a security safe designed to protect your valuable personal property from theft by increasing the time it takes for a thief to access your valuables Most successful burglar...

Page 4: ...asement against an outside wall away from areas where a fire is likely to start or burn exceptionally hot Wat e r a n d f i r e d a m a g e Should your safe be exposed to fire or water the fire resistant properties of the insulation will be compromised Do not continue to store valuable items in such a safe Check with your insurance agent to determine if your policy will replace the safe in additio...

Page 5: ...e safe Notice Your Browning ProSteel Safe is not designed for exterior use Exposing your safe to rain moisture or high humidity can cause rust and damage to the lock and other parts of the safe The painted exterior finish is designed for interior use only and will not withstand direct contact with water or moisture without damage The safe bottom is lightly finished metal It will rust if exposed to...

Page 6: ...r the door completely down 4 Close the door and use a 5 32 Allen wrench to turn the Allen bolt located in the bottom piece of the bottom hinge four half turns clockwise looking down at the hinge 5 Open and close the door several times to make sure it swings smoothly Important Hardened steel ball bearings are located below the hinge pins within the hinge housing Do not lose these bearings while the...

Page 7: ...e caulking will seal the opening and prevent hot gases from entering the safe during a fire Not required on models that are not fire resistant 10 Replace the floor panel elevation brace and interior shelving ANCHORING to a J OIST FLOOR Important Pre drill the pass through holes in the safe back and floor prior to anchoring the safe to the floor or wall 1 Follow steps 1 5 above but use 3 8 x 4 lag ...

Page 8: ...topping on it the third time 3 Turn the dial counterclockwise left two times passing the third number in your combination once and stopping on it the second time 4 Turn the dial clockwise right until it stops which is normally around 95 ANCHORING to a FRAMED WALL important Pre drill the holes in the safe back and floor prior to anchoring the safe to the floor or wall Anchoring to a framed wall req...

Page 9: ...nce page 22 Should your keylock stick or be difficult to turn you can put a small drop of light oil on the key before inserting it into the keyway 5 Turn your safe handle clockwise to open the safe door important If you miss any combination number by more than 1 dial mark your safe will not open Make sure you are looking straight down at the index marks Make sure to align the numbers with the cent...

Page 10: ... recommended if your average daily relative humidity is above 20 percent C HANGING THE C OM B INATION Your combination of the S G Mechanical Lock is pre set at the factory Changing the combination will void your lock warranty If you must change the combination for some reason contact a certified locksmith to do this for you KEYLO C K The keylock in your combination dial is used to lock the dial on...

Page 11: ...Failure to follow these warnings could result in serious injury death or cause damage to the safe or belongings HINGES Your door height is adjusted at the factory and should not require any adjustment when new However hinge adjustment bolts are located on the bottom of each hinge to allow you to make adjustments over time Figure 5 This allows you to raise and lower the door slightly as needed Rota...

Page 12: ... in the extended position Mirror Interior If your safe is equipped with an interior mirror on the back panel use only rubbing alcohol or distilled water and a soft cloth to clean the mirror Bulb Repl acem ent 1 Prior to replacing a bulb turn the light switch off and unplug the light Allow the bulb to cool before replacing 2 Twist lens cover counterclockwise 3 Use only Type JCDGY8 20 watt 120 volt ...

Page 13: ...d use only the recommended cleaning materials Failure to follow this information COULD CAUSE YOUR MIRROR TO become CLOUDY Wa r r a n t y S e r v i c e If you experience any problems with your Browning ProSteel safe please contact our warranty service hotline We want you to be completely satisfied with your safe Your dealer cannot provide warranty service for this product All warranty service must ...

Page 14: ... Morgan Utah 84050 9326 BROWNING CANADA Browning Canada Sports Ltd Lteé St Laurent Quebec H4S 1W6 BROWNING INTL Parc Industriel des Hauts Sarts B 4040 Herstal Belgium NEU080610 07137 07 137 BSF_Safe OM indd 26 7 21 08 11 13 10 AM ...

Page 15: ...ers insurance does not cover the claim The safe must be returned to the factory along with a report by the investigating police or fire department documentation from the purchaser policyholder s insurance company stating that the claim is not covered and proof of purchase For safes in the continental United States ProSteel will arrange for and cover the shipping costs both to and from the factory ...

Reviews: